
Best Editing Tools to Buy in July 2026

Adobe Premiere | Video Editing and Production Software | 12-Month Subscription with Auto-Renewal, PC/Mac
- SEAMLESSLY EDIT 8K TO VR FOOTAGE FOR STUNNING PRODUCTIONS.
- TRUSTED BY HOLLYWOOD PROS AND CREATORS, TELL YOUR STORY VISUALLY!
- COMPLETE MEMBERSHIP TERM FOR EXCLUSIVE ACCESS TO NEW FEATURES.


![VEGAS Pro Edit 21 - The creative standard for video and audio | video editing software | video cutting software | video editor | 1 license [PC Online code]](https://cdn.blogweb.me/1/513_H32_O_Lp2_L_SL_160_899085f4a7.jpg)
VEGAS Pro Edit 21 - The creative standard for video and audio | video editing software | video cutting software | video editor | 1 license [PC Online code]
-
EFFORTLESS VIDEO EDITING: CREATE STUNNING CONTENT EASILY AND QUICKLY.
-
FREE AI-POWERED TOOLS: UNLOCK ADVANCED EFFECTS AND VIDEO REPAIR FOR NO COST.
-
ALL-IN-ONE TOOLKIT: STREAMLINE YOUR WORKFLOW WITH EFFICIENT AI FEATURES.

Adobe Premiere Pro | Video editing and production software | 1-month Subscription with auto-renewal, PC/Mac
- TRANSITION TO NEW SUBSCRIPTION AFTER CURRENT TERM ENDS EFFORTLESSLY.
- CREATE STUNNING VIDEOS WITH PRO TOOLS FOR ALL STORYTELLING NEEDS.
- EDIT IN ANY FORMAT, FROM 8K TO VR, FOR DIVERSE PROJECTS.
![VEGAS Pro 18 Edit – Professional video editing [PC Download]](https://cdn.blogweb.me/1/41pu_GQ_Jz_3_L_SL_160_dd8f767f2e.jpg)
VEGAS Pro 18 Edit – Professional video editing [PC Download]
- BOOST CREATIVITY WITH AI-DRIVEN STYLE TRANSFER AND COLORIZATION TOOLS.
- EXPERIENCE LIGHTNING-FAST PERFORMANCE WITH TOP HARDWARE ACCELERATION.
- ACHIEVE STUNNING VISUALS WITH ADVANCED COLOR GRADING AND HDR SUPPORT.

AVCHD Video Converter: Edit and Convert Files from over 50 Formats into any Video or Audio Format - Great Program for Video Cutting
- CONVERT ANY VIDEO FORMAT EFFORTLESSLY FOR SEAMLESS EDITING.
- SUPPORTS A VAST RANGE OF INPUT/OUTPUT FORMATS, ENSURING COMPATIBILITY.
- USER-FRIENDLY INTERFACE STREAMLINES CONVERSION FOR ALL SKILL LEVELS.
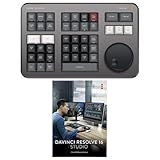
Blackmagic Design Davinci Resolve Speed Editor Bundle with Davinci Resolve 18 Studio (Activation Card)
- COMPACT DESIGN WITH BUILT-IN BATTERY FOR ULTIMATE PORTABILITY.
- EFFORTLESS EDITING WITH BUILT-IN SEARCH DIAL AND KEYBOARD SHORTCUTS.
- INCLUDES DAVINCI RESOLVE 17 STUDIO FOR ENHANCED CREATIVE CONTROL.
Sharing Adobe Premiere projects is a straightforward process that allows multiple users to collaborate on a single project. Here are a few methods to share Adobe Premiere projects:
- Using a shared storage system: If you have a shared storage system in place, such as a network-attached storage (NAS) or a cloud-based storage solution, you can save the Adobe Premiere project files to this location. This enables multiple users to access and work on the project simultaneously. Each user can open the project file directly from the shared storage system and make their desired edits.
- Zipping and sending project files: Another way to share Adobe Premiere projects is by compressing or "zipping" the project files into a single zip file. This creates a portable version of the project that can be easily shared via email or file-sharing services like Dropbox or Google Drive. Once the recipient receives the zip file, they can extract it and open the project in Adobe Premiere.
- Exporting and importing XML files: Adobe Premiere allows you to export the project as an XML file. This XML file contains information about the project, such as timelines, sequences, and media references. You can save this XML file and share it with another user who can then import it into their Adobe Premiere software. This method is especially useful when collaborating between different versions of Adobe Premiere or with other editing software that supports XML import.
- Collaborating using Adobe Creative Cloud: If you and your collaborators have Adobe Creative Cloud subscriptions, you can utilize the "Team Projects" feature. Team Projects allows multiple users to work on the same project simultaneously. It enables real-time collaboration, where each user's edits are saved and updated in real-time for all collaborators to see. This method provides a seamless and efficient way to work together on Adobe Premiere projects.
Remember to consolidate and collect all the project's media files and assets into a single folder before sharing to ensure that all users have access to the necessary resources. Additionally, consider establishing a clear communication channel to avoid conflicts when multiple users work on the same project simultaneously.
What is the significance of project linking when sharing Adobe Premiere projects?
Project linking is a significant feature when sharing Adobe Premiere projects as it allows for collaboration and seamless integration between different project files.
When a project is linked, it means that a sequence or composition from one project can be imported and used within another project. This enables multiple editors to work on different sections of a project simultaneously, dividing the workload and increasing productivity. It also allows for the reuse of assets and sequences across multiple projects, saving time and effort.
Project linking ensures that any changes made in the original project are automatically reflected in the linked project, ensuring consistency and up-to-date content. This is particularly useful when working on complex or long-term projects where changes and updates are frequent.
Additionally, project linking can significantly improve the workflow when working with dynamic and evolving content. For example, when using dynamic linking with Adobe After Effects, changes made to the After Effects composition are automatically updated within the Premiere project, eliminating the need to manually render and replace footage.
In summary, project linking in Adobe Premiere is significant because it enhances collaboration, facilitates asset reuse, improves productivity, and ensures consistency when working with shared projects.
What is the best way to share Adobe Premiere projects with voice-over artists?
There are several ways to effectively share Adobe Premiere projects with voice-over artists. Here are a few recommended methods:
- Export video reference files: Share rendered video files for the voice-over artists to review. This ensures they are aware of the timing and context while providing the voice-over. You can export the video with a low-resolution, watermarked version to protect your work until the final voice-over is received.
- Share project files: Use cloud-based file-sharing services like Google Drive, Dropbox, or Adobe Creative Cloud to share the entire Premiere project folder. Ensure all media files, sequences, and assets are included. Voice-over artists can then work directly on the project, syncing their recordings with the existing timeline.
- Export audio stems: If the voice-over artist prefers working independently, export the audio from Premiere as separate stems for each audio track, such as dialogue, music, and sound effects. This way, they can work on the voice-over separately and provide you with the clean audio files to import into your project.
- Collaborate using Adobe Team Projects: If both parties have access to Adobe Creative Cloud, you can collaborate using Team Projects. This allows voice-over artists to work directly on the Premiere project without having to manually share files. It offers synchronous editing, version control, and real-time collaboration.
- Use dedicated project sharing platforms: There are online platforms specifically designed for sharing and collaboration on video projects. Frame.io and Wipster are popular examples that provide commenting, review features, and seamless integration with Adobe Premiere. These platforms enable voice-over artists to preview the project, add comments, and upload their recordings directly into the platform.
Ultimately, the choice of method depends on the preferences and technical capabilities of the voice-over artists and your workflow. Make sure to communicate and agree on the best approach that suits both parties.
What is the preferred method to share Adobe Premiere projects on collaborative platforms?
The preferred method to share Adobe Premiere projects on collaborative platforms is by using the Adobe Creative Cloud.
- Save your Premiere project and all associated media files to a shared or synced folder within the Creative Cloud storage. This ensures that all collaborators have access to the same project files and media.
- Make sure all collaborators have Adobe Premiere and Creative Cloud installed on their devices. They should also have access to the shared folder in the Creative Cloud storage.
- Open the Premiere project and select "File" from the menu. Choose "Project Manager" to open the Project Manager window.
- In the Project Manager window, select the sequences you want to include in the shared project. You can choose to include the entire project or specific sequences.
- Under "Destination" in the Project Manager window, select the storage location within the shared Creative Cloud folder where you want to save the trimmed project. You can create a new folder within the shared folder to organize the project.
- Check the "Include Unused Clips" option if you want to include the unused media files in the trimmed project. Otherwise, leave it unchecked to save space and only include necessary media.
- Click on the "OK" button to begin the project trimming and copying process. This will create a new project file with trimmed and consolidated media, making it easier to share and collaborate.
- Once the trimming process is complete, all collaborators can access the shared folder in the Creative Cloud storage. They can open the trimmed project file using Adobe Premiere on their devices and start working on the project.
By using the Adobe Creative Cloud and sharing trimmed project files, collaborators can work on the project simultaneously, making edits, and updates that are synced in real-time. This method ensures efficient collaboration and minimizes the chances of any version conflicts or file inconsistencies.
What is the recommended method to share Adobe Premiere projects on external SSDs?
The recommended method to share Adobe Premiere projects on external SSDs is as follows:
- Make sure the external SSD is properly formatted and compatible with your operating system (e.g., exFAT or NTFS for Windows, APFS or Mac OS Extended for macOS).
- Open Adobe Premiere Pro and go to File > Project Manager.
- In the Project Manager window, select the project(s) you want to share by checking the boxes next to their names.
- Choose a destination folder on your external SSD where you want to save the trimmed project files. You can create a new folder on the SSD if needed.
- Under the options, select "Collect Files and Copy to New Location" to gather all the necessary media files associated with the project. This will ensure that all project files are consolidated and copied to the destination folder.
- Verify the settings and click on "OK" to start the process. Premiere Pro will consolidate the media files and copy the project files to the specified destination folder on the external SSD.
- Once the process is completed, close Adobe Premiere Pro.
Now, you can safely disconnect the external SSD from the computer and share it with others or use it on another system. When you want to work on the project again, simply connect the SSD to a computer with Adobe Premiere Pro installed and open the project file from the SSD.
What is the significance of proxies when sharing Adobe Premiere projects?
Proxies play a significant role when sharing Adobe Premiere projects, especially in scenarios where the original media files are too large or not easily accessible for all collaborators. Here are some key aspects of the significance of proxies:
- File size and format: Original media files in a project can often be large in size and may have a specific format that might not be compatible with every system or software. Creating proxies allows you to generate lower-resolution and more manageable files, reducing the file size and enabling easy sharing across different devices and platforms.
- Collaboration and accessibility: Proxies make it easier for multiple collaborators to work on the same project simultaneously. Since proxies are smaller files, they can be easily shared via cloud services or other file-sharing methods. This simplifies collaboration, allowing smooth project sharing and real-time feedback among team members, even if they have limited disk space or slower internet connections.
- Performance and speed: Premiere Pro uses proxies to maintain smooth playback and editing performance, especially when working with high-resolution or complex media. By using smaller and lower-resolution proxy files during the editing process, the software can render and process changes more quickly, resulting in a smoother experience even on less powerful systems.
- Offline editing and remote work: Proxies become particularly useful when working remotely or in situations where the original media files are not immediately available. Collaborators can work with proxy files on their local systems, making the editing process possible without requiring constant access to the original media. Once the project is complete, the proxies can be replaced with the original files during the final exporting or rendering phase.
- Improved workflow: Proxies support a more streamlined and efficient workflow. Editors can start working on a project immediately, even if the original media is not yet imported or ingested. Additionally, they can continue editing seamlessly while waiting for the high-resolution or final media files to be delivered or encoded.
Overall, proxies in Adobe Premiere projects serve as a crucial tool for simplifying sharing, enhancing collaboration, maintaining performance, and improving workflow efficiency in a multimedia production environment.
What is the process of exporting Adobe Premiere projects for YouTube sharing?
To export Adobe Premiere projects for YouTube sharing, you can follow these steps:
- Finish editing your project in Adobe Premiere. Make sure all your video clips, audio, transitions, effects, and titles are in place.
- Choose the "File" menu at the top left corner of the Adobe Premiere interface and select "Export Media." Alternatively, you can use the shortcut keys "Ctrl+M" (Windows) or "Cmd+M" (Mac).
- In the Export Media dialog box that appears, select the format for your YouTube export. Typically, you can choose the "H.264" format, which is widely compatible with YouTube.
- Set the desired preset for your export. You can select the YouTube 1080p preset, YouTube 720p preset, or other suitable settings depending on your project's resolution and quality requirements.
- Customize the export settings if necessary. Click on the "Video" and "Audio" tabs to adjust parameters such as resolution, bitrate, format, audio channels, etc. Ensure that the settings are compatible with YouTube's recommended specifications.
- Specify the output destination by clicking on the "Output Name" field. Choose a location on your computer to save the exported video file, and provide it with an appropriate name.
- Optionally, you can add metadata to your video by filling in the description, tags, and other relevant information in the "Metadata" tab.
- Once you have set all the desired export settings, click on the "Export" button to start exporting your Premiere project. Adobe Premiere will begin rendering and exporting the video.
- After the export process is complete, navigate to the output destination you specified earlier. You should find the exported video file ready for YouTube.
- Lastly, log in to your YouTube account and click on the "Upload" button to select and upload the exported video file. Add necessary details, thumbnail, and other settings before publishing your video to YouTube.
Remember to ensure that your exported video meets YouTube's recommended specifications, such as resolution, aspect ratio, and file size limits, for optimal viewing on the platform.
How to version control shared Adobe Premiere projects for collaborative editing?
Version controlling shared Adobe Premiere projects for collaborative editing can be done using the following steps:
- Set up a Version Control System (VCS): Choose a VCS tool that suits your team's needs. Git is a popular choice for version control, but there are other options like SVN or Perforce.
- Initialize the Repository: Create a new repository using your chosen VCS tool. This will serve as the central storage for your Adobe Premiere projects.
- Define the Project Structure: Decide on a folder structure that you will use to store your Adobe Premiere projects within the repository. This structure should include folders for footage, media, project files, and any other assets that are part of the project.
- Import the Initial Project: Import the initial Adobe Premiere project file into the repository. Make sure to include all the necessary media and assets it requires.
- Add and Commit Changes: As collaborators make changes to the project, they should periodically commit their changes to the repository. This creates a new "version" of the project that can be accessed or reverted to at any time.
- Branching and Merging: If multiple collaborators are working on different aspects of the project simultaneously, create branches for each collaborator. They can work independently, and when ready, they can merge their changes back into the main project.
- Communicate and Coordinate: Establish communication channels and processes to ensure that collaborators are aware of ongoing changes and avoid conflicts. This can include regular team meetings, status updates, and clear communication about who is working on what.
- Resolve Conflicts: In case conflicts arise when merging changes, use your VCS tool to resolve them. Collaborators can communicate and decide how to blend their changes together to produce a cohesive version of the project.
- Review and Rollback: Collaborators should periodically review the project's history and changes. If necessary, use the version control system to rollback changes or revert to a previous version.
Remember that version control tools like Git are primarily designed for text files, and Adobe Premiere project files are binary files. So, while you can version control the project file, it won't provide meaningful differences between versions. However, it can still serve as a central repository for collaboration and disaster recovery.