Best Video Editing Software Hacks to Buy in July 2026
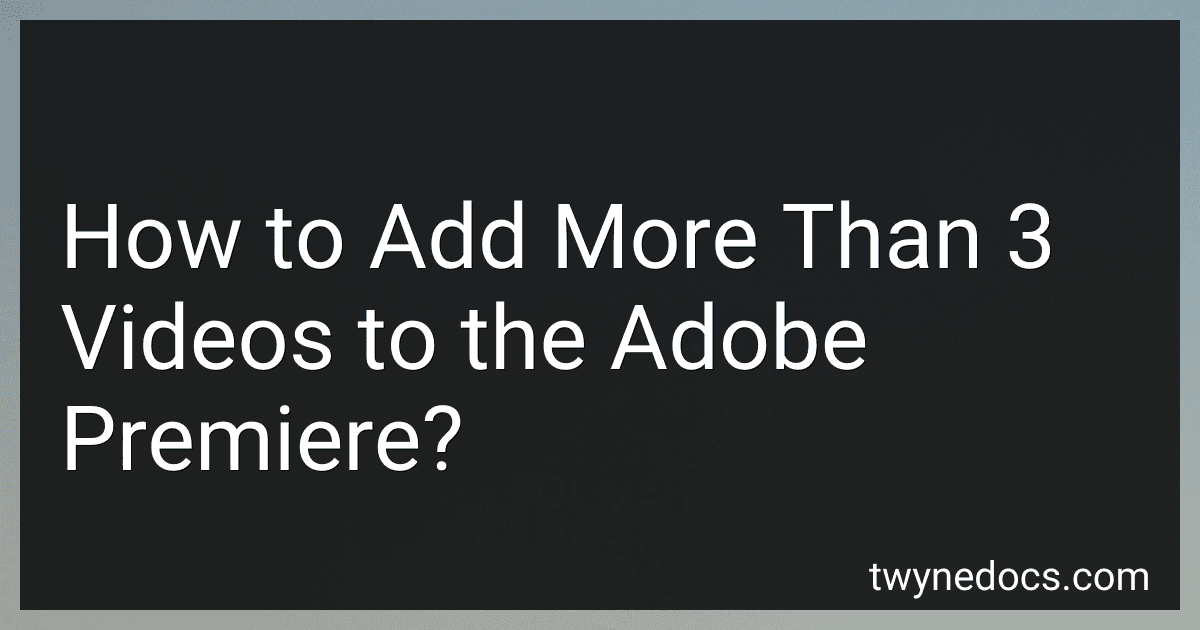
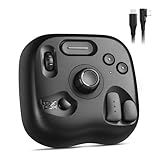
XPPen Mini Keydial ACK05 Wireless Shortcut Keyboard Bluetooth Programmable Express Remote Control with Dial & Customized Express Keys for Drawing Tablet PC MacBook Windows Images Video Editing
-
FLEXIBLE CONNECTIVITY: CONNECT VIA BLUETOOTH, USB, OR DONGLE FOR VERSATILITY.
-
CUSTOMIZED SHORTCUTS: TAILOR UP TO 40 SHORTCUTS FOR ENHANCED PRODUCTIVITY.
-
LONG BATTERY LIFE: ENJOY 300 HOURS OF USE WITH A COMPACT, LIGHTWEIGHT DESIGN.


Movie Film Clap Board, Hollywood Clapper Board Wooden Film Movie Clapboard Accessory with Black & White, 12"x11" Give Away White Erasable Pen
- DURABLE NATURAL WOOD DESIGN FOR LASTING USE IN EVENTS AND PRODUCTIONS.
- INCLUDES ERASABLE PEN FOR VERSATILE WRITING AND EASY CLEANUP.
- IDEAL FOR PARTIES, EVENTS, AND FILM PRODUCTION-EVERYONE WILL LOVE IT!
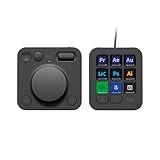
TourBox NEO - Customizable Editing Controller, Photo Color Grading Illustration Speed Editor, Intuitive Control Boost Productivity, Programmable Keyboard for Adobe CSP and More, Works with Mac/PC
- ZERO-LATENCY WIRED CONNECTION BOOSTS CREATIVITY WITHOUT INTERRUPTIONS.
- EXTENSIVE COMPATIBILITY WITH TOP CREATIVE SOFTWARE FOR SEAMLESS WORKFLOWS.
- INTUITIVE CONTROLS STREAMLINE PHOTO EDITING AND VIDEO COLOR GRADING.
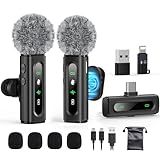
USB C Lavalier Microphone Wireless Mini Mic for Type-C Android Phone/Tablet/PC Video Recording Clip-on Mics with Rotatable Clip&Denoise Recording, Ideal for Vlog Tiktok Youtube Podcast Content Creator
-
CRYSTAL-CLEAR AUDIO WITH ACTIVE DENOISE FOR ANY ENVIRONMENT.
-
PLUG & PLAY DESIGN FOR EFFORTLESS OPERATION AND USAGE.
-
LONG BATTERY LIFE ENSURES UNINTERRUPTED RECORDING SESSIONS ANYWHERE.
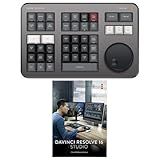
Blackmagic Design Davinci Resolve Speed Editor Bundle with Davinci Resolve 18 Studio (Activation Card)
- COMPACT DESIGN WITH BUILT-IN BATTERY FOR ULTIMATE PORTABILITY.
- EFFORTLESS EDITING WITH KEYBOARD SHORTCUTS AND BUILT-IN SEARCH DIAL.
- INCLUDES DAVINCI RESOLVE 17 STUDIO FOR PROFESSIONAL EDITING POWER.
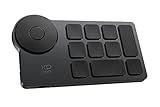
TourBox Lite - Editing Keyboard Compact, Artists Go-to Drawing Macro Keypad, Works with Photoshop, CSP & More, Creative Controller with Custom Software, Streamline All Workflows - Wired Only
-
MASTER ALL CREATIVE WORKFLOWS WITH 8 CUSTOMIZABLE BUTTONS!
-
98% OF USERS LEARN FAST-NO COMPLEX SHORTCUTS NEEDED!
-
ERGONOMIC DESIGN REDUCES HAND STRAIN FOR LONG SESSIONS!
Logitech MX Creative Console, 9 Customizable LCD Keys, Stream Deck Accessories,Connectivity Technology USB-C, Control Dial for Graphic Design, Zoom, Spotify - Graphite, 3-Month Adobe Cloud Membership
- BOOST WORKFLOW EFFICIENCY: ACCESS TOOLS QUICKLY FOR UNINTERRUPTED FOCUS.
- FULLY CUSTOMIZABLE: ASSIGN ACTIONS TO 15 KEYPAD PAGES FOR EVERY APP.
- FREE ADOBE CLOUD OFFER: GET 3 MONTHS OF CREATIVE CLOUD WITH PURCHASE!
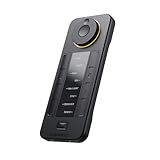
XENCELABS Quick Keys for PC, MacBook, Desktop, Drawing Tablet, Pen Display, OLED Display, 44 Customizable Shortcuts Keydail for Digital Drawing, Video Editing, Photo Retouching, Windows/macOS
-
OLED DISPLAY FOR INSTANT SHORTCUT IDENTIFICATION EASILY SEE AND SWITCH BETWEEN COMMANDS-NO GUESSWORK!
-
40 CUSTOMIZABLE KEYS FOR ULTIMATE EFFICIENCY TAILOR SHORTCUTS ACROSS APPS FOR A STREAMLINED CREATIVE FLOW.
-
FLUID ROTARY DIAL CONTROL ENHANCES WORKFLOW SMOOTHLY NAVIGATE EDITING TASKS WITH INTUITIVE DIAL FUNCTIONALITY.
Elgato Stream Deck MK.2 – Studio Controller, 15 macro keys, trigger actions in apps and software like OBS, Twitch, YouTube and more, USB, works with Mac and PC
- CONTROL APPS INSTANTLY WITH 15 CUSTOMIZABLE LCD KEYS!
- EXECUTE ACTIONS EFFORTLESSLY WITH ONE-TOUCH OPERATION!
- STREAMLINE WORKFLOWS WITH POWERFUL PLUGINS FOR TOP PLATFORMS!
ActionRing Streaming Macro Keypad, Stream Controller Deck, Gaming Shortcut Keyboard, with Customizable 6 LCD Shortcut Keys, 3 Buttons and 3 Knobs, Trigger Actions in OBS/Twitch/YouTube, Windows 10/Mac14.0 (N3 Black)
- CUSTOMIZABLE KEYS & DIALS: TAILOR ACTIONS AND CONTROL EASILY!
- ONE-CLICK EFFICIENCY: STREAMLINE TASKS AND BOOST PRODUCTIVITY NOW!
- WIDE COMPATIBILITY: WORKS WITH MAJOR SOFTWARE FOR SEAMLESS INTEGRATION!
To add more than three videos to Adobe Premiere, follow these steps:
- Launch Adobe Premiere: Open Adobe Premiere on your computer. You can find it in your list of installed applications or via the Start menu (Windows) or Applications folder (Mac).
- Create a new project: Click on "New Project" to create a new project in Adobe Premiere. Give your project a name and choose a location to save it.
- Import your videos: Go to the menu bar and select "File," then click on "Import." A file browser window will open. Locate the videos you want to add and select them. Click "Import" to import the videos into your project.
- Create a new sequence: Right-click on the "Project" panel and select "New Item" > "Sequence." Set the sequence settings according to your requirements, such as resolution, frame rate, and aspect ratio, then click "OK."
- Arrange the timeline: Locate the "Timeline" panel at the bottom of the Adobe Premiere interface. Drag and drop your imported videos from the "Project" panel into the timeline. You can arrange them in the desired order.
- Adjust video settings: If needed, you can make adjustments to each video clip on the timeline. Right-click on a clip and select "Properties" to access options like crop, speed, and effects.
- Customize transitions (optional): To add transitions between video clips, go to the "Effects" panel and search for transitions. Drag the desired transition onto the timeline between two clips.
- Preview and edit: Use the playback controls in the program monitor to preview your video. If further edits are required, you can trim, split, or apply various effects to each video clip by selecting them and accessing the editing options in the "Effect Controls" panel.
- Export your video: Once you've finished adding and editing your videos, go to the menu bar and select "File" > "Export" > "Media." Adjust the export settings as desired and select a destination folder. Click on "Export" to generate the final video.
By following these steps, you can easily add more than three videos to Adobe Premiere and create your desired video project.
How to add text or captions to videos in Adobe Premiere?
To add text or captions to videos in Adobe Premiere, follow these steps:
- Import the video clip(s) into your project by going to File > Import. Alternatively, you can also directly drag and drop them into the project panel.
- Create a new caption track by right-clicking in the project panel and selecting New Item > Captions.
- In the "New Captions" dialog box, choose the desired format for the captions and click OK.
- Drag and drop the video clip onto the timeline.
- Select the video clip on the timeline, then go to Window > Captions to open the Captions panel.
- In the Captions panel, click the "Toggle Animation" button (looks like a rectangular icon) to enable the captions for that specific clip.
- Drag the playhead to the desired location where you want the caption to start appearing.
- Click the "Add Caption" button (looks like a plus sign) in the Captions panel to add a new caption at the current playhead position.
- In the Program Monitor, you will now see a text field below the video preview. Enter the desired text or caption for that specific frame.
- Move the playhead to the next frame where you want the caption to change or end.
- Click the "Add Caption" button again to add another caption at the new playhead position.
- Enter the text or caption for the new frame.
- Repeat steps 9-12 as needed to add text or captions for other frames or scenes.
- Customize the appearance of the captions by selecting the caption on the timeline and using the Formatting tab in the Captions panel. Here, you can change font, alignment, size, color, etc.
- Preview your video with captions by clicking on the "Play" button in the Program Monitor.
- Adjust the position and duration of the captions by dragging them on the timeline or changing the duration values in the Captions panel.
- Once you are satisfied with the captions, you can export the video with captions by going to File > Export > Media.
- In the Export Settings dialog box, choose the desired format, settings, and destination for your video, and then click Export.
By following these steps, you can easily add text or captions to your videos using Adobe Premiere.
How to create a multicam sequence in Adobe Premiere?
To create a multicam sequence in Adobe Premiere, follow these steps:
- Import all the video clips you want to use in your multicam sequence into your project.
- Create a new sequence by going to File -> New -> Sequence. Choose a preset that matches the settings of your video clips or select a custom sequence.
- Drag and drop all the video clips onto the timeline in the order you want them to appear.
- Right-click on one of the video clips and select "Create Multi-Camera Source Sequence" from the context menu.
- In the Multi-Camera dialog box, choose a name for your multicam sequence and adjust the settings as needed. You can choose whether to synchronize the clips based on timecode, audio, or markers. It's recommended to use either timecode or audio, depending on which one is more accurate in your project.
- Click OK to create the multicam sequence. Premiere will create a new sequence with all the video clips stacked on top of each other and a new camera angle track.
- Click on the "Toggle Multi-Camera View" button located in the Program Monitor. This will open the Multi-Camera Monitor window.
- In the Multi-Camera Monitor window, you can switch between camera angles by clicking on the corresponding clip in the video track or by using the number keys on your keyboard. You can also use the Cut tool to make edits directly in the multicam sequence.
- Make your edits by switching camera angles as needed and refining the timing of your cuts.
- Once you're satisfied with your multicam edit, you can return to the main timeline by clicking on the "Toggle Multi-Camera View" button again.
- You can further refine your multicam sequence by adding transitions, audio adjustments, color correction, or any other desired effects.
- Finally, export your multicam sequence by going to File -> Export -> Media, and choose your desired output settings.
That's it! You have successfully created a multicam sequence in Adobe Premiere.
What is the purpose of the timeline in Adobe Premiere?
The purpose of the timeline in Adobe Premiere is to provide a visual representation of the video or audio project being edited. It allows users to arrange and manipulate various media elements, such as clips, images, and audio tracks, in a sequential manner. The timeline provides precise control over the timing, duration, and order of media content and enables editing functions like trimming, cutting, adding transitions, applying effects, and adjusting audio levels. Ultimately, the timeline serves as the central workspace for creating and organizing a cohesive and well-structured video or audio project.
How to organize multiple video clips in Adobe Premiere?
To organize multiple video clips in Adobe Premiere, you can follow these steps:
- Import your video clips: Go to File > Import and select the video files you want to organize. You can also drag and drop the clips into the Project panel.
- Create a new bin/folder: Right-click in the Project panel and choose "New Bin" or click on the Folder icon at the bottom of the panel. This will create a new folder in the project panel where you can store your clips.
- Organize clips in the bin/folder: Drag and drop your video clips into the new bin/folder. You can arrange them in any order that makes sense for your project. You can also create multiple bins to categorize different types of clips.
- Create sequences: To create a sequence, go to File > New > Sequence. A new window will open where you can set the sequence settings according to your footage. Drag and drop the desired clips from the bin/folder onto the timeline panel to create your desired sequence.
- Use labels and markers: To further organize your clips, you can assign labels and markers. Select a clip in the project panel, right-click, and choose "Label" to assign a color label. You can also add markers to highlight important points within the clips.
- Use subclips: If your video clips are too long, you can create subclips to organize and work with specific sections. Right-click on a clip in the project panel, select "Make Subclip," and set the in and out points for the desired section.
- Use the search function: If you have a large number of clips, you can use the search bar at the top right of the project panel to quickly find specific clips based on their names, labels, or other attributes.
By following these steps, you can effectively organize and manage multiple video clips in Adobe Premiere, making the editing process more efficient.
What is Adobe Premiere and how does it work?
Adobe Premiere is a professional video editing software developed by Adobe Systems. It is widely used by video editors, filmmakers, and content creators to edit and manipulate videos with various tools and features.
Adobe Premiere allows users to import video clips, audio files, and other media into the program's timeline, where they can arrange and organize the content. It provides a wide range of editing capabilities including trimming, cutting, cropping, adding transitions, applying effects, and manipulating audio. Users can also add titles, captions, or subtitles to their videos.
The software supports a wide range of video formats and resolutions, allowing users to work with different footage from various sources. It provides advanced editing features like multi-camera editing, color grading, and audio enhancement. Users can also integrate other Adobe tools like After Effects and Photoshop to enhance their editing workflow.
Adobe Premiere utilizes a non-linear editing system, which means that users can easily jump between different sections of a video project without having to rearrange the actual footage. This non-destructive editing workflow allows users to experiment and make changes without altering the original files.
The final edited video can be exported in various formats and resolutions, including high-definition and 4K, as well as shared directly to social media platforms or uploaded to websites for distribution.
Adobe Premiere offers a user-friendly interface with a wide range of features and capabilities, making it a popular choice for professional video editing. It provides a comprehensive set of tools to help users achieve their desired results and bring their creative vision to life.
How to add background music or audio to videos in Adobe Premiere?
To add background music or audio to videos in Adobe Premiere, follow these steps:
- Import both the video clip and the audio file into your project. To import files, go to "File" and select "Import" or use the shortcut Ctrl+I.
- Create a new sequence by dragging the video clip onto the "New Item" button at the bottom of the Project panel. This will automatically create a sequence with the settings matching your video clip.
- Find the audio file in the Project panel and drag it to the Timeline panel below the video clip. It will create a new audio track.
- Position the audio file on the timeline where you want the background music to start.
- Adjust the volume of the audio by clicking on the volume line in the audio track and dragging it up or down to increase or decrease the volume.
- If you want to fade in or fade out the background music, click on the audio file on the timeline and go to "Effects Control" panel. Under the "Opacity" settings, you can adjust the "Volume" to create fades.
- To fine-tune the audio, you can apply audio effects and make adjustments in the "Effects Control" panel. This panel allows you to modify various audio parameters such as EQ, dynamics, and more.
- Preview the video with the background music by clicking on the "Play" button in the Program Monitor. Make any necessary adjustments to the volume or positioning of the audio.
- When you're satisfied with the result, export your video by going to "File" and selecting "Export" or by using the shortcut Ctrl+M. Choose the desired settings for your video output and click "Export" to save the final video with the background music.
That's it! Your video should now have background music or audio.
How to apply visual effects and filters in Adobe Premiere?
To apply visual effects and filters in Adobe Premiere, follow these steps:
- Open Adobe Premiere and create a new project or open an existing one.
- Import your footage by clicking on "File" in the menu bar and selecting "Import." Alternatively, you can drag and drop your media files directly into the project panel.
- From the project panel, find the footage you want to add visual effects or filters to, and drag it onto the timeline.
- Select the video clip on the timeline by clicking on it.
- Go to the "Effects" tab in the bottom panel or choose "Window" > "Essential Graphics" to open the Effects panel.
- In the Effects panel, you'll find various folders containing different categories of effects. Browse through the folders to find the effect or filter you want to apply.
- Once you find the desired effect or filter, drag it from the Effects panel and drop it onto the video clip on the timeline. You can also apply effects by double-clicking on them.
- Adjust the effect settings in the Effects Controls panel. This panel allows you to customize the effect parameters, such as intensity, duration, color, etc. The specific options available will depend on the effect or filter you applied.
- Continue adding additional effects or filters to your video clips as desired, using the same process of dragging and dropping from the Effects panel.
- Preview your video with the applied effects by playing it in the program monitor. Make any necessary adjustments to the settings until you're satisfied with the result.
- To remove an effect, select the video clip on the timeline and open the Effects Controls panel. Find the applied effect in the panel and click on the "Delete" or "Reset" button next to it.
- Once you're done applying effects and filters to your video, you can export your final edited video by going to "File" > "Export" > "Media." Choose the desired export settings and click on "Export" to save your video.
Remember to save your project periodically to avoid losing your progress.