
Best Tools to Reduce Video Noise in Premiere Pro to Buy in July 2026
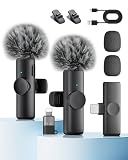
Wireless Microphone for iPhone iPad and Android Phone, 2 Pack Wireless Lavalier Lapel Mic with Noise Reduction, Plug and Play Mini Microphone for Video Recording Interview Podcast YouTube TikTok Vlog
- PLUG AND PLAY: EASY SETUP WITH AUTOMATIC PAIRING-NO APPS NEEDED!
- DUAL MICROPHONES: RECORD SIMULTANEOUSLY WITH TWO MICS FOR ENHANCED SOUND.
- LONG BATTERY LIFE: ENJOY UP TO 5 HOURS OF RECORDING WITH QUICK CHARGING!


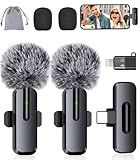
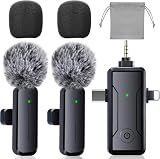
Wireless Mini Microphone for iPhone, Android - 2 Pack Lavalier Microphone for Video Recording, 2 In 1 Noise Reduction Lapel Mic for Ipad, Clip-on Mini Mic with USB-C for Content Creators Podcast
-
STUDIO-QUALITY SOUND: BROADCAST-READY AUDIO FOR PROFESSIONAL RECORDINGS!
-
INSTANT PLUG & PLAY: CONNECT EASILY VIA USB-C OR LIGHTNING-NO HASSLE!
-
CLEAR AUDIO ANYWHERE: CAPTURE CRISP SOUND, EVEN IN NOISY ENVIRONMENTS!

ZOPPLM Wireless Mini Microphone for iPhone - 2 Pack Lavalier Microphone for Video Recording, 2 in 1 Noise Reduction Lapel Mic for Ipad, Android, Clip-on Mini Mic for Vlog Podcast
- ACHIEVE STUDIO-QUALITY SOUND FOR PROFESSIONAL VIDEO CREATION.
- HIGH-SENSITIVITY DESIGN ENSURES CRYSTAL-CLEAR VOCAL CLARITY.
- COMPATIBLE WITH IPHONE AND ANDROID FOR VERSATILE USE.
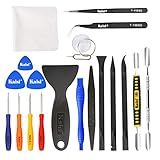
Kaisi Professional Electronics Opening Pry Tool Repair Kit with Metal Spudger Non-Abrasive Nylon Spudgers and Anti-Static Tweezers for Cellphone iPhone Laptops Tablets and More, 20 Piece
- COMPREHENSIVE KIT: 20 TOOLS FOR ALL YOUR ELECTRONICS REPAIR NEEDS.
- DURABLE DESIGN: PROFESSIONAL-GRADE STAINLESS STEEL FOR LASTING USE.
- BONUS CLEANING TOOLS: INCLUDES CLOTHS FOR A SPOTLESS FINISH AFTER REPAIRS.
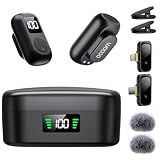
occiam Mini Lavalier Microphone for iPhone & Android Wireless Microphone Noise Reduction Magnetic Mini Lapel Mic with 54H Charging Case for YouTube Podcast Tiktok Vlogging Video Recording Black
-
AI NOISE CANCELLATION FOR STUDIO-CLEAR AUDIO UP TO 328FT AWAY.
-
10 HOURS OF RECORDING, EXTENDABLE TO 54 HOURS WITH CHARGING CASE.
-
PLUG-AND-PLAY DESIGN FOR QUICK SETUP ON ANY DEVICE, NO APPS NEEDED.
Gicorino 4 Packs Wireless Lavalier Microphone for iPhone/Android/Camera, Upgraded Mini Microphone with Noise Reduction, Mic for Video Recording, Podcasts, YouTube, TikTok, and Vlogging
- CAPTURE CONVERSATIONS WITH UP TO 4 MICS FOR SEAMLESS RECORDING.
- ENJOY CRYSTAL-CLEAR AUDIO WITH SMART NOISE REDUCTION TECHNOLOGY.
- COMPATIBLE WITH ALL DEVICES; LONG-RANGE & QUICK RECHARGE FOR CONVENIENCE.
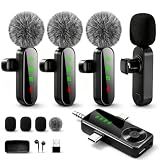
PGDLOF Wireless Mini Microphone for iPhone Android Phone Camera: 3 in 1 Lavalier Lapel Mic for Video Recording - Noise Cancelling Clip on Shirt Microphones for Tiktok YouTube Podcast Vlogging
-
UNIVERSAL COMPATIBILITY: WORKS WITH PHONES, TABLETS, LAPTOPS, AND CAMERAS.
-
CRYSTAL CLEAR AUDIO: NOISE REDUCTION AND LOW-LATENCY FOR PERFECT SOUND.
-
EFFORTLESS SETUP: PLUG & PLAY DESIGN-NO ADAPTERS OR BLUETOOTH REQUIRED.
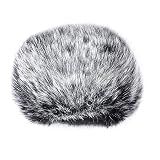
Sunmns Furry Windscreen Wind Cover Compatible with Blue Yeti Microphone
-
ENHANCE AUDIO CLARITY BY MINIMIZING NOISE AND WIND INTERFERENCE.
-
DESIGNED FOR EFFECTIVE WIND NOISE REDUCTION IN OUTDOOR SETTINGS.
-
TOOL-FREE INSTALLATION ENSURES EASY USE AND PROTECTS FROM MOISTURE.

Bubblebee Mic Hiding Kit for Deity W.Lav Pro - Lapel Microphone Hiding Kit, Noise & Wind Reduction & Case for Content Creators, Videographers, Audio Engineers & Filmmakers - Black
- PROFESSIONAL AUDIO CLARITY - ELIMINATE NOISE FOR CLEAR SOUND QUALITY.
- DISCREET & VERSATILE SETUP - SEAMLESS MIC HIDING WITH FLEXIBLE OPTIONS.
- COMPACT & ORGANIZED KIT - KEEP ACCESSORIES READY FOR QUICK ACCESS.
To reduce video noise in Adobe Premiere Pro, you can follow these steps:
- Import the video clip into your Premiere Pro timeline by dragging and dropping it or using the "Import" option.
- Once the video clip is in the timeline, select it and go to the Effects Control panel.
- In the Effects Control panel, search for the "Lumetri Color" effect and apply it to the video clip. This effect helps in reducing noise and improving the overall color of the footage.
- Expand the Lumetri Color effect by clicking on the triangle beside its name in the Effects Control panel.
- Within the Lumetri Color effect settings, you will find various options. Look for the "Noise Reduction" option and increase its value to reduce video noise. Make sure to adjust the value gradually, as a high noise reduction may result in a loss of detail in the footage.
- After adjusting the Noise Reduction value, you can further enhance the result by tweaking the other options like Contrast, Saturation, and Sharpening, depending on the needs of your specific footage.
- You can also try using the "Denoiser" effect, which is specifically designed to reduce video noise. Search for it in the Effects panel and apply it to the clip. Adjust the settings as required, such as increasing the "Reduce Noise" parameter to reduce the noise level.
- Additionally, if the video noise is highly visible, you can try duplicating the video clip on a new track and applying the noise reduction effects to this duplicate layer. Then, adjust the opacity of the duplicate clip to achieve the desired balance between noise reduction and preserving detail.
- Once you are satisfied with the noise reduction, play the video clip to preview the changes. If necessary, make further adjustments to fine-tune the results.
- Finally, render or export your video with reduced noise by going to the File menu and selecting the "Export" option. Choose your desired export settings, format, and destination to save the noise-free video.
Keep in mind that completely eliminating video noise may not always be possible, especially if the source footage is of low quality or captured in low light conditions. However, Adobe Premiere Pro provides effective tools to help minimize noise and improve the overall video quality.
What is the purpose of reducing video noise in a video clip?
The purpose of reducing video noise in a video clip is to improve the overall quality and visual appearance of the video. Video noise refers to random variations in brightness and color that appear as grainy or pixelated artifacts in the footage. It can be caused by various factors such as low light conditions, high ISO settings, compression artifacts, or electronic interference.
By reducing or eliminating video noise, the video clip looks clearer, more professional, and visually appealing. It enhances the level of detail, reduces distractions, and provides a smoother and more natural viewing experience for the audience. This is particularly important in scenarios where high-quality visuals are desired, such as in films, documentaries, advertisements, or video presentations.
What are some common misconceptions about reducing video noise in Adobe Premiere Pro?
- Misconception: Noise reduction can completely eliminate all video noise. Reality: While Premiere Pro's noise reduction tools can significantly reduce video noise, it cannot completely eliminate it. Some noise may still be visible, especially in high ISO or low-light footage.
- Misconception: Increasing the "Sharpen" effect will reduce video noise. Reality: Sharpening can temporarily make noise less noticeable, but it does not effectively reduce or eliminate video noise. It may even enhance the noise or introduce artifacts, making the footage appear worse.
- Misconception: Using the "Denoiser" effect is the best way to reduce noise. Reality: The Denoiser effect in Premiere Pro is a basic noise reduction tool, and while it can be helpful in certain situations, it may not be suitable for all footage. Depending on the type and severity of the noise, other tools or plugins may provide better results.
- Misconception: Increasing the brightness or exposure will reduce video noise. Reality: Brightening the footage can indeed make the noise less noticeable, but it does not reduce or eliminate noise. It might just make the overall image appear brighter and possibly enhance the noise further.
- Misconception: Applying multiple noise reduction effects will yield better results. Reality: Applying too many noise reduction effects or stacking multiple instances of the same effect can lead to over-processing and cause undesirable artifacts. It is generally better to apply one effective noise reduction effect rather than multiple weaker ones.
- Misconception: Noise reduction can be achieved without sacrificing image sharpness. Reality: Noise reduction techniques often involve blur or softening of the image to minimize noise. While it can help reduce noise, it may also result in a loss of fine details or image sharpness.
- Misconception: Noise reduction can be done in real-time without any rendering. Reality: Most noise reduction processes require intensive calculations and may not be achievable in real-time playback. To accurately assess and apply noise reduction, rendering or exporting the footage may be necessary.
It's important to understand the limitations and best practices for noise reduction to achieve optimal results without compromising the overall quality of the video.
How to use keyframes to fade in/out the noise reduction effect in Adobe Premiere Pro?
To use keyframes to fade in/out the noise reduction effect in Adobe Premiere Pro, you can follow these steps:
- Import your footage into the Premiere Pro timeline.
- Apply the "Noise Reduction (Process)" effect to your desired clip or adjustment layer. You can find this effect by navigating to the Effects panel, then searching for "Noise Reduction (Process)."
- Open the Effects Controls panel (Window > Effects Controls) and locate the Noise Reduction effect settings.
- Determine the start and end points of where you want the fade to occur.
- Move the playhead to the desired start point.
- Click the stopwatch icon next to the "Opacity" parameter under the Noise Reduction effect settings to enable keyframing for that parameter.
- Set the initial opacity value to 0, effectively "fading out" the effect at the start point.
- Move the playhead to the desired end point.
- Adjust the opacity value to your desired value, such as 100, to "fade in" the effect.
- Premiere Pro will automatically create a keyframe at each point you set an opacity value.
- Adjust the timing and easing of the keyframes as needed.
- You can do this by selecting the keyframes on the timeline and using the handles to adjust their positions or by using the Graph Editor in the Effect Controls panel.
- Preview your timeline to observe the fade in/out effect of the noise reduction.
By animating the opacity parameter of the Noise Reduction effect, you can gradually fade in/out the noise reduction effect at your desired points in the timeline.
How to use the waveform monitor to identify areas with excessive video noise?
To use the waveform monitor to identify areas with excessive video noise, follow these steps:
- Open the waveform monitor: Most video editing software or video capture devices have a waveform monitor tool. Find and open it in your chosen software.
- Load the video: Import the video that you want to analyze for excessive noise into your video editing software or capture device.
- Set the waveform monitor view: Adjust the settings of the waveform monitor to display the video signal in a way that highlights noise. This may require adjusting the scale or intensity of the waveform display.
- Observe the waveform pattern: Look for any unusual patterns or spikes in the waveform monitor. These might indicate areas with excessive noise in the video.
- Analyze the noise levels: Examine the amplitude and shape of the waveform patterns. Noisy areas are typically represented by irregular and jagged waveform peaks.
- Zoom in for detailed inspection: If necessary, zoom in on specific areas of the video using the waveform monitor to get a closer look at the noise patterns.
- Adjust noise reduction techniques: Once you identify areas with excessive video noise, take corrective measures to reduce the noise. This may involve using noise reduction filters or adjusting specific settings in your video editing software.
- Repeat the process: Continue analyzing the video using the waveform monitor and repeating steps 3-7 until you have minimized the excessive noise to an acceptable level.
By using the waveform monitor to visually identify areas with excessive video noise, you can effectively locate and address specific problem areas in your video footage.
What are the keyboard shortcuts for adjusting the Denoiser effect in Adobe Premiere Pro?
In Adobe Premiere Pro, the keyboard shortcuts for adjusting the Denoiser effect are as follows:
- Increase Amount: Ctrl + Alt + +
- Decrease Amount: Ctrl + Alt + -
- Reset Amount: Ctrl + Alt + 0