
Best Adobe Premiere Plugins to Buy in July 2026

CyberLink PowerDirector 2026 | Easily Create Videos Like a Pro | Intuitive AI Video Editing for Windows | Visual Effects, Slideshow Maker & Screen Recorder | Box with Download Code
- CAPTURE SCREEN & WEBCAM TOGETHER FOR ENGAGING VIDEO CONTENT.
- AUTOMATICALLY ENHANCE VIDEO COLOR AND CONTRAST FOR PROFESSIONAL QUALITY.
- EFFORTLESSLY REMOVE BACKGROUNDS OR ISOLATE SUBJECTS WITH AI PRECISION.


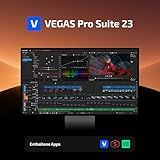
VEGAS Pro Suite 23 — All-in-one Suite for video, audio and post-production | Video editing software | Video editing program | Windows 11 PC | 1 license
- CUSTOMIZE YOUR WORKSPACE WITH POWERFUL VIDEO & AUDIO EDITING TOOLS.
- UNLOCK PROFESSIONAL AUDIO WITH SOUND FORGE PRO & ACID PRO INCLUDED.
- EFFORTLESSLY CREATE HIGH-QUALITY VIDEOS WITH OUR ALL-IN-ONE TOOLKIT.
![Adobe Premiere Elements 2026 | Software Download | Video Editing | 3-year term license | Activation Required [PC/Mac Online Code]](https://cdn.blogweb.me/1/51q_VIY_2_Zcy_L_SL_160_76e8d61d4b.jpg)
Adobe Premiere Elements 2026 | Software Download | Video Editing | 3-year term license | Activation Required [PC/Mac Online Code]
- AI-POWERED EDITING FOR QUICK TRIMMING AND ADJUSTMENTS.
- THREE INTUITIVE MODES FOR EVERY SKILL LEVEL - START EDITING FAST!
- SEAMLESS VIDEO ORGANIZATION WITH CLOUD INTEGRATION AND AUTOMATIC TAGGING.
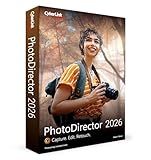
CyberLink PhotoDirector 2026 | Generative AI Photo Editor for Windows | AI Tools, Layer Editing, Photo Retouching, Creative Effects & Design | Box with Download Code
- EFFORTLESSLY REMOVE DISTRACTIONS WITH AI OBJECT DETECTION & REMOVAL.
- ENHANCE PHOTOS INSTANTLY-AI OFFERS SHARPNESS AND FACE RETOUCHING!
- ONE-CLICK BATCH EDITING: STREAMLINE YOUR WORKFLOW FOR FASTER RESULTS!
![Corel Photo Video Ultimate Bundle 2023 | PaintShop Pro 2023 Ultimate and VideoStudio Ultimate 2023 | Powerful Photo and Video Editing Software [PC Download]](https://cdn.blogweb.me/1/51lv_SJ_7f_Mn_L_SL_160_78a18027ca.jpg)
Corel Photo Video Ultimate Bundle 2023 | PaintShop Pro 2023 Ultimate and VideoStudio Ultimate 2023 | Powerful Photo and Video Editing Software [PC Download]
- EDIT PHOTOS LIKE A PRO WITH ADVANCED AI TOOLS AND UNIQUE WORKSPACES.
- CREATE STUNNING MOVIES EFFORTLESSLY WITH OUR INTUITIVE VIDEO EDITING SUITE.
- TRANSFORM IMAGES INTO ANIMATIONS & ACCESS PREMIUM EFFECTS WITHOUT A SUBSCRIPTION!
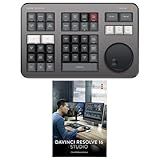
Blackmagic Design Davinci Resolve Speed Editor Bundle with Davinci Resolve 18 Studio (Activation Card)
- COMPACT DESIGN WITH LONG-LASTING BATTERY FOR ON-THE-GO EDITING.
- INTUITIVE SEARCH DIAL FOR QUICK ACCESS TO EDITING TOOLS.
- INCLUDES DAVINCI RESOLVE 17 STUDIO FOR PROFESSIONAL VIDEO EDITING.
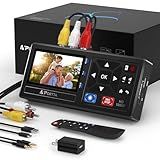
Portta VHS to Digital Converter, Video to Digital Recorder with Remote, Compatible with VHS, VCR, DVR, DVD, Hi8, Mini DV Players, Camcorder, Gaming Consoles (Tapes/DVD Player Not Included)
-
EASY CONVERSION: TRANSFORM ANALOG VIDEOS TO 1080P DIGITAL EFFORTLESSLY.
-
DIRECT PLAYBACK: PREVIEW AND PLAYBACK RECORDED CONTENT WITHOUT A PC.
-
VERSATILE SUPPORT: COMPATIBLE WITH VCR, CAMCORDERS, AND GAMING CONSOLES.

Adobe Premiere Pro | Video editing and production software | 1-month Subscription with auto-renewal, PC/Mac
- EDIT ANY FOOTAGE, FROM 8K TO VR, FOR STUNNING VISUAL STORYTELLING.
- TRUSTED BY HOLLYWOOD PROS-JOIN CREATORS SHAPING THE INDUSTRY'S FUTURE.
- TRANSFORM RAW CLIPS INTO POLISHED PRODUCTIONS WITH POWERFUL TOOLS.
To change the opacity in Adobe Premiere, follow these steps:
- Open your project in Adobe Premiere.
- Select the video clip or image you want to adjust the opacity of.
- In the Effects panel, search for the "Opacity" effect. You can access the Effects panel by clicking on the "Effects" tab at the bottom-left of the workspace.
- Drag and drop the "Opacity" effect onto the selected clip or image on the timeline.
- In the Effects Controls panel, which is usually located on the top-left of the workspace, you will find the Opacity controls.
- Adjust the opacity by using the slider or entering a specific opacity value. Lower values like 0% represent complete transparency, while higher values like 100% represent full opacity.
- You can keyframe the opacity by clicking on the stopwatch icon next to the Opacity controls, which allows you to create varying levels of transparency over time.
- Repeat these steps for any other video clips or images you wish to change the opacity of.
- Preview your changes by playing the video in the timeline or using the preview window.
Remember to save your work regularly to avoid losing any changes.
What is the shortcut to reduce opacity in Adobe Premiere?
The shortcut to reduce opacity in Adobe Premiere is to select the clip or layer you want to adjust, and then press the "Shift" key along with the "-" (minus) key on your keyboard. This will decrease the opacity by 10% each time you press the shortcut.
How to keyframe opacity in Adobe Premiere?
To keyframe opacity in Adobe Premiere, follow these steps:
- Import your video clip or image into the timeline.
- Select the clip and go to the Effects Controls panel (Window > Effects Controls).
- Locate the Opacity section and click on the Stopwatch icon to enable keyframing for opacity.
- Move the playhead to the desired starting point for the opacity animation.
- Set the opacity value for the starting point by either entering a percentage value or dragging the opacity slider.
- Click on the small Add/Remove Keyframe button next to the Stopwatch icon to add a keyframe at the starting point.
- Move the playhead to the desired end point for the opacity animation.
- Set a new opacity value for the end point.
- Click on the Add/Remove Keyframe button again to add a keyframe at the end point.
- Play the timeline to preview the opacity animation. Adjust the keyframes as necessary by dragging them on the timeline or changing their opacity values in the Effects Controls panel.
By adding keyframes at different points in the timeline, you can create a smooth transition of opacity values for your video clips or images in Adobe Premiere.
What is the maximum keyframe opacity value in Adobe Premiere?
The maximum opacity value for keyframes in Adobe Premiere is 100%.
How to apply a fade-in effect using opacity in Adobe Premiere?
To apply a fade-in effect using opacity in Adobe Premiere, follow the steps below:
- Import your footage into the project panel.
- Drag the footage to the timeline.
- Go to the Effects panel and search for the "Opacity" effect.
- Drag and drop the "Opacity" effect onto the footage clip in the timeline.
- Click on the "Effects Controls" tab in the top left corner of the interface.
- Locate the "Opacity" property under the "Opacity" effect in the Effects Controls panel.
- Set the initial opacity to 0% by dragging the slider to the left or typing in "0" in the input box.
- Position the playhead in the timeline to the point where you want the fade-in to start.
- Enable keyframes by clicking on the stopwatch icon next to the "Opacity" property.
- Move the playhead to the point where you want the fade-in to end.
- Increase the opacity to 100% by dragging the slider to the right or typing in "100" in the input box.
- Premiere will automatically create a keyframe at each time point you set the opacity.
- Preview your footage to see the fade-in effect applied gradually over time.
- Adjust the timing and length of the fade-in effect by dragging the keyframes.
- If needed, you can also add easing to the keyframes to modify the speed of the fade-in effect.
Note: You can also apply a fade-in effect to a specific section of the footage by splitting the clip at the desired start and end points and then applying the fade-in effect to the specific section.
What is the opacity percentage range in Adobe Premiere?
In Adobe Premiere, the opacity percentage ranges from 0% (completely transparent) to 100% (completely opaque).