
Best Video Editing Tools to Buy in July 2026
![Adobe Premiere Elements 2026 | Software Download | Video Editing | 3-year term license | Activation Required [PC/Mac Online Code]](https://cdn.blogweb.me/1/51q_VIY_2_Zcy_L_SL_160_d2cd1291db.jpg)
Adobe Premiere Elements 2026 | Software Download | Video Editing | 3-year term license | Activation Required [PC/Mac Online Code]
- AI-POWERED TRIMMING AND EDITING FOR QUICK, EFFORTLESS VIDEO CREATION!
- MULTIPLE EDITING MODES TO SUIT ALL SKILL LEVELS AND VIDEO TYPES.
- EASY CLOUD INTEGRATION WITH SMART ORGANIZATION AND AUTOMATIC TAGGING.
![Adobe Premiere Elements 2026 | Software Download | Video Editing | 3-year term license | Activation Required [PC/Mac Online Code]](https://cdn.flashpost.app/flashpost-banner/brands/amazon.png)
![Adobe Premiere Elements 2026 | Software Download | Video Editing | 3-year term license | Activation Required [PC/Mac Online Code]](https://cdn.flashpost.app/flashpost-banner/brands/amazon_dark.png)

Adobe Premiere Pro | Video Editing and Production Software | 12-Month Subscription with Auto-Renewal, PC/Mac
- SEAMLESS EDITING FOR VIDEO PROS: FROM 8K TO VR WITH EASE.
- CREATE FLAWLESS PRODUCTIONS: EDIT, COLOR, AND REFINE LIKE HOLLYWOOD.
- JOIN CREATORS WORLDWIDE: YOUR STORY DESERVES TOP-TIER EDITING TOOLS.

Adobe Premiere Pro | Video editing and production software | 1-month Subscription with auto-renewal, PC/Mac
- EDIT VIDEO LIKE HOLLYWOOD PROS WITH PREMIERE PRO'S POWERFUL TOOLS.
- TRANSFORM RAW FOOTAGE INTO STUNNING PRODUCTIONS WITH EASE.
- SUPPORTS ALL FORMATS FROM 8K TO VR FOR ULTIMATE CREATIVITY.
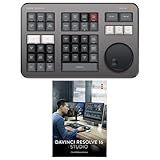
Blackmagic Design Davinci Resolve Speed Editor Bundle with Davinci Resolve 18 Studio (Activation Card)
- COMPACT DESIGN WITH BUILT-IN BATTERY FOR ON-THE-GO EDITING.
- QUICK ACCESS WITH BUILT-IN SEARCH DIAL FOR EFFICIENT WORKFLOWS.
- INCLUDES DAVINCI RESOLVE 17 STUDIO FOR ENHANCED EDITING POWER.
![Corel Photo Video Ultimate Bundle 2023 | PaintShop Pro 2023 Ultimate and VideoStudio Ultimate 2023 | Powerful Photo and Video Editing Software [PC Download]](https://cdn.blogweb.me/1/51lv_SJ_7f_Mn_L_SL_160_9a4942f370.jpg)
Corel Photo Video Ultimate Bundle 2023 | PaintShop Pro 2023 Ultimate and VideoStudio Ultimate 2023 | Powerful Photo and Video Editing Software [PC Download]
- EDIT LIKE A PRO WITH AI TOOLS AND POWERFUL LAYER-BASED EDITING.
- UNLEASH CREATIVITY WITH ADVANCED VIDEO EFFECTS AND INTUITIVE INTERFACE.
- ENJOY SUBSCRIPTION-FREE ACCESS WITH TUTORIALS AND PREMIUM FEATURES.
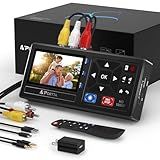
Portta VHS to Digital Converter, Video to Digital Recorder with Remote, Compatible with VHS, VCR, DVR, DVD, Hi8, Mini DV Players, Camcorder, Gaming Consoles (Tapes/DVD Player Not Included)
-
EFFORTLESSLY CONVERT ANALOG VIDEO TO STUNNING 1080P DIGITAL FORMATS.
-
PREVIEW AND PLAYBACK RECORDINGS DIRECTLY WITH A BUILT-IN LCD SCREEN.
-
VERSATILE SUPPORT FOR VHS, VCR, AND RETRO GAMING CONSOLES INCLUDED.
![VEGAS Pro Edit 21 - The creative standard for video and audio | video editing software | video cutting software | video editor | 1 license [PC Online code]](https://cdn.blogweb.me/1/513_H32_O_Lp2_L_SL_160_1372d289e6.jpg)
VEGAS Pro Edit 21 - The creative standard for video and audio | video editing software | video cutting software | video editor | 1 license [PC Online code]
-
BOOST CREATIVITY: AI TOOLS STREAMLINE VIDEO EDITING FOR UNIQUE PROJECTS.
-
ALL-IN-ONE TOOLKIT: SAVE TIME WITH ADVANCED EFFECTS AND AUDIO ENHANCEMENTS.
-
PROFESSIONAL QUALITY: EXPORT WITH GPU ACCELERATION FOR FAST UPLOADS.

Adobe Acrobat Pro | PDF Software | Convert, Edit, E-Sign, Protect | PC/Mac Online Code | Activation Required
-
EDIT PDFS AND IMAGES SEAMLESSLY-NO APP SWITCHING NEEDED!
-
E-SIGN FROM ANY DEVICE-NO LOGIN REQUIRED FOR RECIPIENTS!
-
SECURE YOUR PDFS WITH PASSWORDS TO PROTECT SENSITIVE INFO!
Adobe Audition | Audio recording, editing, and mixing software |1-month Subscription with auto-renewal, PC/Mac
- SEAMLESS AUDIO EDITING WITH MULTITRACK AND SPECTRAL DISPLAY TOOLS.
- ENHANCE VIDEO WORKFLOWS AND DELIVER POLISHED SOUND WITH AUDITION.
- UNLOCK ADVANCED FEATURES AFTER COMPLETING YOUR CURRENT MEMBERSHIP.
![VEGAS Pro 18 Edit – Professional video editing [PC Download]](https://cdn.blogweb.me/1/41pu_GQ_Jz_3_L_SL_160_eefb23f478.jpg)
VEGAS Pro 18 Edit – Professional video editing [PC Download]
- ENHANCE VISUALS WITH AI-DRIVEN STYLE TRANSFER AND COLORIZATION.
- EXPERIENCE LIGHTNING-FAST PERFORMANCE WITH ADVANCED HARDWARE ACCELERATION.
- ACHIEVE STUNNING RESULTS WITH SOPHISTICATED COLOR GRADING AND HDR SUPPORT.
To fix playback quality issues in Adobe Premiere, you can take the following steps:
- Reduce playback resolution: You can adjust the playback resolution in Premiere Pro to make it easier for your computer to handle playback. Lowering the resolution can alleviate playback problems. To do this, go to the Playback Resolution dropdown menu in the Program Monitor panel and decrease the resolution.
- Adjust playback settings: In the Preferences settings, you can customize the playback settings to optimize playback quality. Go to Edit > Preferences > Playback (Windows) or Premiere Pro > Preferences > Playback (macOS). Experiment with different settings such as enabling or disabling GPU acceleration, changing the audio hardware buffer size, or modifying the renderer to see if it improves playback.
- Optimize media cache: Premiere Pro uses media cache files to store certain types of audio and video data. If the media cache is not properly optimized, it can cause playback issues. To optimize the cache, go to Edit > Preferences > Media Cache (Windows) or Premiere Pro > Preferences > Media Cache (macOS). Here, you can clean the cache, change the cache location, or adjust the cache settings to improve playback quality.
- Disable effects: If you have applied numerous effects to your clips, they may be straining your system's resources and causing playback problems. Try disabling individual effects or temporarily turning off the effects for better playback performance. You can disable effects in the Effect Controls panel by toggling the "fx" icon next to each effect.
- Transcode footage: If you're working with high-resolution or complex video files, it might be helpful to transcode them into a more editing-friendly format. Converting your footage to a codec that Premiere Pro handles efficiently can enhance playback performance. Use Adobe Media Encoder or other video conversion software to transcode your footage to a lower resolution or a codec that Premiere Pro prefers.
- Ensure adequate computer specifications: Premiere Pro requires certain hardware specifications to function optimally. Check if your computer meets the recommended requirements for running Premiere Pro smoothly. Ensure you have sufficient RAM, a powerful graphics card, and fast storage drives to handle high-quality playback.
By implementing these steps, you should be able to troubleshoot and improve playback quality in Adobe Premiere, resulting in smoother and more accurate playback of your videos.
How to adjust the video codec settings for better playback quality in Adobe Premiere?
To adjust video codec settings for better playback quality in Adobe Premiere, you can follow these steps:
- Open Adobe Premiere and import your video file into the project.
- Drag the video file onto the timeline to start editing.
- Click on the "Sequence" tab at the top menu and select "Sequence Settings" from the dropdown.
- In the Sequence Settings window, make sure the "Editing Mode" is set to match your video's resolution and frame rate.
- Under the "Video" tab, locate the "Codec" dropdown menu. Click on it to see the available options.
- Choose a video codec that provides better quality and compatibility. Some commonly used codecs include H.264, ProRes (Mac), or DNxHD/DNxHR (Windows).
- Adjust other settings like bitrate or quality if necessary. Higher bitrates generally result in better quality but larger file sizes.
- Once you've made your adjustments, click "OK" to save the settings and close the window.
- Preview your video playback by clicking the "Play" button in the Program Monitor window to check the quality and make any further adjustments if needed.
- Finally, when exporting your video, select the appropriate video codec and settings under the "Export Settings" window to maintain the improved playback quality.
Remember, adjusting the video codec settings may affect the file's size, compatibility, and editing performance, so consider the trade-offs before making significant changes.
How to disable effects or filters that may affect playback quality in Adobe Premiere?
To disable effects or filters that may affect playback quality in Adobe Premiere, you can follow these steps:
- Open your project in Adobe Premiere.
- Locate the Effects Controls panel. If you don't see it, you can go to Window > Effects Controls to display it.
- In the Effects Controls panel, you will find all the applied effects and filters for the selected clip.
- To disable an effect or filter, locate the effect in the Effects Controls panel and click on the blue stopwatch icon next to it. This will remove the keyframes and disable the effect.
- If you want to disable multiple effects or filters, you can hold down the Shift key and select multiple effects with your cursor. Then, click on the stopwatch icon to disable them all at once.
- If you want to temporarily disable an effect or filter instead of removing it completely, you can click on the eyeball icon next to the effect in the Effects Controls panel. This will hide the effect during playback, but it will still be enabled.
- Repeat the above steps for any other effects or filters you want to disable.
- After you have disabled the effects or filters, you can play back your video to see the improved playback quality without the effects.
Remember that disabling effects or filters can improve playback performance, but it will also alter the appearance of your video. Make sure to preview your video after disabling the effects to ensure it meets your expectations.
How to optimize audio settings for smoother playback in Adobe Premiere?
To optimize audio settings for smoother playback in Adobe Premiere, you can follow these steps:
- Check the audio sample rate: Go to Edit > Preferences > Audio Hardware. Ensure that the sample rate matches the sample rate of your audio files (typically 44.1 kHz or 48 kHz).
- Adjust the audio buffer size: In the same Audio Hardware preferences, adjust the audio buffer size to a higher value (e.g., 512 or 1024). This can help reduce audio playback issues due to CPU processing.
- Disable audio effects and plugins: If you have multiple audio effects or plugins applied to your audio clips, try temporarily disabling them during editing or playback. Effects and plugins can demand processing power and slow down playback.
- Optimize audio playback preferences: Go to Edit > Preferences > Audio. Set the audio device to your primary sound card and select the appropriate audio input/output channels. Enable "Play Audio While Scrubbing" if needed.
- Adjust audio preview quality: To reduce the strain on your CPU during playback, go to File > Project Settings > General. Under the "Video Rendering and Playback" section, change the "Renderer" option to "Mercury Playback Engine Software Only." This will utilize your CPU for video rendering, freeing up GPU resources for smoother audio playback.
- Use optimized audio formats: Consider converting your audio files to a more optimized format, such as uncompressed WAV or AIFF. These formats require less processing power compared to compressed formats like MP3.
- Close unnecessary applications: Close any background programs or processes that are consuming CPU resources. This will ensure that your system can dedicate more power to Adobe Premiere for better playback performance.
- Upgrade hardware if needed: If you frequently face playback issues despite trying the above steps, consider upgrading your computer's hardware, including the CPU, RAM, or graphics card. This can significantly improve the performance of Adobe Premiere.
Remember to save your project files regularly and restart Adobe Premiere if you encounter any issues.
What is the recommended playback resolution for Adobe Premiere?
The recommended playback resolution for Adobe Premiere depends on the specifications of your computer and the resolution of your video footage. Adobe Premiere generally recommends using a lower resolution (such as 1/4 or 1/2) for smooth playback during editing. This can be adjusted in the program's Playback Resolution settings. However, if your computer has sufficient processing power and RAM, you can also choose to work with full resolution playback.
What is the impact of the timeline settings on playback quality in Adobe Premiere?
The timeline settings in Adobe Premiere have an impact on playback quality in terms of smoothness and performance. The following timeline settings can affect the playback quality:
- Timeline resolution: The resolution of the timeline can impact playback quality. Lower resolutions (such as 720p) might result in smoother playback performance, especially on less powerful computers. Higher resolutions (such as 4K) require more processing power, and if the computer cannot handle it, the playback may become choppy or stutter.
- Playback quality settings: Premiere allows you to adjust the playback quality manually. If you set it to a lower quality, it can enhance playback performance, particularly during editing or previewing complex effects or high-resolution footage. However, setting it to a lower quality may result in the loss of some visual details during playback.
- Preview file format: Premiere generates preview files to assist during playback. You can choose different preview file formats such as ProRes, DNxHD, or CineForm. The format you select can impact the playback quality and performance, as some formats may require more processing power to decode and play smoothly.
- GPU acceleration: Premiere supports GPU acceleration, which can boost playback quality and performance, especially when working with high-resolution footage or applying GPU-accelerated effects. Enabling GPU acceleration can significantly enhance playback smoothness and real-time editing capabilities.
- System hardware: The overall performance of Adobe Premiere, including playback quality, is dependent on your computer's hardware. Higher-end CPUs, an ample amount of RAM, a dedicated GPU, and fast storage drives can all contribute to better playback quality and smoother editing experience.
In summary, adjusting the timeline resolution, playback quality settings, choosing suitable preview file formats, enabling GPU acceleration, and having adequate hardware resources can impact the playback quality in Adobe Premiere. These settings may need to be adjusted based on the complexity of your project and the capabilities of your computer.
How to change the resolution of video previews in Adobe Premiere?
To change the resolution of video previews in Adobe Premiere, you can follow these steps:
- Open Adobe Premiere and navigate to the "Edit" tab on the top menu bar.
- Click on "Preferences" and select "Media" from the drop-down menu.
- In the Media preferences window, look for the section called "Video Rendering and Playback."
- Under the "Video Previews" section, you will find an option labeled "Resolution."
- Click on the drop-down menu next to "Resolution" and choose the desired resolution for your video previews. You can select options like "Full," "1/2," "1/4," etc. The "Full" resolution represents the original resolution of your video footage.
- Once you have selected the desired resolution, click "OK" to save the changes.
The video previews in Adobe Premiere will now be rendered and displayed at the selected resolution, which can help improve the playback performance of high-resolution videos.
What is the impact of the project settings on playback quality in Adobe Premiere?
The project settings in Adobe Premiere have a significant impact on playback quality. Here are a few key factors:
- Resolution: The resolution setting determines the number of pixels used to display the video footage. Higher resolutions provide more detail, but they also require more processing power. If the project settings are set to a lower resolution than the video footage, the playback quality may be downgraded.
- Frame rate: The frame rate setting defines the number of frames displayed per second. Higher frame rates result in smoother playback, but they also require more computational resources. If the project settings use a lower frame rate than the video footage, the playback may appear choppy.
- Codec: The codec selection impacts the compression and decompression of video files. Different codecs have varying levels of compression, affecting both file size and playback quality. For optimal quality, it is important to use a codec that preserves the video's original quality while ensuring efficient playback.
- Bitrate: Bitrate refers to the amount of data processed per second during playback. A higher bitrate generally results in better quality but requires more processing power. If the project settings have a lower bitrate than the video footage, the playback quality may suffer due to compression artifacts.
- GPU Acceleration: Adobe Premiere allows for GPU (Graphics Processing Unit) acceleration, which can greatly improve playback performance. By enabling GPU acceleration and configuring the appropriate settings, the decoding and rendering of video files can be offloaded to the GPU, resulting in smoother playback and better quality.
Overall, choosing the appropriate project settings that match the attributes of the video footage and optimizing them for the available hardware resources can significantly impact playback quality in Adobe Premiere.
What is the impact of the audio format on playback quality in Adobe Premiere?
The audio format used in Adobe Premiere can have a significant impact on playback quality, as it determines the compression, file size, and audio fidelity. Different audio formats have different characteristics, and choosing the appropriate format is crucial for achieving optimal playback quality.
Lossless audio formats like WAV or AIFF provide uncompressed audio, ensuring high-quality playback with no loss of data. These formats are ideal for professional use and editing purposes as they preserve the original audio fidelity. However, they result in larger file sizes, requiring more storage space.
Lossy audio formats like MP3 or AAC offer compressed audio by discarding some audio data. These formats are commonly used for web distribution and streaming platforms due to their smaller file sizes. However, the compression can result in decreased audio quality, particularly with lower bitrates.
When choosing an audio format in Adobe Premiere, it is essential to consider the target use of the project. If the focus is on high-quality audio, utilizing lossless formats is recommended. Conversely, for online sharing or if storage space is a concern, lossy formats can be used, but it's important to strike a balance between file size and audio quality.
What is the impact of hardware acceleration on playback quality in Adobe Premiere?
Hardware acceleration can have a significant impact on playback quality in Adobe Premiere. By offloading the decoding and rendering tasks to the graphics processing unit (GPU) instead of relying solely on the central processing unit (CPU), it can greatly enhance playback performance.
- Smoother Playback: Hardware acceleration helps achieve a smoother playback experience by utilizing the GPU's parallel processing capabilities. It reduces the burden on the CPU, allowing for more efficient video decoding and rendering, resulting in seamless playback even with high-resolution and complex video files.
- Real-time Editing: With hardware acceleration, Adobe Premiere can leverage the power of the GPU to process video effects and transitions in real-time while editing. This capability enables immediate visual feedback, making it easier to make precise adjustments and improve the overall editing workflow.
- Faster Exporting: Hardware acceleration can significantly speed up the export process, especially when applying effects, color grading, or adding multiple layers to the final video. By utilizing the GPU's processing power, Adobe Premiere can accelerate rendering, resulting in quicker exports without compromising video quality.
- Improved Performance with 4K and High-resolution Footage: 4K and high-resolution videos demand substantial computational resources to handle their intricacies. Hardware acceleration ensures smooth playback and editing of such videos by distributing the workload between the CPU and GPU effectively.
- Enhancing Multi-stream Playback: Hardware acceleration allows for better performance when working with multi-stream footage, such as multiple video layers or simultaneous playback of multiple video files. It can prevent dropped frames or stutters, maintaining smooth playback while editing or previewing complex video projects.
However, it is important to note that the impact of hardware acceleration may vary depending on the specific system configuration, GPU capabilities, and the type of video being edited or played back. In some cases, older or less powerful GPUs may not provide as significant a boost in performance compared to more advanced GPUs. Additionally, certain effects or features in Adobe Premiere may not be fully supported or accelerated by hardware acceleration, necessitating fallback to CPU-based rendering in those cases.