
Best Audio Noise Reduction Tools to Buy in July 2026
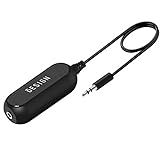
BESIGN Ground Loop Noise Isolator for Car Audio/Home Stereo System with 3.5mm Audio Cable
- ELIMINATE AUDIO HISS AND BUZZ WITH OUR GROUND LOOP ISOLATOR.
- COMPATIBLE WITH ALL 3.5MM DEVICES FOR VERSATILE USE ANYWHERE.
- COMPACT AND PORTABLE DESIGN FOR EASY PLUG-AND-PLAY CONVENIENCE.


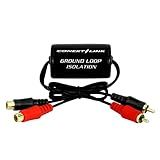
Conext Link RCA Stereo 2 Channel Ground Loop Isolator Signal Noise Filter Suppressor Reducer Alternator for Car Audio Stereo(13600)
- SAY GOODBYE TO HUMMING AND BUZZING WITH OUR GROUND LOOP ELIMINATOR!
- CRYSTAL-CLEAR AUDIO WITH DC CURRENT FILTERING FOR PURE SOUND QUALITY.
- DURABLE METAL HOUSING AND PREMIUM RCA CONNECTORS FOR LASTING PERFORMANCE.
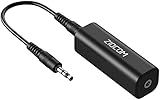
ZIOCOM Ground Loop Noise Isolator, Noise Filter, Eliminate The Buzzing Noise for Your Car Audio System/Home Stereo with Jack 3.5mm Audio Cable (1 Pack)
-
ELIMINATE BUZZING NOISE FOR CRYSTAL-CLEAR AUDIO INSTANTLY!
-
PLUG AND PLAY DESIGN FOR HASSLE-FREE SETUP IN SECONDS.
-
COMPATIBLE WITH ANY DEVICE FEATURING A 3.5MM AUDIO JACK.
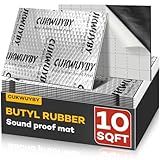
Sound Deading Material for Cars, 80mil (2mm) 10 sqft (0.93 sqm) Car Sound Deadening Mat, Butyl Automotive Sound Deadener, Noise Insulation and Vibration Dampening Material (9 pcs)
-
BLOCKS 90% NOISE: ADVANCED 3-LAYER TECH FOR EXCEPTIONAL SOUND REDUCTION.
-
EASY DIY INSTALLATION: PEEL & STICK DESIGN FOR HASSLE-FREE SETUP.
-
UNIVERSAL FIT: 10SQFT COVERS MOST VEHICLES; DURABLE AND WATERPROOF.
![Clip-on Noise Filter,VSKEY [10pcs 7.0mm] Anti-Interference High-Frequency Ferrite Core Choke Clip for Speakers,Video,Radio,Amplifier,Home Audio Device Noise Suppressor (0.275 inch Inner Diameter)](https://cdn.blogweb.me/1/41b_Jg_ZK_0_d_L_SL_160_05d124c169.jpg)
Clip-on Noise Filter,VSKEY [10pcs 7.0mm] Anti-Interference High-Frequency Ferrite Core Choke Clip for Speakers,Video,Radio,Amplifier,Home Audio Device Noise Suppressor (0.275 inch Inner Diameter)
- VERSATILE FIT: WORKS WITH VARIOUS CABLES - HDMI, AUDIO, AND MORE!
- ENHANCED SIGNAL QUALITY: REDUCES EMI/RFI FOR CLEARER AUDIO AND VIDEO.
- EASY INSTALL & REUSE: SNAP-ON DESIGN FOR QUICK SETUP AND ADJUSTMENTS.
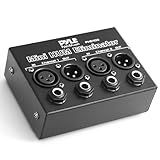
Pyle Compact Mini Hum Eliminator Box - 2 Channel Passive Ground Loop Isolator, Noise Filter,AC Buzz Destroyer, Hum Killer w/ 1/4" TRS Phone,XLR Input/Output, Uses 1:1 Isolation Transformer
- ELIMINATE 60HZ AC HUM FOR CRYSTAL-CLEAR AUDIO QUALITY.
- PORTABLE, COMPACT DESIGN FOR EASY TRANSPORT AND SETUP ANYWHERE.
- 30-DAY MONEY-BACK GUARANTEE ENSURES WORRY-FREE SHOPPING.
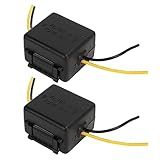
Car Power Filter Noise Ground Loop Isolator Car Audio Noise Filter 12V Car Stereo Audio Filter Noise Isolation Reducer for Stereo Audio Radio Amplifier Amp Speaker
- WIDE COMPATIBILITY WITH MOST DC 12V AUDIO DEVICES.
- REDUCES AUDIO NOISE FOR CRYSTAL CLEAR SOUND EXPERIENCE.
- IMPROVES SOUND QUALITY WITH ENHANCED CLARITY AND FIDELITY.

Ear Plugs for Concerts, 2 Pairs High Fidelity Ear Plugs with Acoustic Filter – NRR of 22 and 24dB Noise Reductions for Festival, Nightclub, DJs, Musicians, Noisy Workplace(Blue)
- EXPERIENCE HIGH-FIDELITY SOUND WITH SUPERIOR AUDIO FILTERING TECH!
- ENJOY ALL-DAY COMFORT WITH ERGONOMIC, SOFT SILICONE EARPLUGS!
- STYLISH STARRY DESIGN ENSURES SECURE FIT AND ENHANCES YOUR VIBE!
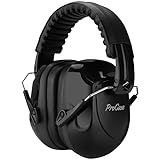
ProCase Noise Reduction Ear Muffs, Sound Proof Ear Protection, NRR 28dB Noise Cancelling Headphones for Adults Kids Autism, Hearing Protection for Mowing -Black
-
EXCEPTIONAL NOISE REDUCTION: NRR 28 DB FOR MAXIMUM EAR PROTECTION.
-
ADJUSTABLE FIT: ERGONOMIC DESIGN FOR KIDS AND ADULTS ALIKE.
-
PORTABLE & COMPACT: EASY TO STORE AND TAKE ALONG ANYWHERE.
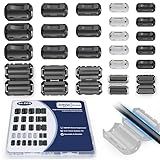
JoTownCand 24Pcs Professional Ferrite Beads, Snap-On Ferrite Choke Core Kit for USB/Audio/Power Cable Noise Reduction | EMI RFI Filter (3.5-13mm)
-
UNIVERSAL FIT FOR VARIOUS CABLES: 5 SIZES ACCOMMODATE ALL KINDS OF CORDS.
-
EASY INSTALLATION: SNAP-ON DESIGN ENSURES QUICK AND TOOL-FREE USAGE.
-
DURABLE & REUSABLE: LONG-LASTING CORES THAT PROTECT WITHOUT HARMING WIRES.
In Adobe Premiere Pro, there are several ways to reduce noise in your video footage and improve its overall quality.
- Neat Video Plugin: One effective method is to use a third-party plugin called Neat Video, which is specifically designed for noise reduction. It allows you to easily apply noise reduction filters to your footage using a simple interface.
- Apply the Denoiser Effect: Premiere Pro also provides a built-in effect called Denoiser, which can help reduce noise. Simply drag this effect onto your footage and adjust the settings to reduce various types of noise, such as temporal noise or color noise.
- Use the Noise Print feature: Another tool within Premiere Pro is the Noise Print feature. By selecting a small portion of your footage that represents the background noise, you can create a noise print. Then, apply the noise reduction effect to the entire clip, using the noise print as a reference to remove similar noise throughout.
- Adjust the levels in the Audio Effects panel: If you're experiencing noise in your audio, you can utilize the Audio Effects panel in Premiere Pro. Under the Dynamics tab, you'll find tools like the Dynamics effect or the Parametric Equalizer effect that can help reduce background noise and improve audio quality.
- Fine-tune with keyframes: For situations where you have intermittent noise in your video, you can use keyframes to isolate and reduce specific sections of noise. By applying the necessary adjustments only to the noisy parts, you can gradually reduce and eventually eliminate the unwanted noise.
- Experiment with different settings: Premiere Pro provides various settings and options to customize the noise reduction process. Experiment with different levels of reduction, frequencies, and parameters to find the optimal balance between reducing noise and maintaining video quality.
Remember, reducing noise should be done with caution. Over-application of noise reduction filters can result in loss of detail and make the footage appear blurry or unnatural. It is crucial to find the right balance that provides a cleaner result while preserving the overall visual quality of your video.
What are the different types of noise that can appear in footage?
There are several types of noise that can appear in footage, including:
- Gaussian Noise: Also known as electronic noise or sensor noise, it appears as random variations of brightness and color in an image. It is caused by the inherent electronic fluctuations and appears as small, random specks all over the image.
- Salt and Pepper Noise: This type of noise appears as randomly occurring white and black pixels scattered throughout the footage. It occurs due to errors in data transmission or faulty image sensors.
- Banding Noise: Banding noise is characterized by visible horizontal or vertical bands of different shades or colors in footage. It is typically caused by compression algorithms, poor bit depth, or interference during data transfer.
- Color Noise: Color noise appears as random fluctuations of color in an image, distorting the smoothness of transitions. It can occur due to limitations in image sensors or problems during image processing.
- Motion Blur: Motion blur occurs when there is relative movement between the camera and the subject during exposure. It leads to a loss of sharpness and details in the footage.
- Chromatic Aberration: Chromatic aberration appears as color fringing or blurring at the edges of objects. It occurs because different wavelengths of light are refracted differently by the camera lens, resulting in color distortion.
- Compression Artifacts: Compression artifacts are distortions introduced during video compression, such as blocky or pixelated areas, smearing, or color shifts. They occur when the compression algorithm reduces the file size by discarding or approximating certain image data.
It is worth noting that some noise types can be intentional artistic choices, like film grain introduced for aesthetic purposes.
How can I reduce background noise in interviews or voice recordings using Adobe Premiere Pro?
To reduce background noise in interviews or voice recordings using Adobe Premiere Pro, you can follow these steps:
- Import your footage: Start by launching Adobe Premiere Pro and creating a new project. Then, import the interview or voice recording footage into the project.
- Add the footage to the timeline: Drag and drop the footage onto the timeline to begin working with it.
- Select the audio track: Locate the audio track that contains the interview or voice recording on the timeline. Right-click on it and choose "Detach Audio" to separate the audio from the video.
- Isolate the audio track: Select the detached audio track and right-click on it. Now, choose "Edit Clip in Adobe Audition" from the context menu. This will launch Adobe Audition with the selected audio track.
- Apply noise reduction effect: In Adobe Audition, use the Selection Tool (Shortcut: V) to highlight a segment of the audio that contains only the background noise, and no significant audio you want to retain (e.g., a silent portion). Once selected, navigate to the Effects menu, choose "Noise Reduction/Restoration," and then "Capture Noise Print."
- Adjust the noise reduction settings: After capturing the noise print, navigate back to the Effects menu and select "Noise Reduction/Restoration" again, but this time choose "Noise Reduction (process)." A dialogue box will appear. Adjust the settings to reduce the background noise while maintaining the voice quality. Experiment with the sliders for "Reduction," "Reduce By," and "Reduce Only."
- Preview and apply the effect: Click the "Preview" button to hear the effect on a selected portion of the audio. Adjust the settings further if needed to achieve the desired result. Once satisfied, click "Apply" to apply the noise reduction effect to the entire audio track.
- Save and return to Premiere Pro: Save the edited audio in Adobe Audition and return to Adobe Premiere Pro. The modified audio will automatically update in your Premiere Pro project.
- Adjust audio levels if required: Back in Premiere Pro, you can further fine-tune the audio by adjusting the volume levels, balancing the voice recording with other audio sources, or applying additional audio effects if desired.
Can noise reduction be applied to specific sections of a video?
Yes, noise reduction can be applied to specific sections of a video. Video editing software often provides the ability to select and apply effects to specific portions of a video, including noise reduction. This allows users to identify the specific sections where noise is prominent and apply noise reduction only to those areas, preserving the quality of the rest of the video.
Are there any automatic noise reduction features in Adobe Premiere Pro?
Yes, Adobe Premiere Pro offers automatic noise reduction features. It includes the "Adaptive Noise Reduction" effect which uses advanced algorithms to reduce and remove background noise from audio clips. Additionally, Premiere Pro also provides a variety of tools and effects like the "DeNoise" effect that can be used to reduce noise in videos. These features help improve the quality of your audio and video by reducing unwanted noise.
What causes noise in Adobe Premiere Pro?
There can be several factors that cause noise or audio issues in Adobe Premiere Pro. These include:
- Low-quality source footage: If the original audio files used in the project are of low quality, they may have inherent noise or other audio issues.
- Background noise during recording: If there was background noise present while recording audio, it can result in unwanted noise in the final edited video.
- Incompatible or outdated audio drivers: Outdated or incompatible audio drivers on your computer can cause audio problems, including noise.
- Incorrect audio settings: Wrong audio settings in Premiere Pro, such as sample rate, bit depth, or audio hardware setup, can lead to noise issues.
- Audio interference: Sometimes, external factors such as electrical interference, faulty cables, or improper grounding can introduce noise in the audio signal.
- Over-processing or excessive audio effects: Applying too many audio effects or processing filters can sometimes introduce unwanted noise or artifacts.
It is important to identify the specific cause of the noise and apply appropriate troubleshooting steps accordingly.
Are there any limitations to noise reduction in Adobe Premiere Pro?
Yes, there are some limitations to noise reduction in Adobe Premiere Pro. Here are a few:
- Quality of the original recording: If the original audio recording has very poor quality or excessive noise, the noise reduction tools may not be able to completely eliminate all the noise. Some noise artifacts may remain even after applying noise reduction effects.
- Over-processing: Applying excessive noise reduction effects can lead to over-processing, resulting in unnatural sound artifacts such as distortion or robotic sounding speech. It's important to find a balance and avoid excessive noise reduction.
- Specific noise types: Certain types of noise, like intermittent or impulse noise, may be challenging to remove entirely using the built-in noise reduction tools in Premiere Pro. Additional specialized plugins or software may be required for better results.
- Processing time: Applying noise reduction effects can be computationally intensive, especially for longer or complex audio clips. This can increase the rendering and export times significantly. It is important to have a powerful computer system to handle the processing requirements.
- Compatibility: Premiere Pro's noise reduction tools may not be compatible with all audio formats or plugins. Ensure that you use supported formats and plugins to avoid any compatibility issues.
Remember that noise reduction is not a perfect solution, and it is always best to start with high-quality audio recordings to minimize noise issues.
What are the best techniques for reducing digital noise in low-light footage?
Reducing digital noise in low-light footage can be challenging, but here are some techniques that can help:
- Shoot at a higher ISO setting: Increasing the ISO sensitivity of your camera can capture more light in low-light conditions. However, higher ISO also leads to more noise. So, finding the right balance is important.
- Use a larger aperture: Using a lower f-stop number (larger aperture) allows more light into the camera sensor, which can help improve the overall exposure and reduce noise.
- Shoot in RAW format: RAW files contain more data and provide greater flexibility in post-processing. They offer more options for reducing noise without sacrificing image quality.
- Denoising software: There are several software tools specifically designed for reducing digital noise in post-processing. Popular options include Adobe Camera Raw, Lightroom, or dedicated noise reduction software like Neat Image or Topaz DeNoise AI. Experiment with different tools to find the one that gives you the best results.
- Reduce exposure in post-processing: If there is excessive noise in certain areas, reducing the exposure in those parts during post-processing can help minimize noise.
- Use noise reduction filters/plug-ins: Some video editing software or plugins offer noise reduction filters that can help reduce digital noise in video footage. Experiment with different settings to find the right balance between noise reduction and image quality.
- Shoot with a larger sensor camera: Larger sensor cameras tend to handle low-light situations better and produce less noise. This is because larger sensors capture more light, leading to less amplification required and hence less noise.
- Shoot in well-lit conditions: Whenever possible, try to improve the lighting conditions. Adding more light to the scene will result in less noise and better image quality.
Remember that completely eliminating noise from low-light footage is often not possible without affecting image quality. Therefore, it is essential to strike a balance between noise reduction and preserving the overall details and sharpness of the footage.