
Best Tools for Video Editing to Buy in July 2026
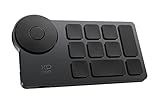
XPPen Mini Keydial ACK05 Wireless Shortcut Keyboard Bluetooth Programmable Express Remote Control with Dial & Customized Express Keys for Drawing Tablet PC MacBook Windows Images Video Editing
- VERSATILE CONNECTIVITY: CONNECT VIA BLUETOOTH, USB, OR DONGLE EASILY!
- CUSTOM SHORTCUTS: PROGRAM UP TO 40 SHORTCUTS FOR ULTIMATE PRODUCTIVITY!
- PORTABLE POWER: SLIM DESIGN WITH 300-HOUR BATTERY LIFE FOR ON-THE-GO USE!


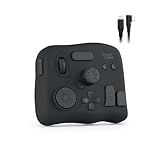
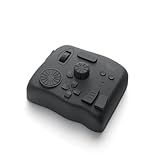
TourBox NEO - Customizable Editing Controller, Photo Color Grading Illustration Speed Editor, Intuitive Control Boost Productivity, Programmable Keyboard for Adobe CSP and More, Works with Mac/PC
-
ZERO-LATENCY WIRED DESIGN ENSURES STABLE, UNINTERRUPTED CREATIVE WORK.
-
EXTENSIVE SOFTWARE COMPATIBILITY BOOSTS EFFICIENCY IN VARIOUS CREATIVE TASKS.
-
USER-FRIENDLY CONTROLS STREAMLINE DRAWING, EDITING, AND POST-PROCESSING TASKS.
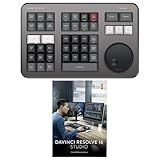
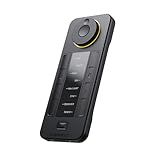
Blackmagic Design Davinci Resolve Speed Editor Bundle with Davinci Resolve 18 Studio (Activation Card)
- COMPACT DESIGN WITH A BUILT-IN BATTERY FOR ON-THE-GO USE.
- EASY NAVIGATION WITH A BUILT-IN SEARCH DIAL FOR QUICK ACCESS.
- INCLUDES DAVINCI RESOLVE 17 STUDIO FOR POWERFUL EDITING CAPABILITIES.

Movie Film Clap Board, Hollywood Clapper Board Wooden Film Movie Clapboard Accessory with Black & White, 12"x11" Give Away White Erasable Pen
- VERSATILE USE: PERFECT FOR PARTIES, EVENTS, AND PROFESSIONAL SHOOTS!
- REUSABLE DESIGN: WRITE, WIPE, AND REUSE WITH ERASABLE PEN AND CHALK!
- DURABLE QUALITY: STYLISH NATURAL WOOD CONSTRUCTION FOR LASTING APPEAL!
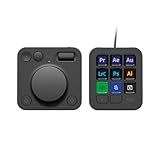
Logitech MX Creative Console, 9 Customizable LCD Keys, Stream Deck Accessories,Connectivity Technology USB-C, Control Dial for Graphic Design, Zoom, Spotify - Graphite, 3-Month Adobe Cloud Membership
-
GET 3 MONTHS OF ADOBE CREATIVE CLOUD FREE WITH MX CONSOLE!
-
BOOST CREATIVITY: ACCESS TOOLS INSTANTLY WITH MX CONSOLE!
-
CUSTOMIZE YOUR WORKFLOW: ASSIGN ACTIONS TO 15 KEYPAD PAGES!
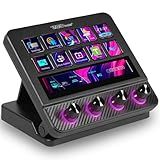
VSDINSIDE Macro Pad, Streaming Deck Stream Controller Soundboard Keypad, Programmable Keys USB Shortcut Keyboard for Gamer Streamer, Audio Mixer for OBS, YouTube, Office Desk Setup, PC, Mac
- ONE-TOUCH MACROS: EFFORTLESSLY EXECUTE COMPLEX TASKS WITH A SINGLE PRESS.
- ENDLESS CUSTOMIZATION: TAILOR LAYOUTS AND HOTKEYS FOR ULTIMATE WORKFLOW EFFICIENCY.
- 500+ PLUGINS: ENHANCE PRODUCTIVITY WITH SEAMLESS INTEGRATION ACROSS APPS.
TOUR BOX Elite Plus - iPad Drawing Bluetooth Controller, Video Editing Photo Color Grading Speed Editor, Programmable Creative Console Keyboard for DaVinci Procreate Adobe Softwares and More
-
ONE DEVICE, THREE SCENARIOS - SEAMLESSLY SWITCH BETWEEN IPAD, MAC, AND WINDOWS!
-
REVOLUTIONIZE YOUR WORKFLOW - DESIGNED FOR FAST, SMOOTH DIGITAL CREATIVITY ACROSS FIELDS.
-
ERGONOMIC EXCELLENCE - BOOSTS DRAWING EFFICIENCY BY 170% WHILE REDUCING WRIST FATIGUE!
TOUR BOX Elite - Bluetooth Video Editing Controller Color Grading Speed Editor, Intuitive Control, Professional Digital Creator Console for Davinci, Premiere, Final Cut Pro and More, Mac/PC (Black)
- DUAL CONNECTIVITY (BLUETOOTH & USB-C) FOR SEAMLESS PERFORMANCE.
- CUSTOMIZABLE CONTROLS FOR TAILORED WORKFLOWS ACROSS CREATIVE SOFTWARE.
- REVOLUTIONIZE EDITING WITH TACTILE FEEDBACK FOR PRECISION AND EASE.
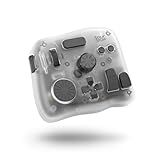
XENCELABS Quick Keys for PC, MacBook, Desktop, Drawing Tablet, Pen Display, OLED Display, 44 Customizable Shortcuts Keydail for Digital Drawing, Video Editing, Photo Retouching, Windows/macOS
-
OLED DISPLAY FOR QUICK ACCESS: INSTANTLY IDENTIFY SHORTCUTS WITHOUT GUESSWORK.
-
40 PROGRAMMABLE KEYS: TAILOR 40 COMMANDS FOR YOUR CREATIVE WORKFLOW EFFORTLESSLY.
-
MULTI-SCENARIO COMPATIBILITY: PERFECT FOR ARTISTS AND EDITORS ACROSS DIVERSE SOFTWARE.
To create a transparent background in Adobe Premiere, follow these steps:
- Import your video clip or image into the project timeline.
- Go to the Effects panel and search for the "Ultra Key" effect.
- Drag the Ultra Key effect onto your video clip in the timeline.
- In the Effect Controls panel, click on the "Key Color" eyedropper tool.
- Use the eyedropper to click on an area of the video or image that should be transparent. This will select the key color.
- You can adjust the "Threshold" slider to fine-tune the keying process. Increasing the threshold value will make the keying more inclusive, while decreasing it will make it more exclusive.
- If there's still some undesired leftovers, you can use the "Matte Generation" options in the Effect Controls panel to refine the edges and improve the transparency.
- You can also adjust other settings such as "Pedestal," "Clip Black" and "Clip White" to further refine the transparency effect if needed.
- If you want to add a background behind your transparent video or image, import the desired background into the project and place it on a layer below the transparent clip.
- Once you are satisfied with the transparency effect, you can export your video with a transparent background by choosing a format that supports alpha channels, such as QuickTime with the Animation codec, or the PNG sequence option.
Remember that the effectiveness of creating a transparent background depends on the quality and contrast of the original clip or image, so having a clean source will yield better results.
What are the possible challenges when working with a transparent background in Adobe Premiere?
Working with a transparent background in Adobe Premiere can pose several challenges, including:
- Compatibility issues: Some formats and codecs do not support transparency, so it may be necessary to convert or export the project in a different format.
- File size: Transparent backgrounds often require an alpha channel, which adds to the file size. This can lead to increased storage requirements and potential performance issues.
- Processing power: Transparent backgrounds can be resource-intensive, especially when multiple layers or effects are applied. It may require a powerful computer to handle real-time playback and editing.
- Color accuracy: Ensuring accurate color representation can be challenging, particularly when compositing elements with different color spaces or working with footage that has been compressed or converted multiple times.
- Compression artifacts: Transparent backgrounds can be susceptible to compression artifacts, such as banding or noise, which can degrade the overall quality of the video.
- Export settings: Proper export settings need to be chosen to preserve transparency. Choosing the wrong settings can result in loss of transparency or other issues in the output file.
- Quality control: It may be necessary to test the final output on different devices and platforms to ensure transparency is maintained consistently across various playback environments.
How to utilize a transparent background in Adobe Premiere to overlay videos or images?
To utilize a transparent background in Adobe Premiere to overlay videos or images, follow these steps:
- Import the video or image that you want to overlay onto your main footage.
- Drag and drop the video or image onto the timeline in a layer above your main footage.
- Select the video or image clip on the timeline, and go to the Effects Control panel.
- Locate the Opacity section and adjust the opacity value to make the video or image transparent. Lower values like 50% will make it partially transparent, while 0% will make it completely transparent.
- If your video or image does not already have a transparent background, you can use Premiere's built-in tools to create a mask and isolate the subject from the background. Select the video or image clip and go to the Effects Control panel. Under Opacity, click on the pen icon next to Mask. Use the Pen tool or one of the shape tools (rectangle, ellipse, etc.) to create a mask around the subject. Adjust the mask’s feather, expansion, and other properties as needed to enhance the transparency and blending.
- To further refine the overlay effect, you can experiment with blending modes. Select the video or image clip, and go to the Effects Control panel. Locate the Blend Mode drop-down menu, and try different blending modes such as Overlay, Screen, Multiply, etc., to achieve the desired result.
- You can also add additional effects or adjustments to the overlay clip, such as color correction or scaling, to match the look and feel of your main footage.
Remember to preview your video to see the overlay effect in action, and make further adjustments if needed.
How to mask elements on a transparent background in Adobe Premiere?
To mask elements on a transparent background in Adobe Premiere, you can follow these steps:
- Import your footage: Start by importing the video clip or image with the transparent background into your Premiere project.
- Create a new sequence: Right-click on the imported footage in the Project panel, select "New Sequence from Clip" or drag the clip to the timeline to create a new sequence.
- Add the element you want to mask: Import the element or video clip that you want to overlay onto the transparent background. Drag it onto the video track above the original footage in the timeline.
- Apply the Mask effect: With the element selected in the timeline, go to the Effects control panel. Expand the Video Effects folder, then navigate to Generate > Pen Tool > Mask. Drag and drop the Mask effect onto the element clip.
- Adjust the mask: In the Effects control panel, locate the Mask effect and click on the small triangle to reveal its options. Adjust the mask's position, size, and shape by manipulating the anchor points and control handles in the Program Monitor.
- Invert the mask if needed: If you want to hide a specific portion of the element, you can invert the mask. Under the Mask options in the Effects control panel, check the "Inverted" checkbox. This will reverse the mask's effect, revealing the area you had masked out.
- Refine the mask with feathering or opacity adjustments: If necessary, you can further enhance the mask's blending with the underlying transparent background by adjusting the feathering or opacity options in the Effects control panel. This can help to create a smoother transition between the element and the background.
- Preview and fine-tune: Play the sequence to preview the masked element on the transparent background. Make any necessary adjustments to the mask or other settings until you achieve the desired effect.
- Export the final video: Once you are satisfied with the results, go to File > Export > Media to export the final video with the masked elements on a transparent background.
Note: Adobe Premiere offers various masking tools, so depending on the version you are using, you may have different options or effects available. Adjust the steps accordingly for your specific version of Premiere.
How do I remove the background in Adobe Premiere?
To remove the background in Adobe Premiere, you can use the "Ultra Key" effect. Here's how to do it:
- Open your project in Adobe Premiere.
- Place the footage with the background you want to remove on the timeline.
- Locate the Effects panel (usually found on the right side of the screen) and search for "Ultra Key."
- Drag and drop the Ultra Key effect onto the footage on the timeline.
- In the Effect Controls panel (usually located on the left side of the screen), click on the drop-down menu for the Ultra Key effect to reveal the settings.
- Using the Eyedropper tool, click on an area of the video that contains the background color you want to remove. This will sample the color to create a key.
- Adjust the "Matte Generation" settings. You can try changing the "Pedestal" value to define the range of colors to remove. Increasing the "Pedestal" value will include more similar colors.
- If necessary, fine-tune the effect by adjusting the "Alpha Channel Tolerance" and "Decontaminate Colors" settings. These help to refine the quality of the key.
- You'll notice that the background should become transparent or replaced with a solid color. To add a new background, create a new video track above the footage and place the replacement background video or image on that track.
- Adjust the position and scale of the replacement background to fit the main footage if needed.
- Preview the result by playing the timeline. Make further adjustments as necessary to achieve the desired effect.
By following these steps, you should be able to remove the background from your footage in Adobe Premiere.
How to add graphics or images with transparent backgrounds in Adobe Premiere?
To add graphics or images with transparent backgrounds in Adobe Premiere, you can follow these steps:
- Import the graphic or image into your Premiere project by clicking on "File" > "Import" and selecting the file from your computer.
- Drag the image from the Project panel to the timeline, placing it on a video track above your main footage.
- Select the image clip on the timeline to reveal the editing options in the Effect Controls panel.
- If your graphic doesn't already have a transparent background, you can remove the background by applying the "Ultra Key" effect. To do this, go to the "Effect Controls" panel, search for "Ultra Key" in the search bar, and drag the effect onto the image clip.
- In the Effect Controls panel, click on the eyedropper tool next to the "Key Color" option.
- Click on an area of the image that you want to act as the transparency color. This will make that color transparent.
- Adjust the settings such as tolerance, edge detail, and alpha channel to fine-tune the transparency effect until it looks desired.
- If needed, you can also make further adjustments using other effects like "Opacity" or "Blend Modes" to control the appearance and blending of the image with the background footage.
- Once you are satisfied with the transparency and placement of the graphic, you can continue editing your video as usual.
By following these steps, you will be able to add graphics or images with transparent backgrounds in Adobe Premiere.