
Best Tools to Increase Brightness in Adobe Premiere Pro to Buy in July 2026
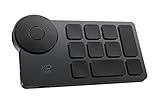
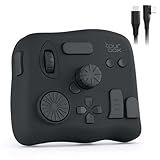
XPPen Mini Keydial ACK05 Wireless Shortcut Keyboard Bluetooth Programmable Express Remote Control with Dial & Customized Express Keys for Drawing Tablet PC MacBook Windows Images Video Editing
- FLEXIBLE CONNECTIVITY: CONNECT VIA BLUETOOTH, USB, OR DONGLE FOR VERSATILITY.
- CUSTOMIZE 40 SHORTCUTS: CREATE TAILORED WORKFLOWS FOR ENHANCED PRODUCTIVITY.
- LONG BATTERY LIFE: UP TO 300 HOURS OF CONTINUOUS USE FOR UNINTERRUPTED CREATIVITY.


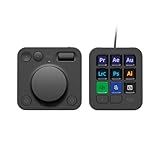
Logitech MX Creative Console, 9 Customizable LCD Keys, Stream Deck Accessories,Connectivity Technology USB-C, Control Dial for Graphic Design, Zoom, Spotify - Graphite, 3-Month Adobe Cloud Membership
-
BOOST PRODUCTIVITY: SPEED UP WORKFLOW BY ACCESSING TOOLS INSTANTLY.
-
FULLY CUSTOMIZABLE: TAILOR 15 KEYPAD PAGES WITH PERSONALIZED ICONS.
-
FREE ADOBE ACCESS: CLAIM 3 MONTHS OF ADOBE CREATIVE CLOUD WITH PURCHASE!
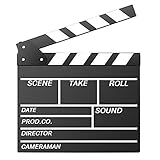
Movie Film Clap Board, Hollywood Clapper Board Wooden Film Movie Clapboard Accessory with Black & White, 12"x11" Give Away White Erasable Pen
- DURABLE NATURAL WOODEN CLAPPER BOARD, PERFECT FOR ANY EVENT!
- INCLUDES ERASABLE PEN FOR EASY SCENE MARKING AND CREATIVITY.
- VERSATILE USE: IDEAL FOR PARTIES, AWARDS, AND PROFESSIONAL SHOOTS!
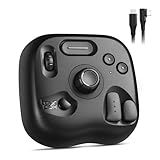
TourBox Lite - Editing Keyboard Compact, Artists Go-to Drawing Macro Keypad, Works with Photoshop, CSP & More, Creative Controller with Custom Software, Streamline All Workflows - Wired Only
- MASTER CREATIVE WORKFLOWS WITH 8 BUTTONS & 50+ ACTIONS!
- LEARN IN 7 DAYS-NO COMPLEX SETUP OR SHORTCUTS REQUIRED!
- ERGONOMIC DESIGN REDUCES STRAIN FOR LONG CREATIVE SESSIONS!
TourBox NEO - Customizable Editing Controller, Photo Color Grading Illustration Speed Editor, Intuitive Control Boost Productivity, Programmable Keyboard for Adobe CSP and More, Works with Mac/PC
- ZERO-LATENCY WIRED CONNECTION FOR UNINTERRUPTED CREATIVE WORK.
- EXTENSIVE SOFTWARE COMPATIBILITY FOR ALL YOUR EDITING NEEDS.
- INTUITIVE CONTROLS FOR STREAMLINED VIDEO EDITING AND COLOR GRADING.
TOUR BOX Elite Plus - iPad Drawing Bluetooth Controller, Video Editing Photo Color Grading Speed Editor, Programmable Creative Console Keyboard for DaVinci Procreate Adobe Softwares and More
-
3-IN-1 DEVICE: SEAMLESSLY SWITCH BETWEEN IPAD, MAC, & WINDOWS WORKFLOWS!
-
STREAMLINED CREATIVITY: BOOST YOUR EDITING SPEED BY 170% WITH ELITE CONTROLS!
-
USER-FRIENDLY PRESETS: ACCESS INDUSTRY-LEADING WORKFLOWS INSTANTLY WITH EASE!
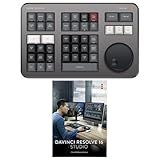
Blackmagic Design Davinci Resolve Speed Editor Bundle with Davinci Resolve 18 Studio (Activation Card)
- PORTABLE DESIGN WITH BUILT-IN BATTERY FOR ON-THE-GO USE.
- CONVENIENT SEARCH DIAL AND KEYBOARD SHORTCUTS FOR QUICK EDITS.
- INCLUDES DAVINCI RESOLVE 17 STUDIO FOR PROFESSIONAL EDITING!
To increase the brightness in Adobe Premiere Pro, follow these steps:
- Open Adobe Premiere Pro on your computer.
- Import your video clip into the software by clicking on "File" in the top menu and selecting "Import" or by using the shortcut Ctrl+I (Command+I on a Mac) and browsing for the file on your computer.
- Drag the imported video clip onto the timeline at the bottom of the screen.
- Select the video clip by clicking on it in the timeline.
- In the top menu, click on "Effects" and then navigate to the "Video Effects" folder.
- Expand the "Color Correction" folder and find the "Brightness & Contrast" effect.
- Click and drag the "Brightness & Contrast" effect onto the video clip in the timeline.
- In the "Effect Controls" tab, you will see different settings for the applied effect.
- To increase the brightness, adjust the "Brightness" slider by dragging it to the right.
- You can fine-tune the brightness by inputting a specific value in the numerical field beside the slider.
- Preview the changes in the program monitor to see the effect in real-time.
- Once you are satisfied with the brightness adjustment, you can proceed with further editing or export the video by selecting "File" in the top menu and then choosing "Export" or by using the shortcut Ctrl+M (Command+M on a Mac) to access the export settings.
Remember to save your project regularly to avoid losing any changes or adjustments you have made.
Can I use the RGB curves option to increase brightness in Adobe Premiere Pro?
Yes, you can use the RGB Curves option in Adobe Premiere Pro to increase brightness. The RGB Curves allow you to adjust the individual red, green, and blue channels of your footage, which can help you control and enhance the brightness, contrast, and color balance of your clips. By increasing the intensity of the curves, you can effectively increase the overall brightness of your footage.
What is the ideal brightness level for a video?
The ideal brightness level for a video can vary depending on factors such as the content, viewing environment, and personal preferences. However, a common recommendation is to aim for a video brightness level that preserves detail in both dark and bright areas without being overly harsh or dim.
One way to ensure this is by adhering to the standard video brightness level advised by the International Telecommunication Union (ITU) known as Rec. 709. According to this standard, the ideal brightness level is defined by a gamma-corrected luminance of 100 nits (candelas per square meter) for normal viewing environments.
However, it is important to note that this standard is primarily applicable to HD and SD video formats. Different recommendations might apply for HDR (High Dynamic Range) content or when specific artistic choices are involved in video production. Ultimately, the optimal brightness level may also depend on the specific context and the intended viewing experience.
Does increasing brightness make the video look washed-out?
Increasing brightness can make a video look washed-out if it is overdone. When brightness is pushed too high, the highlights in the video may be blown out, causing loss of detail and making the overall image appear less vibrant. However, if the brightness adjustment is moderate and within reasonable limits, it can enhance shadow detail and improve visibility without washing out the video.
Which workspace in Adobe Premiere Pro should I use to adjust brightness?
The Lumetri Color workspace in Adobe Premiere Pro is ideal for adjusting brightness. It offers comprehensive tools and controls specifically designed for color correction and grading, including adjustments for brightness, contrast, exposure, and more. To access the Lumetri Color workspace, go to the "Window" menu and select "Workspaces" followed by "Color" or use the shortcut key "Shift + 1".
Can I increase brightness in Adobe Premiere Pro without affecting other color settings?
Yes, you can increase the brightness in Adobe Premiere Pro without affecting other color settings by using the Lumetri Color panel. Here's how you can do it:
- Open your project in Adobe Premiere Pro and navigate to the Color workspace by clicking on the Color tab at the top of the screen.
- In the Lumetri Color panel, you will find various controls for adjusting your video's color, including brightness.
- Find the Brightness slider under the Basic Correction section in the Lumetri Color panel.
- Drag the Brightness slider to the right to increase the brightness of your video. You can adjust it gradually to control the level of brightness you want.
By using the Lumetri Color panel, you can increase the brightness without directly affecting other color settings, such as saturation or contrast. However, keep in mind that making drastic adjustments to brightness can potentially impact the overall look of the video, so it's essential to monitor the changes and ensure they fit your desired outcome.
How do I reset the brightness adjustments made in Adobe Premiere Pro?
To reset the brightness adjustments made in Adobe Premiere Pro, you can follow these steps:
- Select the clip or the sequence in the timeline panel that contains the brightness adjustments you want to reset.
- Go to the Effects Control panel, which is usually located to the left of the Program Monitor. If you can't find it, go to Window > Effects Control to display it.
- In the Effects Control panel, locate the effect or filter that you applied for the brightness adjustments. It might be named "Brightness," "Exposure," "Levels," or something similar.
- Once you find the effect, select it by clicking on it. The effect's settings will appear in the panel.
- To reset the adjustments, you can either click on the "Reset Effect" button at the top of the Effects Control panel (which usually looks like a curved arrow), or you can manually reset the values.
- If you prefer to manually reset the values, you can either double-click on the numerical value and type "0" or adjust the sliders and settings back to their default positions.
- After resetting the effect, playback the clip or the sequence to ensure that the brightness adjustments have been reset.
Note: If you have multiple effects applied to the clip or sequence, make sure to reset the correct one that is responsible for the brightness adjustments.
Does increasing brightness also enhance the visibility of details in the video?
Increasing the brightness can enhance the visibility of details in a video to some extent. Brightening the video can make dim or dark areas more visible and bring out certain details that were previously difficult to see. However, there are limitations to this improvement. If the video is excessively dark or if the details are too faint or obscured, simply increasing brightness may not be enough to significantly enhance the visibility of those details. Additionally, increasing brightness too much can lead to overexposed and washed-out areas, which can make certain details less discernible. Therefore, while increasing brightness can help enhance the visibility of details, it is not a foolproof solution and could have its limitations depending on the specific video and its quality.
Can I create keyframes to gradually increase brightness in Adobe Premiere Pro?
Yes, you can create keyframes to gradually increase brightness in Adobe Premiere Pro. Here's how you can do it:
- Import your video clip into the timeline.
- Select the clip in the timeline and go to the Effects Control panel.
- Locate the "Lumetri Color" effect and drag it onto the clip.
- In the Effects Control panel, you'll find various color correction options. Look for the "Exposure" section.
- To create a keyframe, click on the stopwatch next to the "Exposure" parameter. This will set the initial keyframe.
- Move the playhead along the timeline to the point where you want to increase the brightness and adjust the "Exposure" value.
- As you adjust the value, a new keyframe will automatically be created at that point.
- Continue moving the playhead along the timeline and adjusting the "Exposure" value to gradually increase the brightness. Each adjustment will create a new keyframe.
- You can drag the keyframes along the timeline to adjust their timing and duration.
- Playback the video to see the gradual increase in brightness.
Remember to save your project to keep the keyframes intact.
Where can I find tutorials or online resources to learn more about increasing brightness in Adobe Premiere Pro?
There are several online resources and tutorials available to help you learn more about increasing brightness in Adobe Premiere Pro. Here are a few options:
- Adobe's Help Center: Adobe provides comprehensive support documentation and tutorials on their website. You can access tutorials specific to increasing brightness or adjusting exposure in Adobe Premiere Pro. Visit the Adobe Help Center at helpx.adobe.com/premiere-pro.html.
- YouTube: YouTube is an excellent platform for learning Premiere Pro and offers numerous tutorials on various aspects of video editing. Search for "Adobe Premiere Pro brightness tutorial" or "adjusting exposure in Premiere Pro" to find relevant videos.
- Lynda.com: Lynda.com (now LinkedIn Learning) offers in-depth video tutorials on a wide range of topics, including Adobe Premiere Pro. Their tutorials cover various aspects of video editing, including adjusting brightness and exposure. You may need a subscription to access their content.
- Premiere Pro Forums: Adobe's community forums provide a platform for users to ask questions and seek advice from other Premiere Pro users. You can post your query about increasing brightness in Premiere Pro and other experienced users can assist you with step-by-step instructions and tips.
- Online Courses: Websites like Udemy, Coursera, and Skillshare offer paid and free online courses on Adobe Premiere Pro. These courses are designed to provide comprehensive training on using Premiere Pro, including adjusting brightness and exposure. You can search for courses specific to your needs and preferences.
Remember, while online tutorials and resources can be helpful, hands-on practice is equally essential in mastering any software. Experimenting with the tools and features in Adobe Premiere Pro will enhance your understanding and skillset.