Best Tools to Buy for Editing YouTube Videos in July 2026
![Adobe Premiere Elements 2026 | Software Download | Video Editing | 3-year term license | Activation Required [PC/Mac Online Code]](https://cdn.blogweb.me/1/51q_VIY_2_Zcy_L_SL_160_bf19a64b57.jpg)
Adobe Premiere Elements 2026 | Software Download | Video Editing | 3-year term license | Activation Required [PC/Mac Online Code]
- AI-POWERED EDITING: TRIM FOOTAGE QUICKLY WITH AUTOMATED TOOLS.
- VERSATILE MODES: CHOOSE FROM QUICK, GUIDED, OR ADVANCED EDITING STYLES.
- 3-YEAR ACCESS: ENJOY FULL FEATURES WITH NO HIDDEN RENEWALS!
![Adobe Premiere Elements 2026 | Software Download | Video Editing | 3-year term license | Activation Required [PC/Mac Online Code]](https://cdn.flashpost.app/flashpost-banner/brands/amazon.png)
![Adobe Premiere Elements 2026 | Software Download | Video Editing | 3-year term license | Activation Required [PC/Mac Online Code]](https://cdn.flashpost.app/flashpost-banner/brands/amazon_dark.png)

Adobe Premiere Pro | Video Editing and Production Software | 12-Month Subscription with Auto-Renewal, PC/Mac
- SEAMLESSLY EDIT 8K TO VR FOOTAGE-UNLEASH YOUR STORYTELLING POWER!
- TRUSTED BY HOLLYWOOD PROS, PERFECT FOR ASPIRING CREATORS LIKE YOU.
- COMPLETE CURRENT TERM BEFORE LINKING-MAXIMIZE YOUR MEMBERSHIP VALUE!
Adobe Premiere Pro | Video editing and production software | 1-month Subscription with auto-renewal, PC/Mac
- EDIT STUNNING VIDEOS WITH PRO-LEVEL TOOLS FOR ANY PLATFORM.
- JOIN INDUSTRY PROS USING PREMIERE PRO FOR TOP-QUALITY EDITING.
- SEAMLESSLY EDIT IN ANY FORMAT, FROM 8K TO VR CONTENT!
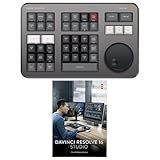
Blackmagic Design Davinci Resolve Speed Editor Bundle with Davinci Resolve 18 Studio (Activation Card)
- PORTABLE DESIGN WITH BUILT-IN BATTERY FOR ON-THE-GO USE.
- BUILT-IN SEARCH DIAL AND KEYBOARD SHORTCUTS FOR EASY NAVIGATION.
- INCLUDES DAVINCI RESOLVE 17 STUDIO FOR ENHANCED EDITING POWER.
![Corel Photo Video Ultimate Bundle 2023 | PaintShop Pro 2023 Ultimate and VideoStudio Ultimate 2023 | Powerful Photo and Video Editing Software [PC Download]](https://cdn.blogweb.me/1/51lv_SJ_7f_Mn_L_SL_160_82c0701379.jpg)
Corel Photo Video Ultimate Bundle 2023 | PaintShop Pro 2023 Ultimate and VideoStudio Ultimate 2023 | Powerful Photo and Video Editing Software [PC Download]
-
PRO-LEVEL EDITING TOOLS: ELEVATE IMAGES WITH AI ADJUSTMENTS & LAYERS.
-
INTUITIVE VIDEO SUITE: CREATE STUNNING VIDEOS WITH FUN EFFECTS AND FEATURES.
-
BONUS CONTENT & FORMATS: ACCESS EXCLUSIVE EFFECTS AND EASY SHARING OPTIONS.
![VEGAS Pro Edit 21 - The creative standard for video and audio | video editing software | video cutting software | video editor | 1 license [PC Online code]](https://cdn.blogweb.me/1/513_H32_O_Lp2_L_SL_160_90e8dc31da.jpg)
VEGAS Pro Edit 21 - The creative standard for video and audio | video editing software | video cutting software | video editor | 1 license [PC Online code]
- EFFORTLESS VIDEO CREATION: FAST, AI-POWERED EDITING FOR ALL CONTENT TYPES.
- FREE ADVANCED TOOLS: INCLUDES EFFECTS, TITLES, AND VIDEO REPAIR FEATURES.
- ULTIMATE PERFORMANCE: OPTIMIZE WITH GPU ACCELERATION FOR SMOOTH EXPORTS.
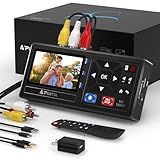
Portta VHS to Digital Converter, Video to Digital Recorder with Remote, Compatible with VHS, VCR, DVR, DVD, Hi8, Mini DV Players, Camcorder, Gaming Consoles (Tapes/DVD Player Not Included)
-
CONVERT ANALOG VIDEOS TO 1080P DIGITAL WITH EASE-NO PC NEEDED!
-
DIRECTLY RECORD TO USB/SD-PLAYBACK AND PREVIEW ON 3.0 LCD!
-
COMPATIBLE WITH VHS, CAMCORDERS, AND GAMING CONSOLES-DIGITIZE ALL!
To edit YouTube videos in Adobe Premiere, you can follow these steps:
- Import your footage: Start by launching Adobe Premiere and creating a new project. Then, go to File > Import and select the video clips you want to edit. You can also import audio, images, or any other media files you may need for your video.
- Organize your media: Once your footage is imported, you can create a new sequence by dragging and dropping your video clips into the "Timeline" panel. Arrange them in the desired order and trim or cut unwanted portions by using the razor tool or the "Trim" function.
- Enhance your video: Adobe Premiere offers various tools and effects to enhance the visual quality of your video. You can adjust brightness, contrast, saturation, and color balance using the Lumetri Color panel. Additionally, you can stabilize shaky footage, reduce noise, and apply other corrections and filters to improve the overall look.
- Add transitions: To create smooth transitions between video clips, you can use the effects panel in Adobe Premiere. Drag and drop the desired transition effect between two clips on the timeline. You can choose from a range of options like cross dissolve, fade in/out, or wipe.
- Apply audio adjustments: Adobe Premiere allows you to enhance the sound quality of your video. You can adjust the volume levels, remove background noise, and add audio effects or music tracks. Use the audio panel to make these adjustments, and ensure that your video has good audio balance.
- Add text and graphics: To make your video more engaging, you can add text overlays, titles, and graphics. Premiere provides essential tools for creating and customizing text, as well as features for incorporating images or logos. Use the Graphics panel and Essential Graphics workspace to achieve this.
- Apply transitions and effects: For additional creative elements, you can apply video and audio effects. Experiment with effects like blurs, distortions, or color grading to give your video a unique touch. Premiere offers a wide range of effects that you can incorporate to enhance visual impact.
- Export your video: Once you are satisfied with your edits, it’s time to export your video. Adobe Premiere provides various export settings, including resolution, format, and quality options. Select the appropriate settings based on your intended use and click on File > Export > Media to export your final video.
Remember to save your project regularly to avoid losing any work. With practice, you can become proficient in using Adobe Premiere to edit your YouTube videos and create engaging content for your audience.
What is the purpose of the audio mixer panel in Adobe Premiere?
The audio mixer panel in Adobe Premiere is used for adjusting and controlling the audio levels and properties of the clips in a project. Its purpose is to provide users with advanced control over the audio elements of their videos. With the audio mixer panel, users can adjust volume levels, balance stereo or multichannel audio, apply audio effects and filters, and control audio tracks individually or collectively. It allows for precise control over audio levels and provides a more professional and polished sound for the video project.
How to create smooth transitions in Adobe Premiere?
To create smooth transitions in Adobe Premiere, follow these steps:
- Import your footage: Open Adobe Premiere and create a new project. Import the video clips you want to use in your timeline.
- Sequence setup: Create a new sequence by clicking the "New Item" button in the Project panel. Set the sequence settings according to the resolution, frame rate, and aspect ratio of your footage.
- Add footage to the timeline: Drag and drop your video clips to the timeline in the order you want them to appear.
- Select the transition: In the Effects panel, click on the "Video Transitions" folder to see a variety of available transitions. Browse through the options and choose the one that suits your desired transition style.
- Apply the transition: Drag the transition effect from the Effects panel and place it between two clips on the timeline where you want the transition to occur. Ensure the clips overlap slightly to create the transition effect.
- Adjust transition duration: Click on the edge of the transition in the timeline and drag it left or right to adjust its duration. You can preview the transition by playing the timeline to see if it creates the desired effect.
- Modify transition settings: In the Effects Controls panel, you can adjust specific settings for the selected transition. For example, you can change the direction, style, or speed of the transition effect.
- Apply easing to transition: To create a smoother transition, right-click on the edge of the transition in the timeline and select "Ease In" or "Ease Out." This will gradually speed up or slow down the transition effect.
- Add keyframes: To create more customized transitions, you can add keyframes to the Motion properties of your clips. This allows you to control the position, scale, rotation, and opacity of the clips over time. Right-click on the clip, select "Show Clip Keyframes," and choose the desired property to modify.
- Preview and adjust: Continuously preview your transitions by playing the timeline to ensure they flow smoothly. Make any necessary adjustments to the duration, easing, or keyframes until you achieve the desired effect.
Remember, creating smooth transitions requires practice and experimentation. So, explore different options and settings to find the perfect transition style that suits your project.
What is the best way to optimize video files for YouTube upload in Adobe Premiere?
To optimize video files for YouTube upload in Adobe Premiere, you can follow these steps:
- Export your video in the appropriate format: YouTube recommends using the H.264 video codec with AAC audio in an MP4 container. In Adobe Premiere, go to File > Export > Media to open the export settings.
- Choose the right preset: Select the YouTube preset from the Format dropdown menu. This preset is optimized for YouTube.
- Adjust the video settings: In the Video tab, check that the video codec is set to H.264. Keep the resolution and frame rate consistent with your original footage to maintain quality. If you're working with high-resolution footage, you can reduce the resolution to reduce file size without significant loss of quality.
- Adjust the audio settings: In the Audio tab, check that the audio codec is set to AAC. Ensure the audio bitrate is set to at least 128 kbps, but higher bitrates up to 384 kbps are allowed.
- Configure the output settings: In the Output tab, select the desired destination and filename for your video. Make sure to choose a location where you can easily locate the video file.
- Choose the appropriate settings for your target audience: You may want to adjust the Bitrate settings based on your target viewers' internet connection capabilities. YouTube recommends using a bitrate between 8-12 Mbps for 1080p resolution videos.
- Enable the Use Maximum Render Quality checkbox: This option improves the final quality of your video but increases processing time. If your computer can handle it, enable this option for better results.
- Preview and export your video: Before exporting, it's a good idea to preview how your video will look using the Export Settings Preview window. Once you're satisfied, click Export to begin rendering your video.
Following these steps will help optimize your video files for YouTube upload using Adobe Premiere.
What is the best export settings for YouTube in Adobe Premiere?
The best export settings for YouTube in Adobe Premiere will depend on factors such as resolution, frame rate, and bitrate. However, below are some recommended settings:
- Format: H.264 (.mp4)
- Resolution: Typically, 1080p (1920x1080) or 4K (3840x2160) is ideal for YouTube.
- Frame Rate: You can use the same frame rate as your project settings. 24, 30, or 60 fps are commonly used.
- Bitrate: For 1080p videos, a bitrate of 8-10 Mbps is recommended. For 4K, 35-45 Mbps is generally sufficient.
- Audio Format: AAC is the standard audio format.
- Audio Bitrate: 320 kbps is a good quality audio bitrate.
- Keyframe Distance: Set the keyframe distance to auto.
It's important to note that YouTube constantly updates their recommended settings, so it's a good idea to check their guidelines periodically for any changes.
How to use the color correction tools in Adobe Premiere?
To use the color correction tools in Adobe Premiere, follow these steps:
- Launch Adobe Premiere and open your project.
- Locate and select the video clip you want to color correct in the project media panel, and then drag and drop it onto the timeline.
- Select the video clip on the timeline and go to the "Color" workspace by clicking on the "Color" tab at the top of the interface.
- Look for the "Lumetri Color" panel on the right-hand side of the interface, which contains the color correction tools.
- Start by adjusting the basic settings. Use the sliders for "Exposure," "Contrast," "Highlights," "Shadows," "Whites," and "Blacks" to fine-tune the overall brightness and contrast of the footage.
- Move on to the "Color Wheels & Match" panel. Here you will find three color wheels: "Shadows," "Midtones," and "Highlights." Dragging the dots around the color wheels can adjust the color balance in the image.
- To make specific adjustments to the color balance, use the "Color Wheel Balance" sliders located below each of the color wheels. These sliders allow you to tweak the hue, saturation, and luma of the corresponding colors in the image.
- If you want to adjust a specific range of colors, go to the "Color Curves" panel. Select the "Curves" dropdown and choose a specific color channel, such as RGB, Red, Green, or Blue. Use the control points on the graph to adjust the specific color range.
- You can also make precise adjustments to the highlights, shadows, and midtones of your footage by utilizing the "Curves" option in the "Lumetri Scopes" panel.
- Experiment with other adjustments like "Vibrance," "Saturation," and "Hue" to enhance the visual impact of your footage.
- Preview the changes by playing the video in the Program Monitor. If you're satisfied, you can continue editing your project; otherwise, revise your color correction settings as needed.
- Once you've finished color correcting the clip, you can copy and paste the color correction settings to other clips in your project or save the settings as a preset for future use.
Remember to always save your project frequently and export a high-quality copy of your final edited video.