Best Photo Editing Tools to Buy in July 2026
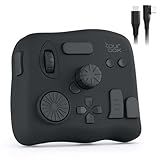
TourBox NEO - Customizable Editing Controller, Photo Color Grading Illustration Speed Editor, Intuitive Control Boost Productivity, Programmable Keyboard for Adobe CSP and More, Works with Mac/PC
-
ZERO-LATENCY WIRED DESIGN ENSURES STABLE, UNINTERRUPTED CREATIVITY.
-
BOOST YOUR WORKFLOW WITH EXTENSIVE COMPATIBILITY ACROSS MAJOR SOFTWARE.
-
INTUITIVE CONTROLS FOR STREAMLINED VIDEO EDITING AND COLOR GRADING.


TourBox Lite - Editing Keyboard Compact, Artists Go-to Drawing Macro Keypad, Works with Photoshop, CSP & More, Creative Controller with Custom Software, Streamline All Workflows - Wired Only
- UNLOCK CREATIVE POTENTIAL WITH 8 BUTTONS AND OVER 200 CUSTOMIZABLE ACTIONS.
- MASTER CREATIVE TOOLS IN JUST 7 DAYS-NO STEEP LEARNING CURVE REQUIRED!
- ERGONOMICALLY DESIGNED FOR COMFORT; REDUCE STRAIN DURING LONG SESSIONS.
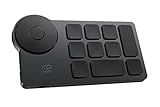
XPPen Mini Keydial ACK05 Wireless Shortcut Keyboard Bluetooth Programmable Express Remote Control with Dial & Customized Express Keys for Drawing Tablet PC MacBook Windows Images Video Editing
-
CONNECT ANYTIME: ENJOY BLUETOOTH 5.0, USB, OR DONGLE OPTIONS.
-
CUSTOMIZE 40 SHORTCUTS: TAILOR UP TO FOUR SETS USING OUR DRIVER.
-
ERGONOMIC DESIGN: ACCELERATE WORKFLOWS WITH INTUITIVE KEY PLACEMENT.
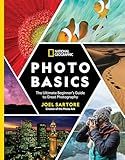
National Geographic Photo Basics: The Ultimate Beginner's Guide to Great Photography
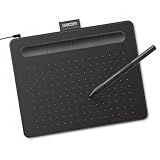
Wacom Intuos Small Graphics Drawing Tablet, Includes Training & Software; 4 Customizable ExpressKeys Compatible with Chromebook Mac Android & Windows, Black
- UNMATCHED PRECISION: EXPERIENCE PEN-ON-PAPER FEEL WITH BATTERY-FREE TECH.
- UNIVERSAL COMPATIBILITY: CREATE WITH ANY SOFTWARE FOR LIMITLESS CREATIVITY.
- PRO-PREFERRED: TRUSTED BY GRAPHIC DESIGNERS FOR TOP-TIER PERFORMANCE.

Drawing Tablet XPPen StarG640 Digital Graphic Tablet 6x4 Inch Art Tablet with Battery-Free Stylus Pen Tablet for Mac, Windows and Chromebook (Drawing/E-Learning/Remote-Working)
-
BATTERY-FREE STYLUS: UNINTERRUPTED DRAWING EXPERIENCE WITH NO CHARGING NEEDED!
-
VERSATILE COMPATIBILITY: PERFECT FOR DIGITAL ART, TEACHING, AND MICROSOFT APPS.
-
ULTRA-SLIM DESIGN: LIGHTWEIGHT AND PORTABLE FOR CREATIVITY ON THE GO!
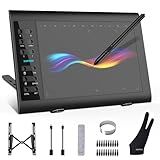
XOPPOX Graphics Drawing Tablet, 10×6 Inch Large Active Area with Battery-Free Stylus, 8192 Levels of Pen Pressure and 12 Hot Keys, Compatible with PC/Mac/Android for Painting, Design & Online Teaching
-
BROAD COMPATIBILITY: WORKS WITH MAJOR OS: WINDOWS, MACOS, ANDROID.
-
NO-BATTERY PEN: ENJOY SEAMLESS DRAWING WITH 8192 PRESSURE LEVELS.
-
CONVENIENT SHORTCUTS: 12 CUSTOMIZABLE KEYS FOR ENHANCED PRODUCTIVITY.
To add pictures to videos in Adobe Premiere Pro, you can follow these steps:
- Import the video and picture files: Open Adobe Premiere Pro and import the video file you want to add pictures to. To do this, click on the "File" menu, select "Import," and choose the video file from your computer. Similarly, import the pictures you want to add by selecting "Import" and choosing the image files.
- Create a new sequence: Right-click on the video file in the Project Panel and select "New Sequence from Clip." This will create a new sequence that matches the settings of your video file.
- Place the video on the timeline: Drag and drop the video file from the Project Panel onto the timeline. This will add the video to the sequence.
- Add pictures to the timeline: To add pictures to the video, drag and drop the image files from the Project Panel onto the timeline above the video clip. Ensure that the pictures are placed on the desired locations within the video timeline.
- Adjust the duration of the pictures: To determine how long the pictures will appear in the video, move the cursor over the end of a picture clip on the timeline until the cursor changes to a bracket with vertical lines. Then, click and drag to adjust the duration.
- Apply any desired effects or transitions: If you want to apply effects or transitions to the pictures, select the picture clip on the timeline and navigate to the "Effects Control" panel. Here, you can modify the properties of the picture and add effects or transitions to enhance its appearance.
- Preview and export the video: Finally, preview the edited video by clicking on the "Play" button in the program monitor. If you are satisfied with the result, go to the "File" menu and select "Export" to save the video file in the desired format.
By following these steps, you can easily add pictures to your videos using Adobe Premiere Pro.
How do I import pictures into Adobe Premiere Pro?
To import pictures into Adobe Premiere Pro, follow these steps:
- Open Adobe Premiere Pro and create a new project or open an existing project.
- Go to the "File" menu and select "Import" or select the "Media Browser" panel.
- Browse and locate the folder where your pictures are stored.
- Select the pictures you want to import and click on the "Import" button.
- The selected pictures will now appear in the Project Panel of Premiere Pro.
- To add pictures to your timeline, simply drag and drop them from the Project Panel onto the timeline.
- You can adjust the duration and position of the pictures on the timeline as needed.
- Preview the sequence by pressing the spacebar or using the playback controls.
Remember, Adobe Premiere Pro supports various image formats including JPG, PNG, TIFF, and more.
Can I add multiple pictures to a video sequence in Adobe Premiere Pro?
Yes, you can add multiple pictures to a video sequence in Adobe Premiere Pro. To do so, follow these steps:
- Import the pictures you want to add to the project by going to File > Import or using the Import Media button in the Project Panel.
- Create a new sequence by going to File > New > Sequence, or you can drag a picture onto the New Item button in the Project Panel to automatically create a sequence with the settings corresponding to the first picture.
- Drag and drop the pictures from the Project Panel into the sequence on the timeline. Arrange them in the desired order.
- Adjust the duration of each picture by clicking and dragging the edges of the picture clips on the timeline.
- To add transitions between pictures, go to the Effects panel and search for Transitions. Drag and drop the desired transition between two picture clips on the timeline.
- Customize the picture properties, such as scaling, position, and opacity, by selecting the picture clip on the timeline and adjusting the settings in the Effect Controls panel.
By following these steps, you can add multiple pictures to a video sequence and create a slideshow or any other type of sequence.
Can I add audio or music to the video along with the pictures?
Yes, you can definitely add audio or music to your video along with the pictures. Most video editing software or apps allow you to import audio files or choose music tracks to accompany your visuals. You can place the audio clip on a separate track and adjust its volume and timing according to your preferences. Additionally, you can also add sound effects, voiceovers, or record custom audio directly within the editing platform to enhance your video.
What are the best practices for adding pictures to videos in Adobe Premiere Pro?
When adding pictures to videos in Adobe Premiere Pro, consider the following best practices:
- Image Formatting: Ensure your images are in the correct format (JPEG, PNG, TIFF, etc.) and resolution for your video project. Larger images may need to be resized or cropped for optimal display.
- Importing: Import your images into the Project panel by selecting File > Import, or directly drag and drop them into the panel. Organize your images into a separate folder within the Project panel for easy access.
- Timeline Placement: Drag and drop the desired image onto the Timeline from the Project panel. Place the image at the desired position, adjusting the duration as needed.
- Transition Effects: To create smooth transitions between images, add video transitions such as Cross Dissolve, Dip to Black, or Dip to White. You can find them in the Effects panel, and by dragging them between two images on the Timeline.
- Keyframe Animations: Use the Motion effect under the Effect Controls panel to apply keyframe animations to the images. This allows you to control position, scale, and rotation of the image over time. Create keyframes at the desired points and adjust the parameters according to your requirements.
- Picture-in-Picture (PiP): If you want to overlay images on top of your video footage, use the Picture-in-Picture technique. Resize and position the image using the Motion effect, adjusting opacity if necessary.
- Transparency: If you need to include transparent images or logos, ensure they have an alpha channel. To enable transparency, select the image on the Timeline, go to the Effect Controls panel, and modify Opacity settings accordingly.
- Color Correction: Adjusting the colors of your images can help maintain a consistent visual tone throughout your video. Use the Lumetri Color panel to make necessary adjustments like exposure, contrast, saturation, and temperature.
- Scaling and Positioning: If you need to scale or position an image within the frame, toggle on the "Show Clip Keyframes" option in the Timeline, and use the fixed effects like Scale and Position under the Effect Controls panel to make changes over time.
- Render and Preview: Once you have added the images and made necessary adjustments, always render and preview your timeline to ensure the final output matches your expectations. Use the "Render In to Out" option to render a specific range or the entire timeline.
By following these best practices, you can effectively add pictures to videos in Adobe Premiere Pro and create visually appealing content.
What are the different ways to add pictures to videos in Adobe Premiere Pro?
There are several ways to add pictures to videos in Adobe Premiere Pro. Here are a few methods:
- Importing images: You can import the pictures into the project panel by right-clicking on the panel, selecting "Import," and then choosing the desired image. Once imported, you can drag the image onto the timeline.
- Using the "Media Browser" panel: In the "Media Browser" panel, navigate to the folder containing the images you want to add. Then, drag the pictures directly from the panel onto the timeline.
- Drag and drop: If the image file is already open on your computer, you can drag and drop it directly onto the timeline in Premiere Pro.
- Creating a new layer: In the "Project" panel, right-click and select "New Item," then choose "Black Video." This adds a black video clip to the project. Drag the black video to the timeline and place it in the layer above the video you want to add the picture to. Next, drag the picture to the timeline and position it on the black video clip.
- Using the "Title" tool: Go to the "Graphics" workspace, select the "Type Tool," and click on the screen to create a new title. Import the picture you want to add into the title editor and position it accordingly. Then, drag the title onto the timeline to overlay the video with the added image.
These are just a few methods to add pictures to videos in Premiere Pro, offering flexibility depending on your specific project requirements.
Can I import pictures directly from social media platforms into Adobe Premiere Pro?
Yes, you can import pictures directly from social media platforms into Adobe Premiere Pro. Follow these steps:
- Open Adobe Premiere Pro.
- Go to the "File" menu and select the "Import" option.
- Choose "Media" from the submenu.
- A window will open, allowing you to browse and select the files you want to import.
- Locate the social media platform where your desired picture is stored (e.g., Facebook, Instagram, etc.).
- Login to your social media account and grant permission for Adobe Premiere Pro to access your photos.
- Browse through the folders and albums to find the picture you want to import.
- Select the picture and click on the "Import" button at the bottom-right corner.
Once imported, the picture will be available in your project bin and ready to use in your Adobe Premiere Pro timeline or sequences.
Are there any online tutorials or resources for learning to add pictures in Adobe Premiere Pro?
Yes, there are many online tutorials and resources available for learning to add pictures in Adobe Premiere Pro. Here are a few popular ones:
- Adobe Premiere Pro Help and tutorials: Adobe's official website offers comprehensive tutorials, guides, and articles on using various features in Premiere Pro, including adding pictures. Visit the Adobe Premiere Pro Help page and search for "adding pictures" to find relevant resources.
- YouTube tutorials: YouTube is a valuable resource with numerous video tutorials explaining how to add pictures in Adobe Premiere Pro. Popular channels like Adobe Creative Cloud, Premiere Gal, and Cinecom.net offer step-by-step guides on this topic.
- Online courses: Platforms like Udemy, Coursera, and LinkedIn Learning offer paid and free courses specifically designed to teach Adobe Premiere Pro. These courses often cover adding pictures as part of the curriculum.
- Online forums and communities: Joining online communities like the Adobe Premiere Pro section on Adobe Community Forums or Reddit's r/premiere subreddit can provide a wealth of information. People often share tips, tutorials, and helpful resources for adding pictures in Adobe Premiere Pro.
Regardless of the platform you choose, make sure to practice hands-on with Adobe Premiere Pro to effectively learn how to add pictures and explore different techniques and options available to enhance your editing skills.