Best Video Editing Tools to Buy in July 2026
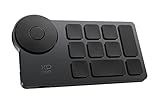
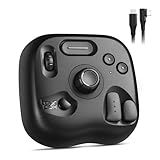
XPPen Mini Keydial ACK05 Wireless Shortcut Keyboard Bluetooth Programmable Express Remote Control with Dial & Customized Express Keys for Drawing Tablet PC MacBook Windows Images Video Editing
- SEAMLESS CONNECTIVITY: BLUETOOTH 5.0, USB, & DONGLE FOR ULTIMATE FLEXIBILITY.
- POWERFUL SHORTCUTS: CUSTOMIZE 40 SHORTCUTS FOR BOOSTED PRODUCTIVITY.
- USER-FRIENDLY DESIGN: ERGONOMIC FORM & DIAL CONTROL ENHANCE WORKFLOW EFFICIENCY.


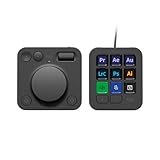
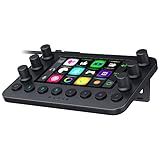
Logitech MX Creative Console, 9 Customizable LCD Keys, Stream Deck Accessories, Control Dial for Graphic Design, Adobe, Zoom, Spotify - Graphite, 3-Month Adobe Creative Cloud Membership
-
SPEED UP CREATIVITY: ACCESS TOOLS INSTANTLY FOR A FOCUSED WORKFLOW.
-
CUSTOMIZE CONTROLS: ASSIGN ACTIONS WITH UP TO 15 PROFILES AND ICONS.
-
FREE ADOBE CREATIVE CLOUD: GET 3 MONTHS OF CREATIVE TOOLS INCLUDED!
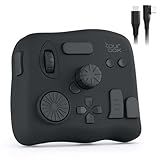
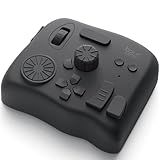
TourBox NEO - Customizable Editing Controller, Photo Color Grading Illustration Speed Editor, Intuitive Control Boost Productivity, Programmable Keyboard for Adobe CSP and More, Works with Mac/PC
-
ZERO-LATENCY PERFORMANCE ENSURES UNINTERRUPTED CREATIVE FLOW.
-
COMPATIBLE WITH TOP SOFTWARE FOR SEAMLESS EDITING EXPERIENCES.
-
USER-FRIENDLY CONTROLS EMPOWER BOTH NOVICES AND EXPERTS ALIKE.
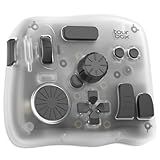
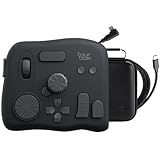
TourBox Lite - Editing Keyboard Compact, Artists Go-to Drawing Macro Keypad, Works with Clip Studio Paint & More, Creative Controller with Custom Software, Streamline All Workflows - Wired (Unit Only)
-
EFFORTLESS CONTROL: MASTER WORKFLOWS WITH 8 CUSTOMIZABLE BUTTONS AND 200+ FUNCTIONS.
-
QUICK LEARNING CURVE: 98% OF USERS MASTER CORE FUNCTIONS WITHIN 7 DAYS!
-
VERSATILE COMPATIBILITY: WORKS WITH MAJOR SOFTWARE LIKE ADOBE AND FINAL CUT PRO.
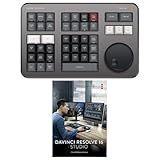
Blackmagic Design Davinci Resolve Speed Editor Bundle with Davinci Resolve 18 Studio (Activation Card)
- COMPACT AND PORTABLE DESIGN WITH A BUILT-IN BATTERY FOR CONVENIENCE.
- EFFORTLESS EDITING WITH KEYBOARD SHORTCUTS AND BUILT-IN SEARCH DIAL.
- INCLUDES DAVINCI RESOLVE 17 STUDIO FOR PROFESSIONAL EDITING RIGHT AWAY!
TourBox Elite - Bluetooth Video Editing Controller Color Grading Speed Editor, Intuitive Control, Professional Digital Creator Console for Davinci, Premiere, Final Cut Pro and More, Mac/PC (Black)
-
DUAL CONNECTIVITY (BLUETOOTH & USB-C) FOR ULTIMATE FLEXIBILITY.
-
CUSTOMIZABLE CONTROLS STREAMLINE YOUR CREATIVE WORKFLOW EFFORTLESSLY.
-
INTUITIVE DESIGN ENHANCES VIDEO EDITING, COLOR GRADING, AND DRAWING.
TOUR BOX Elite Plus - iPad Drawing Bluetooth Controller, Video Editing Photo Color Grading Speed Editor, Programmable Creative Console Keyboard for DaVinci Procreate Adobe Softwares and More
-
ONE DEVICE, THREE SCENARIOS: COMPATIBLE WITH IPAD, MAC, AND WINDOWS-VERSATILE CREATIVITY!
-
ENHANCED WORKFLOW: 70% FASTER EDITING WITH INTUITIVE KNOB CONTROLS AND PRESETS.
-
DEEP SOFTWARE INTEGRATION: SEAMLESS USE WITH MAJOR EDITING PROGRAMS AND FREQUENT UPDATES.
Razer Stream Controller: All-In-One Keypad for Streaming - 12 Haptic Switchblade Keys - 6 Tactile Analog Dials - 8 Programmable Buttons - Designed for PC & Mac Compatibility
-
EFFORTLESSLY MANAGE STREAMS WITH CUSTOMIZABLE SHORTCUTS AND LAYOUTS.
-
TACTILE FEEDBACK FROM 12 HAPTIC KEYS FOR ULTIMATE COMMAND CONTROL.
-
SEAMLESS INTEGRATION WITH PC, MAC, AND POPULAR STREAMING SOFTWARE.
TourBox NEO - Customizable Editing Controller, Video Photo Color Grading Speed Editor, Mac/PC Intuitive Control Productivity for Adobe, Davinci and More, Programmable Keyboard Set with Cable and Bag
- ZERO-LATENCY CONNECTION: EXPERIENCE STABLE, WIRED PERFORMANCE FOR CREATIVES.
- SEAMLESS WORKFLOW: STREAMLINE YOUR DRAWING, EDITING, AND GRADING PROCESSES.
- INTUITIVE CONTROL: EFFORTLESSLY ADJUST BRUSH & COLOR SETTINGS WITH ONE KNOB.
To add name titles in Adobe Premiere, you can follow these steps:
- Launch Adobe Premiere and open your project.
- Navigate to the "Graphics" workspace by selecting it from the top menu.
- In the "Essential Graphics" panel, click on the "Browse" tab.
- Choose the "Text" folder, and you will see various pre-designed title templates to choose from.
- Select a template that suits your needs and drag it onto the timeline at the desired location.
- To edit the text in the title, double-click on the template on the timeline. This opens the template in the "Essential Graphics" panel.
- Within the "Essential Graphics" panel, you can modify the text by clicking on it and typing in your desired name.
- Customize the font, size, and other characteristics using the options available in the "Properties" section of the "Essential Graphics" panel.
- You can also adjust other visual elements of the title, such as color, position, and animation effects, by utilizing the controls in the "Effects Controls" panel.
- Once you are satisfied with the changes, save the modifications and close the "Essential Graphics" panel.
- Continue editing your video as desired, and the name title will appear at the designated location on the video timeline.
Remember to save your project regularly to preserve any changes you've made.
How to add name titles in Adobe Premiere?
To add name titles in Adobe Premiere, follow these steps:
- Open your Premiere project and import the footage you want to add the name titles to.
- In the Project panel, right-click and select New Item > Title.
- In the New Title dialog box, enter a name for your title and click OK.
- The Title window will open. Use the tools in the toolbar to format your text, adjust the font, size, and style, and align it as desired.
- Type the name you want to add as the title in the Title window.
- To create a professional-looking name title, you can add background shapes, colors, or images. To do this, select the Shape tool from the toolbar and draw a shape behind the text. Adjust the fill color, opacity, or stroke using the options in the Graphics workspace.
- Customize further by adding transitions like fades or animation effects to your name title. You can find these options in the Effects Controls panel.
- Once you are satisfied with the design of your name title, go to the File menu and click Export > Media.
- In the Export Settings dialog box, choose your desired format, codec, and resolution for the name title. Make sure to select a location to save the file.
- Finally, click Export and Premiere will render and save your name title as a separate video file. You can now import this file into your project and add it to your footage or video sequence.
Remember to save your Premiere project regularly to avoid losing any changes.
What is the best practice for organizing name titles in a video project?
The best practice for organizing name titles in a video project is to follow a consistent and logical system. Here are some steps you can follow:
- Create a folder structure: Begin by creating a well-organized folder structure for your project. This usually includes folders for assets like videos, audio, images, graphics, and so on.
- Name your files descriptively: Give your files clear and descriptive names. For name titles, consider using a naming convention that helps you identify the content easily, such as "Name_Title_Version."
- Use subfolders when necessary: If you have a significant number of name titles, it may be helpful to create subfolders within the assets folder to further categorize and organize them.
- Arrange the files chronologically: When multiple name titles are involved, consider arranging them chronologically to match the video's flow. This will make it easier to locate the correct name titles during the editing process.
- Maintain consistent formatting: Ensure that all name titles are formatted consistently throughout the project. This includes font, size, color, position, animation, and any other relevant attributes.
- Provide clear instructions or notes: If you're working collaboratively on a video project, it can be helpful to include a separate text document or a dedicated section within your editing software with clear instructions for each name title. This will assist others in understanding their purpose, duration, or any specific requirements.
- Backup your project regularly: Make sure to back up your project regularly. This will help prevent any loss of work and allow you to easily revert to a previous version if needed.
By following these best practices, you can maintain an organized and efficient workflow throughout your video project, making it easier to manage and locate name titles when required.
What is the file format requirement for custom fonts in Adobe Premiere?
In Adobe Premiere, the file format requirement for custom fonts is OpenType Font (OTF) or TrueType Font (TTF). These formats are widely supported and should be compatible with most operating systems and applications, including Adobe Premiere.
How to align multiple name titles in Adobe Premiere?
To align multiple name titles in Adobe Premiere, follow these steps:
- Open your Adobe Premiere project and locate the timeline where you want to add the name titles.
- Create a new title by going to the top menu and selecting File > New > Title. This will open the Title tool window.
- In the Title tool window, create the first name title by typing in the desired name. Customize the text formatting, size, and color as needed.
- Adjust the position of the name title by selecting it in the preview window and dragging it to the desired location on the screen.
- To create additional name titles, click on the "New Title Based on Current Title" button at the top left of the Title tool window. This will duplicate the previous title with the same formatting.
- Repeat step 4 for each additional name title, positioning each one below or beside the previous title.
- To align the name titles vertically, select all the titles in the Title tool window by holding the Ctrl/Cmd key and clicking on each title. Then, go to the top menu and select Title > Align Objects > Vertically Center.
- To align the name titles horizontally, select all the titles in the Title tool window by holding the Ctrl/Cmd key and clicking on each title. Then, go to the top menu and select Title > Align Objects > Horizontally Center.
- Once the name titles are aligned, click on the "Export & Share" button at the top right of the Title tool window to save the titles as graphics that you can import back into your main Premiere timeline.
- Import the exported graphics into your main timeline and position them accordingly. The name titles should now be aligned as desired.
Note: Adobe Premiere also provides alignment guides, which you can enable by going to the top menu and selecting View > Show Title Safe. These guides can help you align the name titles precisely within your video frame.
How to adjust the position of a name title in Adobe Premiere?
To adjust the position of a name title in Adobe Premiere, you can follow these steps:
- Open your Adobe Premiere project and locate the sequence where you have added the name title.
- Select the title on the timeline by clicking on it.
- In the "Effect Controls" panel, you will find all the properties and controls for the selected title. Look for the "Position" property.
- To adjust the position of the title, you can either manually enter numeric values in the X and Y fields of the Position property or click and drag the title directly in the Program Monitor to the desired position.
- As you adjust the values or move the title, you will see the changes in real-time in the Program Monitor.
- Continue adjusting the position until you have it placed exactly where you want it.
- You can also use the "Scale" property to resize the title if needed.
- After making all the adjustments, preview the title to ensure it looks as desired.
- If you have multiple instances of the same title in different parts of the timeline, you can copy and paste the adjustments you made to maintain consistency.
- Finally, save your project and export it to the desired format.
By following these steps, you should be able to easily adjust the position of a name title in Adobe Premiere.