Best Adobe Premiere Plugins to Buy in July 2026

Premier Premium Filter Tips - 18mm - 200 Filters/Bag (5 Bags for a Total of 1,000 Filters)
- 1000 PREMIUM FILTER TIPS FOR ULTIMATE SMOKING EXPERIENCE!
- FIVE BAGS ENSURE LASTING SUPPLY FOR ALL YOUR NEEDS.
- ORIGINAL PREMIER QUALITY-TRUST THE BRAND YOU LOVE!


Premier 18mm Filter Tips - Bag of 200
- VALUE PACK: 200 PLUGS ENSURE LONG-LASTING USE FOR SAVINGS.
- SAFETY SEALED PACKAGING GUARANTEES FRESHNESS AND QUALITY.
- RESEALABLE BAG FOR EASY STORAGE AND ACCESSIBILITY.
Premier Premium Filter Tips - 18mm - 200 Filters/Bag (18 Bags for a Total of 3,600 Filters)
- BOOST SALES WITH 18 RETAIL-READY FILTER TIP BAGS!
- PREMIUM 18MM FILTERS FOR A SUPERIOR SMOKING EXPERIENCE.
- EYE-CATCHING DISPLAY TO ATTRACT CUSTOMERS BOOST SALES!
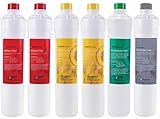
Watts Premier RO Pure Plus 4-Pack Filtration Kit for 4 Stage Pure Plus/Zero Pure Plus Reverse Osmosis System, Push Button Water Filter Replacement, Sediment Filter, Carbon Pre-Filter, VOC, Membrane
- ENJOY CRYSTAL CLEAR, GREAT-TASTING WATER WITH OUR VOC FILTER KIT!
- HASSLE-FREE FILTER REPLACEMENT WITH SMART DESIGN FOR EASY ACCESS!
- TRUSTED QUALITY FILTERS CRAFTED FOR EFFECTIVE, LONG-LASTING PERFORMANCE!

Aquasure Premier Series Complete 4-Stage Quick Twist Filter Replacement Cartridge Bundle Set AF-CP75 | Compatible with AS-PR75 4-Stage Under Sink Reverse Osmosis RO Water Filtration System
- EASY FILTER REPLACEMENT: TWIST-ON DESIGN, NO TOOLS NEEDED!
- REMOVES 99.99% CONTAMINANTS FOR PURE, GREAT-TASTING WATER.
- EXTENDED FILTER LIFE: 12-24 MONTHS OF PRISTINE WATER QUALITY.
Watts Premier Annual RO Pure Plus 6-Pack Filtration Kit for Zero/Pure Plus Reverse Osmosis System, Push Button Water Filter Replacement, 2 Sediment Filters, 2 Carbon Pre-Filters, VOC, Membrane
- ANNUAL SUPPLY FOR FRESH WATER: ONE-YEAR FILTER KIT ENSURES CLEAR, TASTY WATER!
- EASY DIY REPLACEMENT: HASSLE-FREE, TOOL-FREE FILTER CHANGES WITH PUSH-BUTTON DESIGN.
- TRUSTED QUALITY: PREMIER'S PROVEN FILTRATION FOR OVER 30 YEARS OF EXCELLENCE!
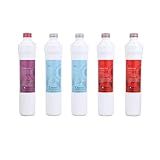
Watts Premier Annual Pure UF-3 5-Pack Filter Kit for 3-Stage Ultra Filtration and RO Pure Reverse Osmosis System, Push Button, 2 Sediment Filters, 2 LVOC Carbon Filters, UF Membrane, WQA Certified
-
ENJOY FRESH, CLEAN WATER YEAR-ROUND WITH OUR 5-PACK FILTER KIT!
-
ADVANCED 3-STAGE FILTRATION ENSURES SAFE WATER FREE FROM CONTAMINANTS.
-
EASY INSTALLATION AND MAINTENANCE WITH A SPACE-SAVING DESIGN!
To add filters in Adobe Premiere, follow these steps:
- Open Adobe Premiere Pro on your computer.
- Import your video footage into the project panel by clicking on "File" and then "Import Media."
- Drag and drop your video file onto the timeline to start editing.
- Go to the Effects panel by selecting "Window" and then "Effects" from the top menu.
- In the Effects panel, you will find various categories of filters, such as Color Correction, Blur & Sharpen, Distort, etc.
- Expand the category that includes the filter you want to add.
- Browse through the available filters and preview them by hovering over each option.
- Once you find the desired filter, click and drag it onto the video clip on the timeline.
- Adjust the filter settings by selecting the video clip on the timeline and then opening the Effects Control panel (usually located on the left side of the screen).
- In the Effect Control panel, you can modify parameters like intensity, hue, saturation, etc., to achieve your desired effect.
- Preview the filtered video by playing it in the program monitor. Make any necessary adjustments until you are satisfied with the result.
- If you want to add multiple filters, repeat steps 7-10 with different filter options.
- To remove a filter, simply select the video clip on the timeline and press the Delete key on your keyboard.
- Once you have added and adjusted all the desired filters, save your project by clicking on "File" and then "Save."
These steps will help you add filters to your video footage in Adobe Premiere and enhance the overall visual appeal of your content.
Are there any third-party filter plugins available for Adobe Premiere?
Yes, there are several third-party filter plugins available for Adobe Premiere. Some popular options include:
- Red Giant Universe: Offers a wide range of creative video effects, transitions, and text presets.
- Boris Continuum Complete: Provides a comprehensive collection of video effects, filters, and transitions.
- FilmConvert: Allows you to emulate the look of various film stocks and apply color grading to your footage.
- Neat Video: A powerful noise reduction plugin for improving the quality of your video footage.
- NewBlueFX: Offers a variety of video effects, transitions, and filters.
- GenArts Sapphire: Provides a vast collection of visual effects and filters for enhancing your video projects.
These plugins can add additional creative options, enhance productivity, and increase the capabilities of Adobe Premiere.
How do I export my video with the applied filters in Adobe Premiere?
To export your video with the applied filters in Adobe Premiere, follow these steps:
- Select the timeline with your edited video sequence.
- Go to the "File" menu and click on "Export" -> "Media." Alternatively, you can press Ctrl+M (Windows) or Command+M (Mac) as a shortcut.
- This will open the Export Settings window. Here, you can configure various export options.
- Choose the desired export format from the Format dropdown menu. For example, you can select H.264, MPEG-4, or any other format based on your requirements.
- Configure the video settings like resolution, frame rate, and bitrate as per your needs.
- In the Export Settings window, under the "Video" tab, check the box next to "Use Maximum Render Quality."
- Under the "Effects" tab, make sure the "Video Effects" checkbox is selected. This will ensure that all the applied filters are included in the exported video.
- Once you have configured all the desired settings, specify the output location and filename for your exported video.
- Click on the "Export" button to begin the export process.
- Premiere will start rendering the video with the applied filters and save it to the location you specified.
Note: The above steps may vary slightly depending on the version of Adobe Premiere you are using.
Is it possible to create a green screen or chroma key effect using filters in Adobe Premiere?
Yes, it is possible to create a green screen or chroma key effect using filters in Adobe Premiere. Here are the steps to do so:
- Import the footage with the green screen into Premiere.
- Drag the footage onto the timeline.
- Go to the Effects panel and search for the "Ultra Key" effect.
- Apply the Ultra Key effect to the green screen footage.
- In the Effect Controls panel, click on the eyedropper tool under the Ultra Key controls.
- Click on the green screen in the footage to select the color for keying. Adjust the settings if needed, such as the Matte Generation and Matte Cleanup settings.
- If necessary, use the controls in the Effect Controls panel to refine the keying, such as adjusting the Transparency and Density values.
- If you have a background clip or image that you want to replace the green screen with, place it on a lower video track so that it appears behind the keyed footage.
- Adjust the timing and positioning of the clips as desired.
By following these steps, you will be able to create a green screen or chroma key effect using filters in Adobe Premiere.
How can I create a black and white effect using filters in Adobe Premiere?
To create a black and white effect using filters in Adobe Premiere, you can follow these steps:
- Import your footage into Adobe Premiere by clicking on "File" and then "Import" to select the desired video file.
- Drag and drop the imported footage into your timeline.
- Select the desired clip on the timeline to apply the black and white effect.
- Go to the "Effects" tab and search for "Lumetri Color" using the search bar.
- Drag and drop the "Lumetri Color" effect onto the clip in the timeline.
- In the "Effects Controls" panel, you will find various adjustments for the "Lumetri Color" effect.
- Under the "Basic Correction" section, modify the "Temperature" and "Tint" sliders to achieve the desired result.
- To create a black and white effect, drag the "Saturation" slider all the way to the left or set it to -100.
- You can further enhance the black and white effect by adjusting the "Contrast," "Highlights," "Shadows," and "Whites" sliders under the "Basic Correction" section.
- Play the timeline to preview the black and white effect. Make additional adjustments as needed until you achieve the desired look.
- Once you are satisfied, you can export your video by clicking on "File" and then "Export" or by using the keyboard shortcut "Ctrl+M" (Windows) or "Command+M" (Mac).
Note: The steps may vary slightly depending on the version of Adobe Premiere you are using, but the general process remains the same.
How do I apply a basic filter to my video clip in Adobe Premiere?
To apply a basic filter to your video clip in Adobe Premiere, you can follow these steps:
- Launch Adobe Premiere and open your project.
- Import your video clip into the project panel by clicking on "File" > "Import" > "File", and select your video file.
- Drag and drop the video clip from the project panel to the timeline.
- Select the video clip in the timeline by clicking on it.
- Go to the "Effects" panel (usually located on the right side of the interface) and search for the "Video Effects" folder.
- Within the "Video Effects" folder, you will find various sub-folders, such as "Stylize," "Blur & Sharpen," or "Color Correction." Choose the appropriate folder based on the type of filter you want to apply.
- Browse through the available filters and effects and double-click on the desired one to apply it to your video clip.
- Adjust the parameters of the filter using the controls that appear in the "Effect Controls" panel (usually located above the timeline). You can modify settings such as intensity, saturation, brightness, etc., depending on the selected filter.
- Preview the filtered video clip in the program monitor to see the changes. You can use the spacebar to play and pause the video.
- When you are satisfied with the filter's look, you can export the edited video by selecting "File" > "Export" > "Media". Choose the desired export settings, file format, and destination folder, then click on "Export" to save your video with the applied filter.
Remember that Adobe Premiere offers a wide range of filters and effects, so you can explore different options to achieve the desired visual look for your video clip.
Is there a way to reduce noise or grain in my video using filters in Adobe Premiere?
Yes, Adobe Premiere offers several filters and effects that can help reduce noise or grain in your videos. Here's a step-by-step guide on using filters to reduce noise or grain:
- Import your video footage into Premiere.
- Drag the video clip to the timeline.
- Select the clip in the timeline, and then go to the "Effects" tab or panel.
- In the "Video Effects" folder, navigate to the "Noise and Grain" category.
- Find and apply the "Noise Reduction" filter by either dragging it directly onto the clip in the timeline or double-clicking on the filter to add it.
- Once applied, go to the "Effect Controls" panel, which should show the properties of the noise reduction filter.
- Adjust the "Amount" or "Strength" parameter to control the intensity of the noise reduction effect. Start with a lower value and gradually increase it until you achieve the desired results.
- Additionally, you can modify other properties such as "Reduce By," "Preserve Details," or "Sharpen Details" to fine-tune the noise reduction.
- Preview the video in the timeline or the Program Monitor to see the effect. You can use the "Toggle Animation" button to enable/disable the effect and compare the before/after result.
Note: Applying too much noise reduction may result in loss of detail or a unnatural look, so it's important to balance the effect to achieve the desired result without compromising the quality.
Apart from the above method, Adobe Premiere also provides other filters like the "Median" filter or third-party plugins like Neat Video, which can further help in reducing noise or grain in your videos.
How can I create a slow-motion effect using filters in Adobe Premiere?
To create a slow-motion effect using filters in Adobe Premiere, you can follow these steps:
- Import your footage: Start by importing the video clip you want to add the slow-motion effect to into your Premiere project.
- Create a sequence: Drag the imported video clip to the timeline and create a new sequence based on its settings. If the sequence settings don't match your footage, you can right-click on the clip and select "New Sequence from Clip."
- Time stretching: To create a slow-motion effect, you need to increase the duration of your video clip. Right-click on the clip in the timeline, select "Speed/Duration," and a dialog box will appear.
- Adjust the speed: In the dialog box, you will find a "Speed" option. Increase the speed percentage to slow down the clip. For a slow-motion effect, you might want to set it to 50% or any desired value less than 100%. You can preview the effect on the right side of the dialog box.
- Apply the changes: Once you are satisfied with the slow-motion effect, click on the "OK" button. Your video clip will now play in slow motion according to the applied speed setting.
- Add motion blur (optional): To enhance the slow-motion effect further, you can apply motion blur to make the movement appear smoother. Locate the "Effects" tab, search for "Directional Blur" or "Radial Blur," and apply the chosen filter to your video clip.
- Adjust motion blur settings: With the motion blur effect applied, you can fine-tune its settings to your liking. You may need to increase the "Blur Length" value and adjust other parameters according to your clip's motion.
- Preview and render: After applying the slow-motion effect and any additional filters, you can preview your video in the timeline to ensure it looks as desired. If everything is satisfactory, you can render your final video by selecting "File" > "Export" > "Media" and choosing your desired export settings.
By following these steps, you can create a slow-motion effect using filters in Adobe Premiere.