Best Video Editing Software Techniques to Buy in July 2026
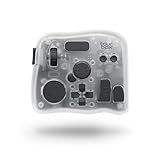
XPPen Mini Keydial ACK05 Wireless Shortcut Keyboard Bluetooth Programmable Express Remote Control with Dial & Customized Express Keys for Drawing Tablet PC MacBook Windows Images Video Editing
- VERSATILE CONNECTIVITY: BLUETOOTH 5.0, USB, AND DONGLE OPTIONS AVAILABLE.
- CUSTOMIZABLE SHORTCUTS: EASILY PROGRAM UP TO 40 PERSONALIZED SHORTCUTS.
- LONG-LASTING BATTERY: ENJOY 300 HOURS OF CONTINUOUS USE ON A SINGLE CHARGE.


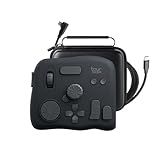
TourBox NEO - Customizable Editing Controller, Photo Color Grading Illustration Speed Editor, Intuitive Control Boost Productivity, Programmable Keyboard for Adobe CSP and More, Works with Mac/PC
-
STABLE WIRED CONNECTION: ZERO-LATENCY PERFORMANCE FOR SEAMLESS CREATIVITY.
-
BROAD SOFTWARE COMPATIBILITY: ENHANCE WORKFLOW IN TOP DESIGN TOOLS EFFORTLESSLY.
-
USER-FRIENDLY DESIGN: INTUITIVE CONTROLS FOR QUICK EDITS AND ENHANCEMENTS.
TourBox Lite - Editing Keyboard Compact, Artists Go-to Drawing Macro Keypad, Works with Photoshop, CSP & More, Creative Controller with Custom Software, Streamline All Workflows - Wired Only
- MASTER CREATIVE WORKFLOWS EFFORTLESSLY WITH CUSTOMIZABLE CONTROLS.
- INTUITIVE DESIGN REDUCES HAND STRAIN-OPTIMIZE YOUR PRODUCTIVITY!
- 98% OF USERS MASTER IT IN 7 DAYS-NO STEEP LEARNING CURVE!
TOUR BOX Elite Plus - iPad Drawing Bluetooth Controller, Video Editing Photo Color Grading Speed Editor, Programmable Creative Console Keyboard for DaVinci Procreate Adobe Softwares and More
-
VERSATILE COMPATIBILITY: WORKS WITH IPADOS, MACOS, AND WINDOWS FOR ALL CREATIVES.
-
INTUITIVE CONTROLS: REPLACE COMPLEX SHORTCUTS WITH EASY KNOB ADJUSTMENTS.
-
RAPID LEARNING CURVE: 98% OF USERS BUILD MUSCLE MEMORY WITHIN JUST 7 DAYS!
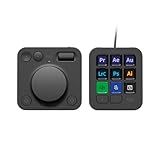
Logitech MX Creative Console, 9 Customizable LCD Keys, Stream Deck Accessories,Connectivity Technology USB-C, Control Dial for Graphic Design, Zoom, Spotify - Graphite, 3-Month Adobe Cloud Membership
-
FREE 3-MONTH ADOBE CC WITH EVERY MX CREATIVE CONSOLE PURCHASE!
-
SPEED UP WORKFLOWS: ACCESS TOOLS INSTANTLY WITH MX CONSOLE!
-
CUSTOMIZE UP TO 15 KEYPAD PAGES FOR EVERY CREATIVE APP!
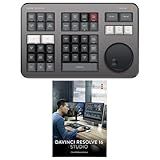
Blackmagic Design Davinci Resolve Speed Editor, Bluetooth & USB-C Editing Keyboard Bundle with Davinci Resolve Studio Activation Card
- COMPACT DESIGN WITH BUILT-IN BATTERY FOR ON-THE-GO EDITING.
- QUICK ACCESS WITH BUILT-IN SEARCH DIAL FOR SEAMLESS NAVIGATION.
- INCLUDES DAVINCI RESOLVE 17 FOR ENHANCED EDITING CAPABILITIES.

Elgato Stream Deck MK.2 – Studio Controller, 15 macro keys, trigger actions in apps and software like OBS, Twitch, YouTube and more, works with Mac and PC
-
15 CUSTOM KEYS: EFFORTLESSLY CONTROL YOUR FAVORITE APPS INSTANTLY!
-
ONE-TOUCH ACTIONS: SIMPLIFY TASKS WITH A SINGLE PRESS FOR EFFICIENCY!
-
POWERFUL PLUGINS: ENHANCE WORKFLOWS WITH POPULAR TOOLS LIKE OBS, TWITCH!
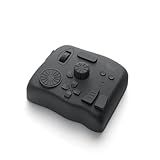
TOUR BOX Elite - Bluetooth Video Editing Controller Color Grading Speed Editor, Intuitive Control, Professional Digital Creator Console for Davinci, Premiere, Final Cut Pro and More, Mac/PC (Black)
- DUAL CONNECTIVITY FOR SEAMLESS USE ON MACOS AND WINDOWS.
- CUSTOMIZE EVERY KNOB AND BUTTON FOR PERSONALIZED WORKFLOW.
- INTUITIVE CONTROLS ENHANCE VIDEO EDITING AND COLOR GRADING PRECISION.
TourBox NEO - Customizable Editing Controller, Video Photo Color Grading Speed Editor, Mac/PC Intuitive Control Productivity for Adobe, Davinci and More, Programmable Keyboard Set with Cable and Bag
- ZERO-LATENCY WIRED CONNECTION FOR SEAMLESS CREATIVE WORKFLOW.
- BOOST YOUR DRAWING AND EDITING WITH INTUITIVE ONE-HANDED CONTROLS.
- PERFECTLY SUPPORTS TABLETS FOR SMOOTH BRUSH AND IMAGE ADJUSTMENTS.
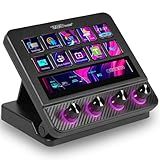
VSDINSIDE Macro Pad, Streaming Deck Stream Controller Soundboard Keypad, Programmable Keys USB Shortcut Keyboard for Gamer Streamer, Audio Mixer for OBS, YouTube, Office Desk Setup, PC, Mac
-
INSTANT PRODUCTIVITY BOOST: ONE-TOUCH MACROS STREAMLINE TASKS EFFORTLESSLY.
-
CUSTOMIZABLE WORKFLOWS: EXECUTE MULTI-STEP PROCESSES WITH NO CODING NEEDED.
-
IMMERSIVE VISUALS: RGB KNOBS AND DYNAMIC BACKGROUNDS ENHANCE YOUR SETUP.
To make a title in Adobe Premiere Pro, follow these steps:
- Open Adobe Premiere Pro and create a new project or open an existing one.
- In the toolbar at the top, click on the "Graphics" tab.
- From the drop-down menu, select "New Layer" and then "Title."
- A new window will open with the title tool. Type in your desired title in the text box provided.
- Customize the font, size, color, formatting, and other attributes using the options in the toolbar above the text box.
- To position the title on the screen, click and drag it to the desired location using the selection tool.
- Adjust the length of the title by dragging the edges on the timeline to the desired duration.
- To animate the title, click on the "Effects" tab in the top toolbar and search for "Text." Choose from the available animation presets to apply to your title.
- If you want to add multiple titles, repeat steps 3-8 for each title you want to create.
- Once you are satisfied with your title, save your project and export it in the desired format.
Note: Adobe Premiere Pro offers advanced features for title creation, including the ability to import custom graphics and create complex animations. However, these steps provide a basic overview of creating a simple title in the software.
What are the recommended audio settings for a title in Adobe Premiere Pro?
The recommended audio settings for a title in Adobe Premiere Pro are as follows:
- Audio Format: AAC or WAV
- AAC is a compressed audio format suitable for web and streaming purposes.
- WAV is an uncompressed audio format with high quality, suitable for professional editing and exporting.
- Sample Rate: 48 kHz
- 48 kHz is the standard sample rate used in professional video production. It provides high-quality audio and is compatible with most platforms and devices.
- Bit Depth: 16-bit
- 16-bit sampling provides adequate audio quality for video production. For higher fidelity, you can use 24-bit, but it may require more processing power and storage space.
- Channels: Stereo (2 channels)
- Stereo audio provides a more immersive listening experience with left and right channels. This setting is ideal for most video projects unless you specifically require mono or surround sound.
These settings can be adjusted in the export settings of Adobe Premiere Pro when exporting your project or creating a title sequence. It's important to consider the intended output platform or destination to ensure compatibility and optimal audio quality.
What is the best way to position a title in Adobe Premiere Pro?
The best way to position a title in Adobe Premiere Pro is by using the Title tool. Here's a step-by-step guide:
- Open Premiere Pro and create a new project.
- Import your video footage into the project.
- Go to the "Graphics" workspace by clicking on the "Graphics" tab at the top of the program.
- In the Essential Graphics panel, click on the "Browse" tab to open the Browse panel.
- In the Browse panel, click on the "Titles" tab to view the available title templates.
- Choose a template that suits your needs and drag it onto the timeline above your video footage.
- Once the title is on the timeline, you can edit it by selecting it and then modifying the text, font, size, color, and other parameters in the Essential Graphics panel.
- To position the title, select the title clip on the timeline and go to the Effect Controls panel.
- In the Effect Controls panel, you'll find the Position controls. You can adjust the X and Y values to move the title horizontally or vertically.
- Additionally, you can also adjust the Scale value to resize the title.
Experiment with different values to achieve the desired positioning and size for your title. You can also customize the title further by adding animations, transitions, and other effects from the Effects panel.
Remember to save your project regularly to avoid losing any changes.
How to add a title to a video in Adobe Premiere Pro?
To add a title to a video in Adobe Premiere Pro, follow these steps:
- Open up Adobe Premiere Pro and import your video footage into the project.
- In the "Project" panel, click on the "New Item" button in the bottom-left corner and select "Title" to create a new title.
- A new title window will appear. You can enter a name for the title and customize other settings such as the resolution and duration. Click "OK" to create the title.
- The title will appear in the "Project" panel. Drag and drop it onto the timeline at the desired position relative to the video footage.
- Once added to the timeline, the title will appear as a new video track. Select the track by clicking on it.
- In the "Effect Controls" panel, you will see various options for customizing the title. These include changing the font, size, color, and position of the text, as well as adding effects such as drop shadows or outlines. Adjust these settings to achieve the desired look for your title.
- To edit the text of the title, double-click on the title track in the timeline. This will open the title in the "Title" window where you can make changes to the text.
- Once you are satisfied with the title, you can preview it by playing back the video in the timeline.
- Finally, when you have finished editing your video, export it by going to "File" > "Export" > "Media" and selecting the desired output format and settings.
What is the shortcut for creating a new title in Adobe Premiere Pro?
The shortcut for creating a new title in Adobe Premiere Pro is Ctrl+T (⌘+T on Mac).
How to navigate the title tools in Adobe Premiere Pro?
To navigate the title tools in Adobe Premiere Pro, follow these steps:
- Open the Essential Graphics panel: Go to Window > Essential Graphics.
- In the Essential Graphics panel, click on the "Browse" tab to access the available title templates.
- Scroll through the templates to find the one you want to use, or use the search bar to search for specific keywords.
- Once you find a template, click on it to preview it.
- To add the selected template to your project, click on the "Install" button next to the template.
- After the template is installed, it will appear in the "My Templates" tab of the Essential Graphics panel.
- Select the template you want to use, and drag it onto the timeline at the desired position.
- To edit the text in the title, double-click on it in the timeline. This will open the title in the Program Monitor.
- In the Program Monitor, you can edit the text, font, size, color, and other properties of the title using the controls in the Essential Graphics panel.
- To move, resize, or reposition the title on the screen, use the Selection tool (shortcut: V) to click and drag the title in the Program Monitor.
- Once you are satisfied with the changes, click on the "Close" button at the top right corner of the Program Monitor to exit the title editing mode.
- You can further customize the title by adding effects, animations, or other modifications using the available tools and options in Premiere Pro.
Note: The specific steps and options may vary depending on the version of Adobe Premiere Pro you are using, but the overall process should remain similar.
What are the options for adjusting the color of a title in Adobe Premiere Pro?
In Adobe Premiere Pro, there are several options available to adjust the color of a title. These options include:
- Text Color: You can change the color of the text by selecting the title and going to the Essential Graphics panel. Under the Appearance tab, you will find options to adjust the Text Fill color. Here, you can choose a specific color or use the color picker to select a custom color.
- Opacity: You can adjust the opacity of the title to make it more or less transparent. This can be done by selecting the title and adjusting the Opacity option under the Essential Graphics panel or the Effect Controls panel. Lowering the opacity will make the title appear more transparent, while increasing it will make it more opaque.
- Drop Shadow: To add a drop shadow effect to the title, select the title and go to the Effects panel. Under Video Effects, navigate to the Perspective folder and select the Drop Shadow effect. Adjust the settings such as Distance, Softness, and Color to customize the appearance of the drop shadow.
- Outline: To add an outline to the title, select the title and go to the Effects panel. Under Video Effects, navigate to the Generate folder and select the Outline effect. Adjust the settings such as Thickness and Color to customize the appearance of the outline.
- Gradient Fill: You can apply a gradient fill to the title, which creates a transition between two or more colors. Select the title and go to the Essential Graphics panel. Under the Appearance tab, you will find the Text Fill options. Click on the Fill Type drop-down box and select Gradient. Then, adjust the Gradient Type, Angle, and Color Stops to create the desired gradient effect.
These options can be combined and customized to achieve the desired color adjustments for a title in Adobe Premiere Pro.
What are the options for adjusting the background color of a title in Adobe Premiere Pro?
In Adobe Premiere Pro, there are several options for adjusting the background color of a title. These options include:
- Default Background: By default, titles have a transparent background. To adjust the background color, you can either create a shape layer behind the title and change its color, or use a solid color video clip as the background.
- Opacity: You can adjust the opacity of the title to make it transparent or semi-transparent, allowing the background color to show through.
- Color Matte: Another option is to create a color matte by going to the Project panel, right-clicking, and selecting "New Item" > "Color Matte". Choose a color, and then drag and drop the color matte onto the timeline below the title. This will create a solid background of the chosen color.
- Adjustment Layers: You can also use an adjustment layer to apply color corrections, including changing the background color of the title. Create an adjustment layer by going to the Project panel, right-clicking, and selecting "New Item" > "Adjustment Layer". Drag and drop the adjustment layer onto the timeline above the title, and then apply color correction effects like "Color Balance" or "Tint" to change the background color.
These options provide flexibility and allow you to achieve the desired background color for your titles in Adobe Premiere Pro.