Best Video Editing Tools to Buy in July 2026
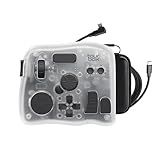
XPPen Mini Keydial ACK05 Wireless Shortcut Keyboard Bluetooth Programmable Express Remote Control with Dial & Customized Express Keys for Drawing Tablet PC MacBook Windows Images Video Editing
- VERSATILE CONNECTIVITY: THREE WAYS TO CONNECT FOR EVERY WORKSPACE NEED.
- CUSTOMIZABLE SHORTCUTS: EFFORTLESSLY SET UP TO 40 PERSONALIZED SHORTCUTS.
- LONG-LASTING BATTERY: 300 HOURS OF USE FROM A COMPACT, 1000 MAH BATTERY.


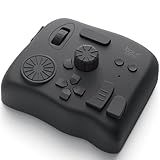
TOUR BOX Elite Plus - iPad Drawing Bluetooth Controller, Video Editing Photo Color Grading Speed Editor, Programmable Creative Console Keyboard for DaVinci Procreate Adobe Softwares and More
- MULTI-PLATFORM SUPPORT: WORKS SEAMLESSLY WITH IPAD, MAC, AND WINDOWS.
- ENHANCED EFFICIENCY: BOOSTS CREATIVE WORKFLOW BY 170% WITH ERGONOMIC DESIGN.
- PRELOADED PRESETS: GET STARTED INSTANTLY WITH INDUSTRY-READY SETTINGS INCLUDED.
XENCELABS Quick Keys for PC, MacBook, Desktop, Drawing Tablet, Pen Display, OLED Display, 44 Customizable Shortcuts Keydail for Digital Drawing, Video Editing, Photo Retouching, Windows/macOS
-
OLED DISPLAY FOR INSTANT SHORTCUT IDENTIFICATION SWITCH EASILY BETWEEN SHORTCUTS WITH CLEAR VISUAL GUIDANCE.
-
40 CUSTOMIZABLE KEYS FOR TAILORED WORKFLOWS ACCESS 40 COMMANDS EFFORTLESSLY TO ENHANCE YOUR CREATIVE PROCESS.
-
WIRELESS BLUETOOTH 5.0 FOR RELIABLE CONNECTIVITY ENJOY SEAMLESS PERFORMANCE EVEN IN HIGH-INTERFERENCE ENVIRONMENTS.
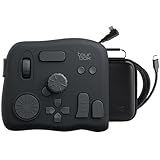
TOUR BOX Elite - Bluetooth Video Editing Controller Color Grading Speed Editor, Intuitive Control, Professional Digital Creator Console for Davinci, Premiere, Final Cut Pro and More, Mac/PC (Black)
-
DUAL CONNECTIVITY FOR SEAMLESS USE ON MACOS AND WINDOWS.
-
EXTENSIVE COMPATIBILITY WITH MAJOR CREATIVE SOFTWARE PROGRAMS.
-
CUSTOMIZABLE CONTROLS FOR TAILORED WORKFLOW AND EFFICIENCY.
The Video Editing Handbook: For Beginners
TourBox NEO - Customizable Editing Controller, Video Photo Color Grading Speed Editor, Mac/PC Intuitive Control Productivity for Adobe, Davinci and More, Programmable Keyboard Set with Cable and Bag
-
STABLE WIRED DESIGN ENSURES ZERO-LATENCY FOR SEAMLESS CREATIVITY.
-
ENHANCES DRAWING, PHOTO EDITING, AND VIDEO COLOR GRADING EFFICIENCY.
-
INTUITIVE CONTROLS FOR PRECISE ADJUSTMENTS-PERFECT FOR ALL SKILL LEVELS.
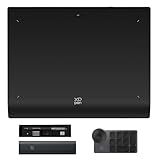
XPPen Wireless Drawing Tablet Deco Pro LW 2nd, 11 Inch Bluetooth Computer Graphics Tablet with X3 Pro Stylus & Mini Key-dial, Digital Drawing Pad for Animation, Digital Art, Video Editing
-
SEAMLESS CONNECTIVITY: CONNECT VIA BLUETOOTH, USB, OR WIRE; SWITCH DEVICES EASILY.
-
HIGH PRECISION STYLUS: 16K PRESSURE LEVELS AND TILT FOR NATURAL, DETAILED ARTWORK.
-
ENHANCED PRODUCTIVITY: CUSTOM SHORTCUTS WITH 10 KEYS FOR EFFICIENT WORKFLOWS.
TOUR BOX Elite Plus All-in-Creative Controller, Bluetooth Keyboard for Photo & Video Editing, Color Grading, Illustration, Works with Procreate, Adobe & Davinci, Cable Bag Included (Ice Translucent)
-
UNIFIED CONTROL ACROSS PLATFORMS: ONE SETUP FOR FASTER LEARNING AND EFFICIENCY.
-
STREAMLINED CREATIVE WORKFLOWS: ENHANCE SPEED IN DIGITAL PAINTING, EDITING, AND MORE.
-
DEEP SOFTWARE INTEGRATION: WORKS SEAMLESSLY WITH TOP CREATIVE APPLICATIONS.
Herncptar 3-in-1 Professional Stylus Pen, White Metal Barrel with Capacitive Tip, Digital Calendar and Video Editing Compatible, Touch Screen Writing Tool for Tablets and Smartphones
- 3-IN-1 FUNCTIONALITY: PRECISION TIP, PEN, AND DIGITAL INPUT IN ONE TOOL.
- ELEGANT & DURABLE DESIGN: PREMIUM METAL BARREL FOR STYLE AND BALANCE.
- UNIVERSAL COMPATIBILITY: WORKS WITH ALL TOUCHSCREEN DEVICES EFFORTLESSLY.
To insert a clip in between in Premiere Pro, follow these steps:
- Open your Premiere Pro project and go to the timeline where you want to insert the clip.
- Locate the clip you want to insert in the Project Panel or the Source Monitor.
- In the timeline, place the playhead (the red vertical line) at the point where you want to insert the clip.
- Press the 'comma' key on your keyboard (,) to perform a standard insert edit. This will push the remaining clips in the timeline to the right and make space for the new clip.
- Alternatively, you can also perform an overwrite edit by pressing the 'period' key (.) on your keyboard. This will overwrite the existing clips at the playhead position with the new clip.
- If you want to insert the clip at a specific time duration, you can set an in and out point using the Source Monitor's Mark In and Mark Out buttons.
- Once the in and out points are set, perform the insert edit by pressing either the 'comma' key (,) for a standard insert or the 'period' key (.) for an overwrite edit.
By following these steps, you can easily insert a clip in between other clips in Premiere Pro's timeline.
What are some considerations to keep in mind when inserting a clip with different resolution in Premiere Pro?
When inserting a clip with a different resolution in Premiere Pro, there are several considerations to keep in mind:
- Aspect Ratio: Ensure that the aspect ratio of the clip aligns with the project settings. Mismatched aspect ratios can distort the image or result in black bars on the sides.
- Scaling and resizing: Adjust the clip's size and scale to fit the sequence frame. Use the "Scale to Frame Size" option to automatically resize the clip to match the sequence settings.
- Quality and sharpness: Clips with lower resolutions may appear blurry or pixelated when played back on higher resolution screens. Use effects like "Sharpen" to improve the visual quality if necessary.
- Performance: Higher resolution clips require more computational power to edit and play smoothly. If editing a project with various resolutions, consider creating proxy files or adjusting the playback resolution in Premiere Pro to ensure smooth editing without lag.
- Rendering: When exporting the final project, make sure to choose the appropriate resolution settings to maintain consistency and avoid upscaling or downscaling issues.
- Crop or zoom: To fit a lower resolution clip into a higher resolution sequence, consider creatively cropping or zooming in the clip to avoid black bars.
- Multiple resolutions: If working with multiple clips of different resolutions, consider creating a sequence with the highest resolution and adjusting the position and scale of each clip individually to maintain consistency.
By keeping these considerations in mind, you can effectively insert clips with different resolutions in Premiere Pro while maintaining visual quality and consistency throughout your project.
Can I insert a clip with different frame rate settings without causing any issues in Premiere Pro?
In Premiere Pro, you can insert a clip with different frame rate settings, but it may cause issues depending on how the clip is handled. Here are a few things to consider:
- Timeline settings: Ensure that your timeline settings match the frame rate of the clip you are inserting. You can modify the sequence settings by right-clicking the clip in the Project panel and selecting "Modify > Interpret Footage."
- Time-stretching: If the frame rates of different clips in your timeline vary significantly, you may need to use time-stretching to make them match. You can right-click on a clip in your timeline, select "Speed/Duration," and adjust the speed settings accordingly.
- Frame blending and optical flow: Premiere Pro offers frame blending and optical flow options to help smooth out motion when clips with different frame rates are combined. You can enable these options by right-clicking on a clip, selecting "Frame Blending," and choosing the desired method.
- Export settings: Ensure that your export settings align with the frame rate of your timeline. This way, the final video will have a consistent frame rate.
However, it's generally recommended to work with clips that have the same frame rate throughout your project to avoid potential issues and maintain overall visual consistency.
How can I insert a clip without affecting the existing audio crossfades in Premiere Pro?
To insert a clip in Premiere Pro without affecting the existing audio crossfades, follow these steps:
- Open your Premiere Pro project and ensure that the audio crossfades are already applied and working as desired.
- In the timeline, locate the point where you want to insert the new clip. Ensure that you have sufficient space for the new clip without overlapping any existing audio clips.
- Use the "Ripple Edit" tool to push all subsequent clips backward to make room for the new clip. You can access this tool by pressing the "B" key on your keyboard or by selecting it from the Tools panel.
- With the "Ripple Edit" tool selected, click and drag the existing clips to the right, creating a gap for the new clip.
- Once you have created the necessary gap, import or drag the new clip into the empty space. It will automatically snap to the timeline.
- If needed, adjust the duration of the new clip by trimming its in and out points.
By using the "Ripple Edit" tool and creating a gap, you can insert a clip without affecting the existing audio crossfades. The clips after the insertion point will automatically shift, maintaining the audio crossfade intact.
Are there any specific settings I need to adjust before inserting a clip in Premiere Pro?
There are a few settings you may want to adjust before inserting a clip in Premiere Pro to ensure optimal workflow and editing experience:
- Project Settings: Before importing any clips, make sure to set up your project settings according to your desired resolution, frame rate, and audio settings. You can access this by going to File > Project Settings > General.
- Sequence Settings: If you want to create a new sequence based on the properties of your clip automatically, you can right-click on the clip in the Project panel and choose "New Sequence From Clip." This will create a sequence with settings that match your clip's attributes.
- Auto Save and Scratch Disk Settings: It's always recommended to adjust your Auto Save and Scratch Disk settings to ensure your project is backed up and to optimize performance. You can access these settings under Edit > Preferences > Auto Save and Scratch Disks.
- Playback Resolution: In the Program Monitor, you can adjust the playback resolution to suit your needs. By default, it is set to "Full," but you can lower it to "1/2," "1/4," or "1/8" if you are experiencing performance issues.
- Audio Levels: If you need to adjust the audio levels for your clip, you can use the Audio Track Mixer or adjust the levels in the Clip Mixer panel.
These settings may vary depending on your specific project requirements, but these are some general settings you might consider adjusting before inserting a clip in Adobe Premiere Pro.
What happens to the existing transitions when I insert a clip in Premiere Pro?
When you insert a clip in Premiere Pro, the existing transitions may be affected depending on the specific situation. Here are a few scenarios:
- If the new clip overlaps with an existing transition: If the inserted clip overlaps with a transition on the timeline, the transition may be shortened or trimmed automatically to accommodate the new clip. The duration and placement of the transition may be adjusted.
- If the new clip interrupts a transition: If the inserted clip disrupts the continuity of a transition on the timeline, the transition between the clips may be split. The portion before the new clip will still have the transition applied, while the portion after the new clip may need to be adjusted or may lose the transition.
- If the new clip is inserted between two existing clips with transitions: In this case, the transition may remain unaffected, and the new clip will be placed on the timeline without any transition. The existing transitions on either side will not be modified.
It's important to note that Premiere Pro offers flexibility in terms of adjusting transitions and clip placement. You can manually adjust the transitions after inserting the clip or make further modifications as per your specific editing needs.