Best Video Editing Tools to Buy in July 2026
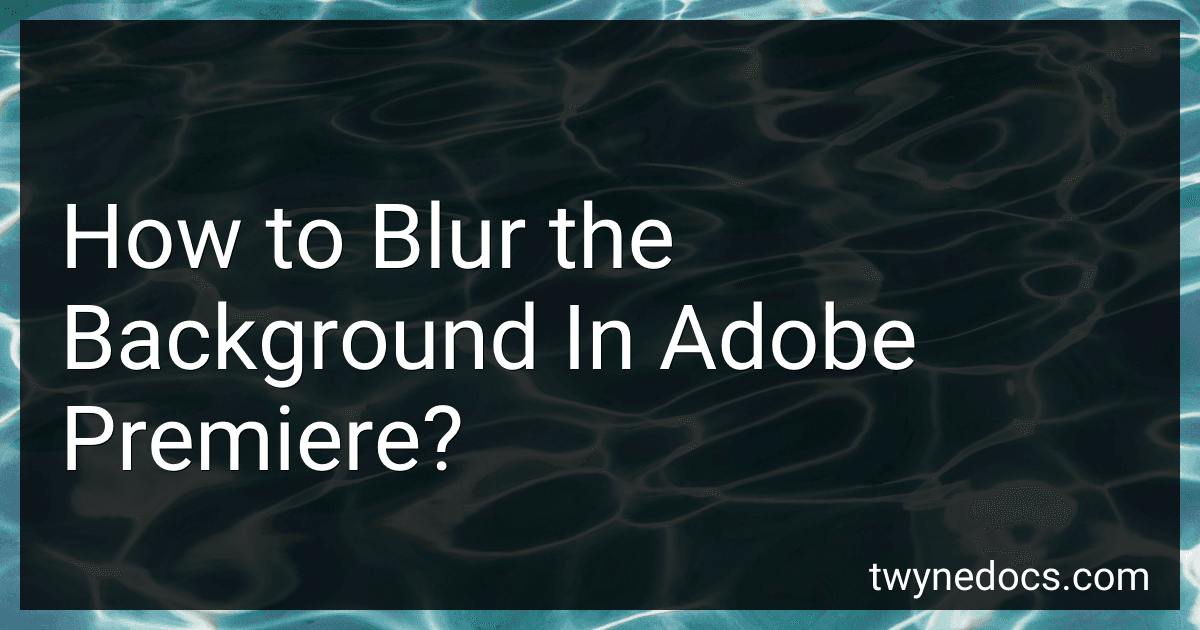
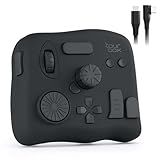
XPPen Mini Keydial ACK05 Wireless Shortcut Keyboard Bluetooth Programmable Express Remote Control with Dial & Customized Express Keys for Drawing Tablet PC MacBook Windows Images Video Editing
-
SEAMLESS CONNECTIVITY: BLUETOOTH 5.0, USB, AND DONGLE OPTIONS ENSURE FLEXIBILITY.
-
CUSTOMIZABLE SHORTCUTS: PROGRAM UP TO 40 SHORTCUTS FOR ENHANCED PRODUCTIVITY.
-
LONG BATTERY LIFE: 1000 MAH BATTERY SUPPORTS UP TO 300 HOURS OF USE.


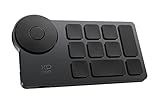
Logitech MX Creative Console, 9 Customizable LCD Keys, Stream Deck Accessories,Connectivity Technology USB-C, Control Dial for Graphic Design, Zoom, Spotify - Graphite, 3-Month Adobe Cloud Membership
-
SPEED UP CREATIVITY: QUICKLY ACCESS TOOLS AND ACTIONS FOR FOCUSED WORK.
-
FULLY CUSTOMIZABLE: TAILOR 15 KEYPAD PAGES FOR ANY APP WITH CUSTOM ICONS.
-
FREE ADOBE SUITE: GET 3 MONTHS OF ADOBE CREATIVE CLOUD WITH PURCHASE!

Movie Film Clap Board, Hollywood Clapper Board Wooden Film Movie Clapboard Accessory with Black & White, 12"x11" Give Away White Erasable Pen
- NATURAL WOOD CLAPPER BOARD: DURABLE, STYLISH, AND ERASABLE.
- PERFECT FOR PARTIES, EVENTS, AND PROFESSIONAL PHOTOGRAPHY SHOOTS.
- INCLUDES ERASABLE PEN-EASY TO WRITE AND WIPE FOR QUICK CHANGES!
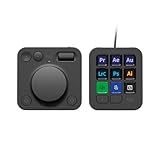
TourBox Lite - Editing Keyboard Compact, Artists Go-to Drawing Macro Keypad, Works with Photoshop, CSP & More, Creative Controller with Custom Software, Streamline All Workflows - Wired Only
-
SEAMLESS INTUITION BOOST: 8 BUTTONS & 200+ FUNCTIONS FOR EFFORTLESS CONTROL.
-
QUICK MASTERY: 98% OF USERS EXCEL IN 7 DAYS WITH ZERO STEEP LEARNING.
-
NATURAL GRIP DESIGN: ERGONOMIC SHAPE REDUCES STRAIN FOR LONG CREATIVE SESSIONS.
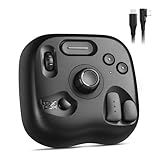
TourBox NEO - Customizable Editing Controller, Photo Color Grading Illustration Speed Editor, Intuitive Control Boost Productivity, Programmable Keyboard for Adobe CSP and More, Works with Mac/PC
-
ZERO-LATENCY CONTROL: ENJOY STABLE, WIRED PERFORMANCE FOR SEAMLESS CREATIVITY.
-
VERSATILE COMPATIBILITY: WORKS WITH LEADING SOFTWARE LIKE PHOTOSHOP AND PREMIERE PRO.
-
ONE-HANDED IMAGE EDITING: UNIQUE LAYOUT STREAMLINES PHOTO ADJUSTMENTS AND GRADING.
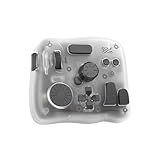
TOUR BOX Elite Plus - iPad Drawing Bluetooth Controller, Video Editing Photo Color Grading Speed Editor, Programmable Creative Console Keyboard for DaVinci Procreate Adobe Softwares and More
-
THREE DEVICES IN ONE - COMPATIBLE WITH IPAD, MACOS, AND WINDOWS.
-
BOOST YOUR WORKFLOW - REPLACES SHORTCUTS FOR FASTER CREATIVE PROCESSES.
-
TRUSTED BY 300K+ USERS - 98% BUILD MUSCLE MEMORY IN JUST 7 DAYS!
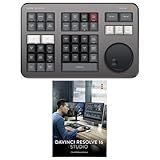
Blackmagic Design Davinci Resolve Speed Editor Bundle with Davinci Resolve 18 Studio (Activation Card)
- COMPACT DESIGN WITH BUILT-IN BATTERY FOR ON-THE-GO CONVENIENCE.
- EFFORTLESSLY NAVIGATE WITH BUILT-IN SEARCH DIAL FOR QUICK ACCESS.
- INCLUDES DAVINCI RESOLVE 17 STUDIO FOR PROFESSIONAL EDITING POWER.
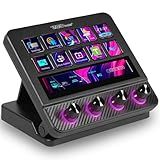
VSDINSIDE Macro Pad, Streaming Deck Stream Controller Soundboard Keypad, Programmable Keys USB Shortcut Keyboard for Gamer Streamer, Audio Mixer for OBS, YouTube, Office Desk Setup, PC, Mac
-
INSTANT COMMANDS: ONE-TOUCH EXECUTION ELIMINATES REPETITIVE TASKS FAST!
-
NO-CODE WORKFLOWS: CREATE MULTI-STEP ACTIONS EASILY-NO PROGRAMMING NEEDED!
-
500+ PLUGINS: INTEGRATE WITH POPULAR APPS FOR SEAMLESS PRODUCTIVITY BOOSTS!
To blur the background in Adobe Premiere, you can follow these steps:
- Import your footage: Open Adobe Premiere and import the video clip you want to work with. Drag it to the timeline.
- Duplicate the video clip: Right-click on the video clip in the timeline and choose "Duplicate."
- Apply Gaussian Blur effect: Select the duplicated clip in the timeline, go to the Effects panel, and search for "Gaussian Blur." Drag and drop the effect onto the duplicated clip.
- Adjust the blur level: With the duplicated clip selected, go to the Effect Controls panel. Locate the Gaussian Blur effect and adjust the Blur Level to your desired intensity. Increasing the value will result in a stronger blur.
- Create a mask: Scroll down in the Effect Controls panel until you find the "Opacity" property. Click on the Pen tool icon next to it to create a mask.
- Draw a mask around the subject: In the program monitor, use the Pen tool to draw a mask around the subject or area you want to keep in focus. Be precise with your drawing.
- Refine the mask: After creating the mask, fine-tune it by adjusting the mask feather, expansion, and other properties in the Effect Controls panel. This helps to blend the edges seamlessly.
- Check the result: Preview the video to check if the background is effectively blurred and the subject remains in focus. Make any necessary adjustments to the mask or blur level until you're satisfied with the result.
- Export the video: Once you're done, go to the File menu and select "Export" to save the video with the blurred background.
Remember, the complexity and effectiveness of blurring the background may vary depending on the specific footage and the subject's movements.
Can you blur the background in Adobe Premiere without using any additional plugins?
Yes, it is possible to blur the background in Adobe Premiere without using any additional plugins. Premiere Pro includes a built-in effect called Gaussian Blur, which can be applied to footage to create a blurred effect. Here's how you can use it:
- Import your footage into Adobe Premiere.
- Drag and drop the footage onto the Timeline.
- Select the footage on the Timeline and click on the "Effects Control" panel.
- In the Effects Control panel, search for "Gaussian Blur" and apply the effect to the footage.
- Adjust the amount of blur by modifying the "Blurriness" parameter. You can either use a specific value or animate it for a gradual blur.
- To isolate the background and blur only that area, you can use the "Mask" feature. In the Effects Control panel, click on the "Pen" tool next to the "Gaussian Blur" effect and draw a mask around the subject.
- Modify the mask to include only the background area you want to blur.
- Adjust the feathering to make the edges of the mask blend more naturally.
- Preview the effect to make sure the background is effectively blurred.
By utilizing the Gaussian Blur effect and applying masks, you can achieve a blurred background effect without additional plugins in Adobe Premiere.
Can I apply multiple layers of background blur to create a more immersive effect in Adobe Premiere?
Yes, you can apply multiple layers of background blur in Adobe Premiere to create a more immersive effect. Here's how you can do it:
- Import your footage into the timeline.
- Create a new adjustment layer by going to File > New > Adjustment Layer. Place it above your footage in the timeline.
- Apply the Gaussian Blur effect to the adjustment layer. You can find this effect by searching for "Gaussian Blur" in the Effects panel.
- Adjust the blur settings to your desired level. You can increase the Radius value to increase the blur effect.
- Duplicate the adjustment layer by selecting it and pressing Ctrl+C (Command+C on Mac), then Ctrl+V (Command+V on Mac). You can also right-click on the adjustment layer and choose "Duplicate".
- Move the duplicated adjustment layer to a slightly different point on the timeline to create a layered effect. You can also adjust the blur settings for the duplicated layer if desired.
- Repeat the duplication and adjustment steps as necessary to create additional layers of background blur.
By applying multiple layers of background blur, you can simulate depth and create a more immersive visual effect in your Adobe Premiere project.
How can I apply a blur to a specific area of the background and retain sharpness everywhere else in Adobe Premiere?
To apply a blur to a specific area of the background while retaining sharpness everywhere else in Adobe Premiere, you can follow these steps:
- Import your video footage into Adobe Premiere and create a new sequence.
- Place your video clip on the timeline.
- Duplicate the video clip by right-clicking on it and selecting "Duplicate."
- In the "Effects" panel, search for and apply the "Gaussian Blur" effect to the duplicated video clip.
- Adjust the Gaussian Blur settings to your desired blurriness level. You can do this by either adjusting the "Blurriness" parameter or by adjusting the "Gaussian Blur" settings under the "Effect Controls" panel.
- Once you have set the desired blur for the duplicated video clip, go to the "Opacity" section under the "Effect Controls" panel.
- Create a mask by clicking on the "Pen" tool next to "Mask Path" and draw around the specific area you want to blur. This will automatically create a mask shape around the area.
- Adjust the mask shape and size to cover only the desired background area. You can click and drag the mask points to modify the shape, and use the handles to adjust the size and curvature.
- After adjusting the mask, adjust the "Expansion" parameter in the "Mask Path" settings to refine the mask even further if needed.
- If necessary, keyframe the mask's position and size to keep it on the desired area if it moves within the clip.
- Play the video to see if the blur is applied correctly to the specific area. If you need further adjustments, modify the mask shape, size, or blurriness as needed.
- If you want the masked area to be more or less realistic, you can adjust the opacity of the blurred video clip by lowering it slightly. This helps retain some details but with a subtle blur effect.
- Finally, export your video with the applied blur effect.
By following these steps, you should be able to effectively apply a blur to a specific area of the background while keeping the rest of the video sharp in Adobe Premiere.
Is there a way to automatically mask the subject and apply background blur in Adobe Premiere?
Yes, Adobe Premiere does have a feature called "Auto Reframe" which can automatically track the subject and apply background blur. However, it is important to note that this feature may not always produce perfect results and may require manual adjustments. The Auto Reframe feature uses Adobe Sensei, Adobe's artificial intelligence technology, to analyze the video footage and automatically adjust the framing and apply background blur based on the subject's movement. You can find this feature by right-clicking on the video clip in the timeline, selecting "Auto Reframe Sequence," and then choosing the desired aspect ratio and level of background blur.
What are the system requirements for effectively using background blur in Adobe Premiere?
To effectively use background blur in Adobe Premiere, you need a system that meets the following requirements:
- Operating System: Windows 10 version 1809 or later, or macOS version 10.13 or later.
- Processor: Intel 6th Gen or newer CPU or an AMD equivalent with SSE4.1 support; a multicore processor is recommended for better performance.
- RAM: 16 GB of RAM (32 GB or more is recommended) for HD media, or 32 GB of RAM (64 GB or more is recommended) for 4K media.
- Graphics Card: NVIDIA GeForce GTX 1050 or AMD Radeon RX 570 or equivalent with 4 GB VRAM or higher; for GPU-accelerated performance, an NVIDIA GPU with CUDA acceleration or an AMD GPU with OpenCL 1.2 support is recommended.
- Storage: Solid-state drive (SSD) or high-speed RAID array for better performance; a minimum of 8 GB free disk space is required for installation, and additional space is necessary for media cache.
- Monitor Resolution: 1920 x 1080 or higher display resolution with 32-bit video card.
- Internet Connection: Internet connection is required for software activation and online services.
- Adobe Creative Cloud: Adobe Premiere Pro requires a subscription to Adobe Creative Cloud.
Note: These requirements are for Adobe Premiere Pro in general, including the capability to use background blur. It is advisable to check Adobe's official website for the most up-to-date and specific system requirements.
Can I use a still image as the blurred background in Adobe Premiere?
Yes, you can use a still image as a blurred background in Adobe Premiere. Here is how you can do it:
- Import the still image and the footage you want to overlay onto the blurred background into your project.
- Create a new sequence by going to File -> New -> Sequence. Choose the settings that match your footage.
- Drag the still image onto the timeline above the footage.
- Select the still image in the timeline and go to the Effects Controls panel.
- In the Effects Controls panel, you can adjust the scale and position of the still image to fit the frame.
- Apply the Gaussian Blur effect to the still image by searching for it in the Effects panel.
- Drag and drop the Gaussian Blur effect onto the still image in the timeline.
- In the Effects Controls panel, increase the Blur Amount to make the image more blurred. Adjust the other settings as desired.
- You can also keyframe the blur effect if you want the blur intensity to change over time.
- Preview the video to see the blurred background effect.
- Once you are satisfied, you can export the video with the blurred background by going to File -> Export -> Media.
That's it! You have successfully used a still image as a blurred background in Adobe Premiere.
How can I create a gradual transition between sharp and blurred background areas in Adobe Premiere?
To create a gradual transition between sharp and blurred background areas in Adobe Premiere, you can follow these steps:
- Import your footage into Adobe Premiere by clicking on File > Import.
- Drag and drop the footage onto the timeline.
- Duplicate the footage by right-clicking on the clip in the timeline and selecting "Duplicate."
- Apply the Gaussian Blur effect to the duplicate clip. You can find this effect by going to the Effects panel, searching for "Gaussian Blur," and dragging it onto the duplicate clip in the timeline.
- Adjust the blur amount as desired. You can adjust the blur effect by either double-clicking on the effect applied to the duplicate clip in the timeline or by selecting the clip and navigating to the Effect Controls panel and adjusting the blur settings there.
- Add a mask to the duplicate clip by selecting the clip and going to the Effect Controls panel. Under the Applied Effects, click on the "Create Ellipse Mask" button.
- Adjust the mask size and position to cover the area that you want to keep sharp in the background. You can modify the mask by clicking and dragging the handles or by adjusting the Position and Scale properties in the Effect Controls panel.
- Go to the "Opacity" property under the Effect Controls panel and adjust it to your liking. Lowering the opacity will gradually mix the sharp and blurred areas, creating a gradual transition effect.
- If necessary, you can keyframe the opacity property to animate the transition over time. Simply enable the stopwatch icon next to the Opacity property, move the playhead to the desired point in the timeline, adjust the opacity, and Premiere will automatically create a keyframe.
- Preview the footage and fine-tune the mask and blur settings as needed to achieve the desired gradual transition between sharp and blurred background areas.
Remember to save your project periodically as you work.