Best Video Editing Guides to Buy in July 2026
CyberLink PowerDirector and PhotoDirector 2026 | AI Video Editing & Generative AI Photo Editing for Windows | Easily Create Stunning Videos, Photos, Slideshows & Effects | Box with Download Code
- PERSONALIZED EDITS: QUICK ACTIONS GIVE PHOTOS A TAILORED TOUCH INSTANTLY.
- EFFORTLESS BATCH PROCESSING: ONE-CLICK EDITS SAVE TIME FOR ENTIRE PHOTO SETS.
- PRO-QUALITY ENHANCEMENTS: AI TOOLS SHARPEN IMAGES AND RETOUCH FACES SEAMLESSLY.


CyberLink PowerDirector 2026 | Easily Create Videos Like a Pro | Intuitive AI Video Editing for Windows | Visual Effects, Slideshow Maker & Screen Recorder | Box with Download Code
- CAPTURE SCREEN & WEBCAM SIMULTANEOUSLY, EXPORT CLIPS EASILY.
- AUTOMATICALLY ENHANCE VIDEO COLORS FOR STUNNING QUALITY IMPROVEMENT.
- SEAMLESSLY ADD AI-GENERATED FRAMES FOR SMOOTHER FOOTAGE TRANSFORMATION.
CyberLink PhotoDirector 2026 | Generative AI Photo Editor for Windows | AI Tools, Layer Editing, Photo Retouching, Creative Effects & Design | Box with Download Code
-
EFFORTLESS PHOTO CLEANUP: AI DETECTS & REMOVES DISTRACTIONS INSTANTLY.
-
PRECISION RETOUCHING: ENHANCE FACES & BODIES WITH AI-DRIVEN CLARITY.
-
ONE-CLICK BATCH EDITS: STREAMLINE YOUR WORKFLOW WITH EFFORTLESS BULK EDITS.
![Adobe Premiere Elements 2026 | Software Download | Video Editing | 3-year term license | Activation Required [PC/Mac Online Code]](https://cdn.blogweb.me/1/51q_VIY_2_Zcy_L_SL_160_069e836570.jpg)
Adobe Premiere Elements 2026 | Software Download | Video Editing | 3-year term license | Activation Required [PC/Mac Online Code]
-
AI-POWERED EDITING: TRIM AND ADJUST FOOTAGE QUICKLY AND EASILY.
-
VERSATILE EDITING MODES: START EDITING EFFORTLESSLY WITH GUIDED OPTIONS.
-
SEAMLESS SHARING: ORGANIZE AND SHARE VIDEOS INSTANTLY WITH AUTOMATED TOOLS.
VEGAS Pro Suite 23 — All-in-one Suite for video, audio and post-production | Video editing software | Video editing program | Windows 11 PC | 1 license
-
CUSTOMIZE AND EXPAND: TAILOR YOUR EDITING WORKFLOW WITH OFX AND VST PLUG-INS.
-
PROFESSIONAL SUITE: ACCESS SOUND FORGE PRO 18 AND ACID PRO 11 INCLUDED.
-
EFFORTLESS EDITING: ENJOY INTUITIVE TOOLS FOR SEAMLESS VIDEO AND AUDIO CREATION.
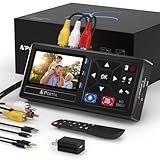
Portta VHS to Digital Converter, Video to Digital Recorder with Remote, Compatible with VHS, VCR, DVR, DVD, Hi8, Mini DV Players, Camcorder, Gaming Consoles (Tapes/DVD Player Not Included)
-
EFFORTLESS CONVERSION: CONVERT ANALOG TO DIGITAL WITHOUT A PC HASSLE.
-
BROAD COMPATIBILITY: WORKS WITH VHS, VCR, DVD, CAMCORDERS & GAMING CONSOLES.
-
HIGH-QUALITY RECORDING: 1080P RESOLUTION WITH MP4/MP3 FORMAT SUPPORT.
To add lyrics in Adobe Premiere Pro, you can follow these steps:
- Open the Adobe Premiere Pro software on your computer.
- Create a new project or open an existing project where you want to add lyrics.
- Import the video or song file to which you want to add lyrics by clicking on "File" and then selecting "Import".
- Once the media file is imported, drag it onto the timeline.
- On the bottom left of the workspace, click on the "T" icon to open the Text tool.
- Click and drag on the program monitor to create a text box where you want the lyrics to appear.
- In the Essential Graphics panel, you can customize the fonts, size, and formatting of the text by adjusting the options.
- Type in the lyrics of the song into the text box and position it on the screen wherever you prefer.
- The text is added as a layer on the timeline. You can adjust the duration of the lyrics by dragging the edges of the text layer.
- To sync the lyrics with the music, you can use the "Razor" tool (shortcut: C) to cut the text layer at specific points and move the lyrics accordingly.
Remember to save your project regularly as you work on it. You can preview the video with the added lyrics by clicking on the "Play" button in the program monitor.
What is the process of adding gradient colors to lyrics in Adobe Premiere Pro?
To add gradient colors to lyrics in Adobe Premiere Pro, you can use the following steps:
- Create a new project or open an existing one in Adobe Premiere Pro.
- Import the video or image file with the lyrics into the project panel.
- Drag and drop the video or image file onto the timeline to create a new sequence.
- Use the text tool in the toolbar to create a new text layer on top of the lyrics video or image.
- Type in the lyrics you want to add gradient colors to.
- Select the text layer on the timeline to activate the text controls in the Essential Graphics panel.
- In the Essential Graphics panel, find the "Fill" option and click on the triangle next to it to reveal the settings.
- Click on the stopwatch icon next to "Fill" to set a keyframe at the current position of the playhead.
- Move the playhead to a different position where you want the gradient color to start changing and adjust the "Fill" color using the color picker.
- Move the playhead to another position where you want the gradient color to change further and adjust the "Fill" color again.
- Repeat step 10 until you have set all the desired keyframes for the gradient color.
- Move the playhead back to the beginning of the text layer.
- Adjust the "Fill" color to the initial color you want for the gradient.
- Play the sequence to see the gradient colors changing on the lyrics.
You can also experiment with different blend modes, opacity adjustments, and other effects to enhance the gradient effect.
How to add motion blur to lyrics in Adobe Premiere Pro?
To add motion blur to lyrics in Adobe Premiere Pro, follow these steps:
- Import the video clip or create a new sequence with the lyrics in Adobe Premiere Pro.
- Select the title or text layer in the timeline or Project panel.
- Go to the Effects panel and search for the "Directional Blur" effect. Drag and drop it onto the text layer.
- In the Effects Controls panel, adjust the "Blur Length" parameter to increase or decrease the motion blur effect. The higher the value, the more intense the blur will be.
- To control the direction of the blur, go to the "Orientation" option in the Effects Controls panel. Adjusting the angle will change the direction of the blur.
- If you want more realistic motion blur, enable the "Repeat Edge Pixels" option in the Effects Controls panel.
- Customize the motion blur effect further by adjusting parameters such as "Blur Dimensions" to determine whether it blurs along the x or y-axis, and "Blurring (Samples)" to control the quality of the blur.
- You can also keyframe the motion blur effect by clicking on the stopwatch icon next to the "Blur Length" parameter. This allows you to animate the blur over time, creating a smoother motion blur effect.
- Preview the video to see the motion blur effect applied to the lyrics. Adjust any other settings if necessary.
- Once you are satisfied with the motion blur effect, render/export the video to save the changes.
That's it! You have successfully added motion blur to lyrics in Adobe Premiere Pro.
How to change the color of lyrics in Adobe Premiere Pro?
To change the color of lyrics in Adobe Premiere Pro, you can follow these steps:
- Open Adobe Premiere Pro and create a new project or open an existing project.
- Import the video or audio track with the lyrics that you want to edit.
- Drag the video or audio track onto the timeline.
- Select the "Effects" tab in the bottom left corner of the workspace.
- In the Effects panel, search for "Basic Text" and double-click on it to apply it to your video or audio track.
- In the Effect Controls panel, click on the "Browse" button next to the "Source Text" property to open the Essential Graphics panel.
- In the Essential Graphics panel, you will see the "Edit" tab. Click on it to open the text editing options.
- In the text editing options, you can change the font, size, and style of the text. You can also set the text alignment, opacity, and other properties.
- To change the color of the lyrics, click on the small colored square next to the "Fill" option. A color picker will appear, allowing you to choose a new color for the text.
- Once you have selected the desired color, close the color picker and make any additional adjustments to the text properties if needed.
- Go back to the timeline and playback your video or audio track to see the changes. Continue making adjustments as needed until you are satisfied.
Remember to save your project regularly to avoid losing any changes.
What is the best font for lyrics in Adobe Premiere Pro?
The choice of font for lyrics in Adobe Premiere Pro can vary depending on personal preference and the overall style or mood of the video. However, some commonly used fonts that work well for lyrics are:
- Helvetica: This classic sans-serif font is clean, simple, and easy to read.
- Arial: Similar to Helvetica, Arial is a popular, no-frills font that offers great legibility.
- Futura: A versatile and modern font, Futura can give lyrics a sleek and stylish look.
- Times New Roman: A more traditional serif font, Times New Roman can add a classic touch to lyric text.
- Garamond: Another serif font, Garamond has a timeless elegance and is often used for artistic or poetic lyrics.
Ultimately, the best font for lyrics in Adobe Premiere Pro is the one that complements the overall style and theme of the video while ensuring legibility and readability. It's always a good idea to preview different fonts and styles to see what works best in the specific video project.
How to add effects to lyrics in Adobe Premiere Pro?
To add effects to lyrics in Adobe Premiere Pro, follow these steps:
- Import your lyrics video into the Premiere Pro timeline.
- Select the lyrics video clip by clicking on it.
- Go to the "Effects" panel, usually located on the right side of the interface.
- In the "Effects" panel, search for the effect you want to apply to the lyrics. For example, you can search for "Gaussian Blur" or "Color Correction" to add those effects.
- Click and drag the desired effect from the "Effects" panel onto the lyrics clip in the timeline. You can also double-click on the effect to apply it instantly.
- Adjust the effect settings in the "Effect Controls" panel, usually located beside the "Effects" panel. This panel allows you to customize the effect's parameters such as intensity, size, color, etc. For example, if you applied a Gaussian Blur effect, you can control the amount of blur by adjusting the "Blur Amount" parameter.
- To apply multiple effects to the lyrics, repeat steps 4-6 for each effect you want to add.
- To preview the applied effects, play the timeline or use the "Play" button located above the timeline.
- If you are satisfied with the effects, continue editing your project. Otherwise, adjust the effect settings or remove the effect by selecting the lyrics clip, going to the "Effect Controls" panel, and modifying the effect parameters or clicking on the "Remove" button beside the effect name.
By following these steps, you can add and customize effects to lyrics in Adobe Premiere Pro. Remember, the specific effects available may vary depending on the version of Premiere Pro you are using, but the basic process remains the same.