
Best Tools for Looping Video in Adobe Premiere to Buy in July 2026
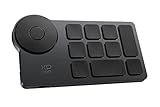
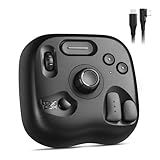
XPPen Mini Keydial ACK05 Wireless Shortcut Keyboard Bluetooth Programmable Express Remote Control with Dial & Customized Express Keys for Drawing Tablet PC MacBook Windows Images Video Editing
- SEAMLESS CONNECTIVITY: THREE VERSATILE CONNECTION OPTIONS FOR EASE.
- CUSTOM SHORTCUTS: EFFORTLESSLY ASSIGN 40 SHORTCUTS FOR ULTIMATE PRODUCTIVITY.
- ERGONOMIC & COMPACT: LIGHTWEIGHT DESIGN WITH ANTI-GHOSTING FOR SEAMLESS USE.


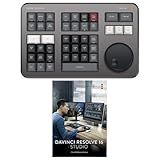
Blackmagic Design Davinci Resolve Speed Editor Bundle with Davinci Resolve 18 Studio (Activation Card)
- COMPACT DESIGN WITH BUILT-IN BATTERY FOR ON-THE-GO USE!
- EFFORTLESS NAVIGATION WITH BUILT-IN SEARCH DIAL FEATURE!
- INCLUDES DAVINCI RESOLVE 17 STUDIO FOR PROFESSIONAL EDITING!
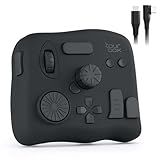
TourBox NEO - Customizable Editing Controller, Photo Color Grading Illustration Speed Editor, Intuitive Control Boost Productivity, Programmable Keyboard for Adobe CSP and More, Works with Mac/PC
-
ZERO-LATENCY WIRED DESIGN ENSURES STABLE PERFORMANCE FOR CREATORS.
-
COMPATIBLE WITH MAJOR CREATIVE SOFTWARE FOR STREAMLINED WORKFLOWS.
-
INTUITIVE CONTROLS FOR EFFORTLESS EDITING AND PRECISE COLOR ADJUSTMENTS.
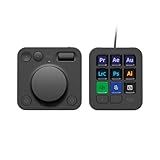
Logitech MX Creative Console, 9 Customizable LCD Keys, Stream Deck Accessories,Connectivity Technology USB-C, Control Dial for Graphic Design, Zoom, Spotify - Graphite, 3-Month Adobe Cloud Membership
-
BOOST CREATIVITY: ACCESS TOOLS SWIFTLY FOR FOCUSED WORK FLOW.
-
FULLY CUSTOMIZABLE: 15 KEYPAD PAGES WITH YOUR OWN ICONS.
-
FREE 3-MONTH ADOBE CC: ENHANCE YOUR CREATIVITY WITH TOP TOOLS!

Movie Film Clap Board, Hollywood Clapper Board Wooden Film Movie Clapboard Accessory with Black & White, 12"x11" Give Away White Erasable Pen
-
NATURAL WOOD DESIGN: CLASSIC, DURABLE, AND PERFECT FOR CHALK!
-
VERSATILE USE: IDEAL FOR PARTIES, EVENTS, AND PROFESSIONAL SHOOTS!
-
INCLUDES ERASABLE PEN: EFFORTLESSLY WRITE AND CLEAN FOR REUSE!
TourBox Lite - Editing Keyboard Compact, Artists Go-to Drawing Macro Keypad, Works with Photoshop, CSP & More, Creative Controller with Custom Software, Streamline All Workflows - Wired Only
- MASTER CREATIVITY FAST: 98% LEARN CORE FUNCTIONS IN JUST 7 DAYS!
- ENHANCED CONTROL: 8 CUSTOMIZABLE BUTTONS FOR 200+ FUNCTIONS.
- ERGONOMIC DESIGN: REDUCE STRAIN WITH A NATURAL GRIP FOR LONG SESSIONS.
TOUR BOX Elite Plus - iPad Drawing Bluetooth Controller, Video Editing Photo Color Grading Speed Editor, Programmable Creative Console Keyboard for DaVinci Procreate Adobe Softwares and More
-
THREE-IN-ONE WORKFLOW: ELEVATE YOUR CREATIVITY ON IPAD, MACOS, AND WINDOWS!
-
DEEP SOFTWARE INTEGRATION: SEAMLESS COMPATIBILITY WITH TOP CREATIVE SOFTWARE!
-
ERGONOMIC EFFICIENCY: BOOST DRAWING SPEED BY 170%; REDUCE WRIST FATIGUE!
VSDINSIDE Macro Pad, Streaming Deck Stream Controller Soundboard Keypad, Programmable Keys USB Shortcut Keyboard for Gamer Streamer, Audio Mixer for OBS, YouTube, Office Desk Setup, PC, Mac
-
INSTANT TASK EXECUTION WITH ONE TOUCH – BOOST YOUR PRODUCTIVITY NOW!
-
CREATE CUSTOM WORKFLOWS EFFORTLESSLY, NO CODING NEEDED!
-
OVER 500 PLUGINS FOR SEAMLESS INTEGRATION WITH YOUR FAVORITE APPS!
To loop a video in Adobe Premiere, follow these steps:
- Import your video clip(s) into the project.
- Drag and drop the video clip onto the timeline.
- Right-click on the video clip in the timeline and select "Speed/Duration" from the context menu.
- In the dialog box that appears, check the "Reverse Speed" option.
- Change the speed value to -100%.
- Click on the "OK" button to apply the changes.
- Next, right-click on the video clip again and choose "Copy" from the context menu.
- Move the playhead on the timeline to where you want the looping section to start.
- Right-click on the timeline and select "Paste" from the context menu.
- This will create a duplicate of the original video clip that loops seamlessly.
- Continue pasting the clip as many times as you want it to loop.
- Adjust the duration of each looped clip if needed by dragging the edges.
- You can also add transitions or effects between the looped sections if desired.
- Preview your looping video by playing it in the preview window.
- Once satisfied, save and export your video by going to the "File" menu and selecting "Export" or "Export Media."
What are the keyboard shortcuts for looping in Adobe Premiere?
The keyboard shortcuts for looping in Adobe Premiere Pro are as follows:
- For setting the in and out points to loop a specific section:
- Mark the in point: I
- Mark the out point: O
- Loop to Play In to Out: Shift + L
- For looping a selected section:
- Select the desired section on the timeline
- Loop to Play Selection: Shift + ;
Note: In Premiere Pro, you can also use the "Looping Playback" feature by using the Loop Playback button located in the Program Monitor. Pressing the Loop Playback button allows continuous playback within the looped region.
What is the importance of looping in video presentations?
Looping in video presentations refers to the process of continuously replaying the video from the beginning once it finishes. Here are some of the key reasons why looping is important in video presentations:
- Seamless playback: Looping allows for a seamless and continuous playback experience, eliminating the need for manual intervention to restart the video. This ensures that the video content seamlessly plays on a loop without any interruptions or gaps.
- Attention-grabbing: In video presentations, looping can help capture and maintain the audience's attention. By continuously replaying the video, it creates a sense of movement and engagement that can keep viewers interested and focused on the content being presented.
- Reinforcement of key points: Looping can be particularly effective in reinforcing key messages or important information. By repeating specific sections or visual elements, viewers are more likely to retain and remember the essential points being conveyed in the video.
- Enhanced visuals and aesthetics: Looping is frequently used in artistic or creative video presentations to achieve specific visual effects or create a certain atmosphere. By repeating certain visual sequences or patterns, it can add a unique and visually appealing element to the overall presentation.
- Time-saving during events: When videos are shown at events or public spaces, looping saves time by automatically replaying the video without requiring manual action. This is especially useful when presenting in high-traffic areas or when there are limited resources available to manage the video playback.
- Background ambiance: In certain contexts, looping videos can serve as background ambiance or mood-setting elements. For example, looped videos of nature scenes or animated patterns can create a calming or inspirational environment in waiting areas, offices, or events.
Overall, looping in video presentations is essential for providing a seamless playback experience, reinforcing key points, maintaining audience engagement, and enhancing the overall visual appeal of the content.
What is the maximum loop duration in Adobe Premiere?
In Adobe Premiere, the maximum loop duration is 99 hours, 59 minutes, and 59 seconds. This means that you can create a loop that lasts up to this duration in your project.
What is the ideal loop length for a video?
The ideal loop length for a video can vary depending on various factors such as the content, platform, and target audience. However, for most scenarios, loops that are between 5 to 15 seconds tend to work well.
Shorter loops can be more engaging and grab attention quickly, especially in platforms like social media where users have shorter attention spans. A 5 to 10-second loop can provide a quick burst of content that is easily consumable and can be easily shared.
On the other hand, longer loop lengths, around 10 to 15 seconds, can be suitable for certain types of content that require more time to convey the message or tell a story. These longer loops can be effective for video advertisements, tutorials, or narrative videos where the additional time helps in providing a complete and engaging experience.
Ultimately, it's essential to consider the specific context and purpose of the video when determining the ideal loop length.
What is loop crossfading in Adobe Premiere?
Loop crossfading in Adobe Premiere is a feature that allows you to seamlessly blend audio or video clips together to create a smooth transition. It is commonly used when working with looped footage or music, where you need to seamlessly repeat a section without any noticeable break or jump.
With loop crossfading, you can select two adjacent clips or sections and apply a crossfade transition between them. This transition gradually fades out the first clip while fading in the second clip, creating a seamless and continuous loop.
To apply loop crossfading in Adobe Premiere, you need to:
- Select the two clips or sections you want to crossfade.
- Right-click on the selected clips and choose "Apply Default Transitions" or "Apply Audio Transition" (for audio clips).
- Adjust the length of the crossfade transition to your preference.
- Preview and fine-tune the crossfade to achieve the desired seamless loop.
Loop crossfading is widely used in music production, motion graphics, and video editing to create smooth and continuous loops without any noticeable breaks or jumps, enhancing the overall viewing and listening experience.
What is loop smoothing in Adobe Premiere?
Loop smoothing in Adobe Premiere refers to a feature that allows the software to automatically create a smooth transition between the end and beginning of a looped video or audio clip. When enabled, loop smoothing reduces or eliminates any visible or audible gaps or jumps that occur during the playback of a looped segment. This feature is particularly useful when working with background music or repeated video segments, ensuring a seamless, continuous loop.
How to create a loop effect with multiple video clips in Adobe Premiere?
To create a loop effect with multiple video clips in Adobe Premiere, you can follow these steps:
- Import your video clips into the Project panel.
- Create a new sequence by clicking on "File" > "New" > "Sequence". Choose the desired settings, such as the resolution and frame rate.
- Drag and drop the first video clip onto the timeline.
- Trim the video clip by adjusting the In and Out points to select the portion you want to loop. You can do this by selecting the clip on the timeline and then using the "Razor" tool to cut, and the "Selection" tool to adjust the duration.
- Copy the trimmed video clip by selecting it and pressing "Ctrl+C" (Windows) or "Command+C" (Mac).
- Select the area on the timeline where you want the loop to occur by placing the playhead at the desired start point and click and drag to create an empty space.
- Paste the trimmed video clip into the empty space by pressing "Ctrl+V" (Windows) or "Command+V" (Mac).
- Repeat steps 4-7 to add more video clips to the loop.
- Once you have your loop set up with multiple video clips, adjust the transition between the clips for a seamless loop. To do this, select the area between two clips on the timeline and go to "Effects" > "Video Transitions" to choose a suitable transition, such as Cross Dissolve.
- To make the loop seamless, click on the end point of the last clip in the loop and press "Ctrl+C" (Windows) or "Command+C" (Mac) to copy it.
- Move the playhead to the start of the loop and paste the copied clip by pressing "Ctrl+V" (Windows) or "Command+V" (Mac). This will create a duplicate of the last clip to continue the loop without any noticeable gaps.
- To preview the loop, play the sequence in the preview window. If you need to make further adjustments, go back to the timeline and modify the clips and transitions as needed.
- Once you are satisfied with the loop, you can export the sequence by going to "File" > "Export" > "Media" to save it in your desired format.
Remember to save your project regularly as you work to avoid losing any changes.
How to add looping background music to a video in Adobe Premiere?
To add looping background music to a video in Adobe Premiere, follow these steps:
- Import your video and the music file into your Premiere Pro project.
- Drag and drop your video file onto the timeline.
- Drag and drop the music file onto a separate audio track on the timeline.
- Trim the music file to match the length of your video if needed by selecting the end of the audio clip and pressing "Ctrl + R" to trim it.
- Right-click on the music file on the timeline and select "Set to Frame Size" to ensure it matches your video dimensions.
- To create a loop, select the music file on the timeline and then go to the "Effects Controls" panel.
- In the "Effects Controls" panel, under the "Time Remapping" section, click on the stopwatch icon next to "Time Remap" to set a keyframe.
- Move the playhead to the end of the music file on the timeline and set another keyframe by clicking on the stopwatch icon again.
- With the second keyframe selected, right-click on it, and choose "Toggle Hold Keyframe" to create a looping effect.
- Adjust the duration between the two keyframes to control the length of the loop.
- Preview your video to make sure the background music loops seamlessly.
By following these steps, you should be able to add looping background music to your video in Adobe Premiere.
How to loop a video with audio in Adobe Premiere?
To loop a video with audio in Adobe Premiere, you can follow these steps:
- Import your video clip and audio file into your Premiere project. Ensure that the audio file is the same duration as the video clip or longer.
- Drag and drop your video and audio files onto the timeline in separate tracks.
- Extend the duration of your video clip on the timeline, by grabbing the end point of the clip and dragging it to the desired length. This will determine how long your loop will be.
- Right-click on the end of the video clip on the timeline and select "Enable Time Remapping".
- In the Effect Controls panel, you will now see a stopwatch icon next to "Time Remapping". Click on the stopwatch to add a keyframe.
- Move the playhead to the end of the video clip on the timeline, and then click on the "Add Keyframe" button (small diamond-shaped icon) in the Effect Controls panel.
- With the second keyframe selected, hold down the "Alt" key (Windows) or "Option" key (Mac) and drag the keyframe to the very end of the timeline.
- To create a smooth loop, right-click on the second keyframe and select "Ease Out". This will gradually fade out the video instead of abruptly cutting it off.
- Select both video and audio clips on the timeline and right-click. Choose "Nest" to group them into a single nested sequence.
- You can now copy and paste this nested sequence as many times as you need to create multiple loops.
That's it! Your video with audio will now loop seamlessly in Adobe Premiere.