Best Photoshop Tools to Buy in July 2026
Drawing Tablet, UGEE M708 10 x 6 inch Large Drawing Tablet with 8 Hot Keys, Passive Stylus of 16384 Levels Pressure, Digital Graphics Art Tablet for PC Paint, Design, Art Creation Sketch
-
LARGE DRAWING SPACE: 10X6 INCH SURFACE FOR SMOOTH, LIMITLESS CREATIVITY.
-
PRECISION STYLUS: 16,384 PRESSURE LEVELS ENSURE DETAILED, PROFESSIONAL ARTWORK.
-
BROAD COMPATIBILITY: WORKS SEAMLESSLY WITH MAJOR OS AND CREATIVE SOFTWARE.


Synerlogic for Adobe Photoshop Quick Reference Keyboard Shortcut Sticker for Any MacBook or Windows PC
- ESSENTIAL SHORTCUTS AT YOUR FINGERTIPS-BOOST PRODUCTIVITY INSTANTLY!
- PERFECT FOR ALL SKILL LEVELS-LEARN AND WORK FASTER, SMARTER!
- DURABLE, PROFESSIONAL QUALITY-GUARANTEED SATISFACTION ASSURED!
TourBox NEO - Customizable Editing Controller, Photo Color Grading Illustration Speed Editor, Intuitive Control Boost Productivity, Programmable Keyboard for Adobe CSP and More, Works with Mac/PC
-
ZERO-LATENCY CONTROL: WIRED DESIGN ENSURES STABLE, DROP-FREE PERFORMANCE.
-
USER-FRIENDLY DESIGN: SIMPLIFIES PHOTO, VIDEO EDITING, AND COLOR GRADING TASKS.
-
BROAD SOFTWARE COMPATIBILITY: WORKS SEAMLESSLY WITH MAJOR CREATIVE PROGRAMS.
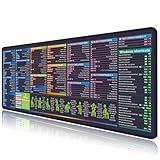
Photoshop Shortcut Key Mouse pad Illustrator Cheat Sheet Desk pad Indesign Desk mat Big Mousepad with Stitched Edge Non-Slip Rubber Base for Computer Keyboard Laptop PC
- PERFECT SIZE: FITS DESKTOPS SEAMLESSLY FOR GAMING AND WORKING.
- VIBRANT DESIGN: TRENDY PATTERNS BRIGHTEN UP YOUR WORKSPACE DECOR.
- DURABLE & NON-SLIP: STITCHED EDGES AND RUBBER BASE ENSURE LASTING USE.
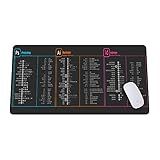
Designer Photo Editing Software Mouse mat, photoshop shortcut Keyboard tips gifts for beginner photographers gifts,photography gifts mouse pad large desk mats KMH
- SPACIOUS DESIGN: ACCOMMODATES MOUSE, KEYBOARD, AND DESK ITEMS COMFORTABLY.
- OPTIMAL CONTROL: EFFORTLESS MOUSE GLIDE FOR SPEED AND PRECISION IN GAMING.
- DURABLE & PORTABLE: FLEXIBLE, EASY TO TRANSPORT, AND EASY TO CLEAN.
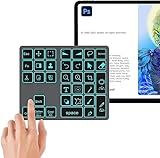
Doohoeek Bluetooth Shortcut Keyboard for Adobe Photoshop for PC Computer, Desktop, iPad & MacBook, PS Shortcut Hotkeys Keypad Rechargeable with 7-Color Backlit Key for MacOS, iOS & Windows
- PERFORM COMMON ACTIONS INSTANTLY WITH HANDY SHORTCUT KEYS!
- EFFORTLESS BLUETOOTH SETUP WITH A 10M RELIABLE CONNECTION.
- CUSTOMIZABLE BACKLIT KEYS FOR PERFECT VISIBILITY IN ANY LIGHT.
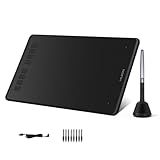
HUION Inspiroy H950P Drawing Tablet, 8x5 inch Digital Art Tablet with Battery-Free Stylus, 8192 Pen Pressure, Tilt, 8 Hot Keys, Graphic Tablet for Design, Writing, OSU, Work with Mac, PC, Mobile
- NATURAL DRAWING EXPERIENCE: BATTERY-FREE PEN MIMICS REAL PEN FEEL.
- CUSTOM SHORTCUTS: PERSONALIZE 8 KEYS FOR EFFORTLESS WORKFLOW.
- PORTABLE DESIGN: ULTRA-SLIM AND LIGHTWEIGHT, PERFECT FOR ON-THE-GO USE.
Adobe Photoshop 2025 Introduction Quick Reference Guide (4-page Cheat Sheet of Instructions, Tips & Shortcuts - Laminated Card)
To convert a layer to a smart object in Photoshop, follow these steps:
- Open Photoshop and open the document that contains the layer you want to convert.
- Locate the layer panel on the right-hand side of the workspace. If it's not visible, go to "Window" in the menu bar and select "Layers" to display it.
- Find the layer you want to convert and select it by clicking on it.
- Right-click on the layer or go to the layer menu at the top of the screen.
- From the menu that appears, select "Convert to Smart Object." This command will convert the layer into a smart object.
- Once the layer is converted, you can recognize it by the small smart object icon that appears on the layer thumbnail in the layer panel.
- With the layer now a smart object, you can apply non-destructive adjustments like filters, transformations, and blending modes without permanently altering the original layer's content.
- To edit the contents of the smart object, double-click on the layer thumbnail. A separate tab will open containing the original contents of the layer.
- In the new tab, make any necessary edits or changes to the smart object's contents. Once you're done, save and close the tab.
- The changes made to the smart object's contents will automatically be applied to the original layer in your main document.
Converting layers to smart objects in Photoshop allows for greater flexibility and non-destructive editing, ensuring that you can easily revert or modify changes made to the layer without losing any original data or quality.
What is the difference between opacity and fill in Photoshop layers?
Opacity and fill are both attributes in Photoshop layers that control the transparency of the layer, but they work slightly differently.
Opacity: Opacity determines the overall transparency of the entire layer. It applies to all the elements within the layer, including any effects, styles, or adjustments applied to it. A layer with 100% opacity is completely opaque and hides all layers beneath it. Decreasing the opacity value will make the layer more transparent, allowing the layers below to show through.
Fill: Fill, on the other hand, controls the transparency of the layer's content but not its effects or styles. A layer with 100% fill will completely hide the content within it, but any applied effects, bevels, gradients, etc., will still be fully visible. Unlike opacity, decreasing the fill value will make the content within the layer transparent, but the layer's effects and styles will remain unaffected. This can be useful when you want to preserve the appearance of the layer's effects while making the content more transparent.
In summary, opacity affects the entire layer (including effects) while fill only affects the content within the layer (excluding effects).
How to arrange layers in Photoshop?
To arrange layers in Photoshop, you can follow these steps:
- Open the Layers panel by clicking on Window in the menu bar, then selecting Layers.
- In the Layers panel, you'll see a list of all the layers in your document. Click and drag the layers to rearrange their order. The topmost layer in the panel will be at the front of the composition, while the bottommost layer will be at the back.
- You can also use the keyboard shortcuts to arrange layers quickly. To move a layer up one position, press Ctrl/Cmd + ] (right bracket). To move a layer down one position, press Ctrl/Cmd + [ (left bracket).
- If you want to move a layer to the top or bottom of the layer stack, you can use these shortcuts: To move a layer to the top: Ctrl/Cmd + Shift + ] (right bracket) To move a layer to the bottom: Ctrl/Cmd + Shift + [ (left bracket)
- Another way to arrange layers is by using the Layer menu. Simply click on Layer in the menu bar, then select Arrange to access options like Bring to Front, Send to Back, Bring Forward, and Send Backward. These options allow you to position layers relative to each other without manually dragging them.
- You can also group layers together by selecting multiple layers in the Layers panel (use the Ctrl/Cmd key to select multiple layers) and then right-clicking on them. Choose Group from the contextual menu. This will create a new folder in the Layers panel, where you can collapse or expand the group to simplify your layer management.
By using these methods, you can easily arrange, organize, and manage your layers in Photoshop to achieve the desired composition.
What is the keyboard shortcut to hide a layer in Photoshop?
The keyboard shortcut to hide a layer in Photoshop is by pressing the "Ctrl" key (Command key on Mac) and the "3" key simultaneously.
What is the shortcut to merge layers in Photoshop?
The shortcut to merge layers in Photoshop is Ctrl+E (Windows) or Command+E (Mac).
What is the keyboard shortcut to group layers in Photoshop?
The keyboard shortcut to group layers in Photoshop is Ctrl+G (Windows) or Command+G (Mac).
What is the difference between raster and vector layers in Photoshop?
Raster layers and vector layers are different types of layers in Photoshop that are used for different purposes:
- Raster Layers: Raster layers in Photoshop are composed of pixels. They are the most common type of layer used for editing photos or creating digital artwork. Raster layers are suitable for working with photographs and images with complex details, shading, and textures. Raster layers can be edited using tools like brushes, erasers, and filters, and the changes affect the individual pixels. Common raster file formats include JPEG, PNG, and TIFF.
- Vector Layers: Vector layers in Photoshop are composed of mathematical calculations known as paths or shapes, rather than pixels. They are ideal for creating graphic elements, logos, icons, or illustrations that require scalability without losing quality. Vector layers allow for resizing, reshaping, and editing individual elements without affecting the overall image quality. Vector layers are created using tools like the Pen tool or Shape tools, and they are saved in formats such as EPS, AI, or PDF.
In summary, raster layers are suitable for working with pixel-based images, while vector layers are used for creating scalable, resolution-independent graphics.