Best Tools to Add Arrows in Videos to Buy in July 2026
XPPen Mini Keydial ACK05 Wireless Shortcut Keyboard Bluetooth Programmable Express Remote Control with Dial & Customized Express Keys for Drawing Tablet PC MacBook Windows Images Video Editing
-
VERSATILE CONNECTIVITY: BLUETOOTH, USB, AND DONGLE OPTIONS ENSURE FLEXIBILITY.
-
CUSTOM SHORTCUTS: TAILOR UP TO 40 SHORTCUTS FOR ENHANCED PRODUCTIVITY.
-
COMPACT & LONG-LASTING: ULTRA-LIGHT DESIGN WITH 300-HOUR BATTERY LIFE.


Movie Film Clap Board, Hollywood Clapper Board Wooden Film Movie Clapboard Accessory with Black & White, 12"x11" Give Away White Erasable Pen
-
HIGH-QUALITY NATURAL WOOD FOR DURABILITY AND TRADITIONAL CHARM.
-
VERSATILE USE: PERFECT FOR PARTIES, EVENTS, AND PROFESSIONAL PRODUCTIONS.
-
INCLUDES ERASABLE PEN FOR EASY WRITING AND REUSING-NO MESS!
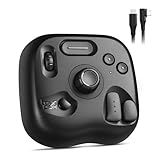
TourBox NEO - Customizable Editing Controller, Photo Color Grading Illustration Speed Editor, Intuitive Control Boost Productivity, Programmable Keyboard for Adobe CSP and More, Works with Mac/PC
- STABLE WIRED CONNECTION ENSURES ZERO-LATENCY FOR SEAMLESS CREATIVITY.
- EXTENSIVE COMPATIBILITY WITH TOP SOFTWARE ELEVATES ANY CREATIVE PROCESS.
- INTUITIVE CONTROLS SIMPLIFY EDITING FOR BOTH NOVICE AND PRO USERS.
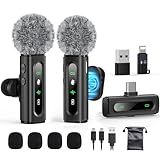
USB C Lavalier Microphone Wireless Mini Mic for Type-C Android Phone/Tablet/PC Video Recording Clip-on Mics with Rotatable Clip&Denoise Recording, Ideal for Vlog Tiktok Youtube Podcast Content Creator
- EXCEPTIONAL SOUND CLARITY: DUAL NOISE REDUCTION MODES ENSURE CLEAR AUDIO.
- USER-FRIENDLY DESIGN: INTUITIVE INTERFACE SIMPLIFIES OPERATION FOR ALL USERS.
- VERSATILE COMPATIBILITY: WORKS SEAMLESSLY WITH USB-C AND USB DEVICES.

Blackmagic Design Davinci Resolve Speed Editor Bundle with Davinci Resolve 18 Studio (Activation Card)
- PORTABLE DESIGN WITH BUILT-IN BATTERY FOR ON-THE-GO USE!
- EFFORTLESS EDITING WITH DEDICATED SEARCH DIAL AND KEYBOARD SHORTCUTS.
- INCLUDES DAVINCI RESOLVE 17 STUDIO FOR PROFESSIONAL-LEVEL EDITING!
TourBox Lite - Editing Keyboard Compact, Artists Go-to Drawing Macro Keypad, Works with Photoshop, CSP & More, Creative Controller with Custom Software, Streamline All Workflows - Wired Only
-
MASTER CREATIVITY: 8 CUSTOMIZABLE BUTTONS FOR INTUITIVE, HANDS-FREE CONTROL.
-
EFFORTLESS LEARNING: 98% OF USERS GRASP CORE FUNCTIONS IN JUST 7 DAYS!
-
VERSATILE COMPATIBILITY: WORKS SEAMLESSLY WITH MAJOR CREATIVE SOFTWARE TOOLS.

Logitech MX Creative Console, 9 Customizable LCD Keys, Stream Deck Accessories,Connectivity Technology USB-C, Control Dial for Graphic Design, Zoom, Spotify - Graphite, 3-Month Adobe Cloud Membership
-
STREAMLINE YOUR WORKFLOW WITH CUSTOMIZABLE APP SHORTCUTS AT YOUR FINGERTIPS.
-
GET 3 MONTHS OF ADOBE CREATIVE CLOUD FOR FREE WITH PURCHASE-$179 VALUE!
-
ENJOY PRECISE CONTROL WITH TACTILE DIALS AND PROGRAMMABLE KEYS FOR EFFICIENCY.
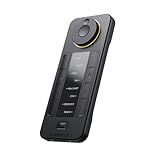
XENCELABS Quick Keys for PC, MacBook, Desktop, Drawing Tablet, Pen Display, OLED Display, 44 Customizable Shortcuts Keydail for Digital Drawing, Video Editing, Photo Retouching, Windows/macOS
-
OLED DISPLAY FOR QUICK SHORTCUT IDENTIFICATION: NO GUESSWORK REQUIRED.
-
40 FULLY PROGRAMMABLE KEYS FOR CUSTOM WORKFLOW EFFICIENCY.
-
MULTI-FUNCTION DIAL WITH 4 MODES FOR SEAMLESS CREATIVE CONTROL.
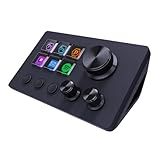
ActionRing Streaming Macro Keypad, Stream Controller Deck, Gaming Shortcut Keyboard, with Customizable 6 LCD Shortcut Keys, 3 Buttons and 3 Knobs, Trigger Actions in OBS/Twitch/YouTube, Windows 10/Mac14.0 (N3 Black)
-
ENDLESS CUSTOMIZATION: DRAG AND DROP ACTIONS ONTO 6 CUSTOMIZABLE KEYS!
-
ONE-CLICK EFFICIENCY: INSTANTLY PERFORM MACROS AND TASKS WITH ONE CLICK.
-
BROAD COMPATIBILITY: WORKS WITH WINDOWS, MACOS, AND POPULAR SOFTWARE.
To add an arrow in Adobe Premiere Pro, follow these steps:
- Launch Premiere Pro and open your project.
- Import the video clip to which you want to add the arrow.
- Go to the "Graphics" workspace by selecting it from the top right drop-down menu.
- Click on the "Graphics" tab in the top left panel to open the Essential Graphics panel.
- In the Essential Graphics panel, click on the "Browse" tab to access the Adobe Stock templates or choose "Local Templates" if you have your own arrow design.
- Search for an arrow template or click "+" to create a new graphic template.
- If you choose an existing template, drag and drop it onto the video clip in the timeline.
- If you create a new template, customize the arrow's appearance and animation properties in the "Edit" tab of the Essential Graphics panel.
- Adjust the arrow's position and size by clicking and dragging it within the Program Monitor.
- Use the keyframes to animate the arrow's movement or rotation by selecting the arrow layer in the timeline and clicking on the stopwatches next to the desired property in the Effect Controls panel.
- Export your video by navigating to "File" > "Export" > "Media" to save the changes.
By following these steps, you can easily add an arrow to your video in Premiere Pro.
What is the difference between Premiere Pro and After Effects?
Premiere Pro and After Effects are both professional video editing software developed by Adobe, but they serve different purposes and have distinct features.
Premiere Pro is a video editing application primarily used for assembling and editing raw video footage, audio, and other visual elements to create a complete video project. It provides a timeline-based editing interface and offers features like trimming and arranging clips, applying transitions and effects, audio editing, color correction, and multi-camera editing. Premiere Pro is most commonly used for tasks such as video editing, storytelling, and creating polished final videos.
On the other hand, After Effects is a motion graphics and visual effects application used for creating complex animations, visual effects, and motion graphics elements. While it also has video editing capabilities, its primary focus is on creating visual effects, compositing multiple layers, and animating various visual elements. After Effects allows for advanced keyframe animation, motion tracking, rotoscoping, creating particle systems, and integrating 3D elements into videos. It is commonly used in the film, television, and advertising industries to create special effects and enhance visual elements in videos.
To summarize, Premiere Pro is mainly used for video editing and finishing, while After Effects is geared towards motion graphics, visual effects, and compositing. Both applications are often used together in professional video production workflows, with Premiere Pro handling the editing process, and After Effects used for more advanced and specialized effects.
How to mute audio in Premiere Pro?
To mute audio in Premiere Pro, you can follow these steps:
- Import the video clip or audio file into your project window.
- Drag and drop the video or audio file onto the timeline.
- Locate the audio track on the timeline.
- Click on the "M" key to enable the selection tool.
- Click on the audio clip to select it.
- Go to the "Effect Controls" panel. If the panel is not visible, you can find it under the "Window" menu.
- In the "Effect Controls" panel, look for the "Audio" section.
- You will see an option called "Volume" with a speaker icon. Drag the slider all the way down to -∞ (negative infinity) or click on the volume toggle to disable it.
- The audio clip is now muted.
What is the role of keyframes in Premiere Pro?
Keyframes in Premiere Pro allow users to animate properties such as motion, opacity, effects, audio levels, and more over time. They mark the starting and ending points of an animation or transition, and the software automatically calculates the values in between, creating smooth movements or changes.
Keyframes are essential for creating dynamic and polished videos. They provide precise control over various elements, allowing users to animate titles, graphics, video clips, and audio in a smooth and controlled manner. With keyframes, users can create effects like fading in/out, zooming, panning, rotation, color changes, and much more.
By placing keyframes at specific points on the timeline, users can define the desired property values at those points. The software then automatically generates the gradual change between those keyframes, creating a smooth animation or transition. This saves time and effort compared to manually adjusting each property frame by frame.
In summary, keyframes in Premiere Pro enable users to bring movement and dynamic changes to their video projects, allowing for professional-looking animations and transitions.
How to adjust audio levels in Premiere Pro?
To adjust audio levels in Premiere Pro, you can follow these steps:
- Import your audio files into the project panel by right-clicking in the panel and selecting "Import" or by using the keyboard shortcut Ctrl+I (Windows) or Command+I (Mac).
- Once your audio files are in the project panel, drag them onto the timeline to create a sequence.
- In the timeline, locate the audio clip that you want to adjust the levels for.
- Click on the audio clip to select it, and then go to the "Effect Controls" panel (usually located in the top left of the screen, but you can find it by going to "Window" > "Effect Controls" if it's not visible).
- In the "Effect Controls" panel, you will see options for "Volume" and "Pan". Click on the triangle next to "Volume" to reveal the audio level controls.
- Adjust the audio level by dragging the slider left or right. Dragging to the right increases the audio level, while dragging to the left decreases it. You can also adjust the level by entering a specific value in the input box.
- To create keyframes and make dynamic adjustments to the audio level, click on the stopwatch icon next to the "Volume" control. This will enable keyframing.
- Move the playhead to the point where you want to set a keyframe, and then adjust the audio level as desired. Premiere Pro will automatically create a keyframe at that point.
- Repeat the process to create additional keyframes at different points in the timeline, and adjust the audio levels as needed to create the desired audio fade-in, fade-out, or any other dynamic audio adjustment.
- To fine-tune your adjustments, you can select individual keyframes and move them around or adjust their values in the "Effect Controls" panel.
- Preview your adjustments by playing back the timeline to ensure the audio levels are to your liking. Make further adjustments if necessary.
- Once you are satisfied with the audio levels, you can export your video or continue working on your project.
Remember to save your work regularly to avoid losing any adjustments you have made.
What is the best format for exporting videos in Premiere Pro?
The best format for exporting videos in Premiere Pro depends on the intended use and platform. However, a commonly recommended format is H.264. It offers a good balance between file size and video quality, making it suitable for online sharing, streaming, and general use.
Here are the recommended export settings for H.264 in Premiere Pro:
Format: H.264 Preset: Match Source – High Bitrate Bitrate Encoding: VBR, 2 pass Target Bitrate: Set according to your desired file size and quality (higher bitrate for higher quality) Maximum Bitrate: Set according to your desired file size and quality (higher bitrate for higher quality) Frame Rate: Match Source Resolution: Match Source or set as desired Profile: High Level: Auto Render at Maximum Depth: Checked Use Maximum Render Quality: Checked (if desired)
These settings can be adjusted based on your specific needs, but they should serve as a good starting point for exporting videos in Premiere Pro.